
Use the following links below if you have not completed the previous steps:
- The Body (View Instructions)
- The Tail (View Instructions)
- The Beak (View Instructions)
The head and beak is the part when you create a life like look and put interest in your work. It requires that you measure and mark your outlines very carefully. They can not be changed very easily later. Some of these steps will help establish the head which we will discuss in our next stage. Work slowly, re drawing you lines, and checking your measurements as needed.
You may have completed some of these steps when working on the beak or body. They do not need to be completed in this order but this method works for me.
Note:
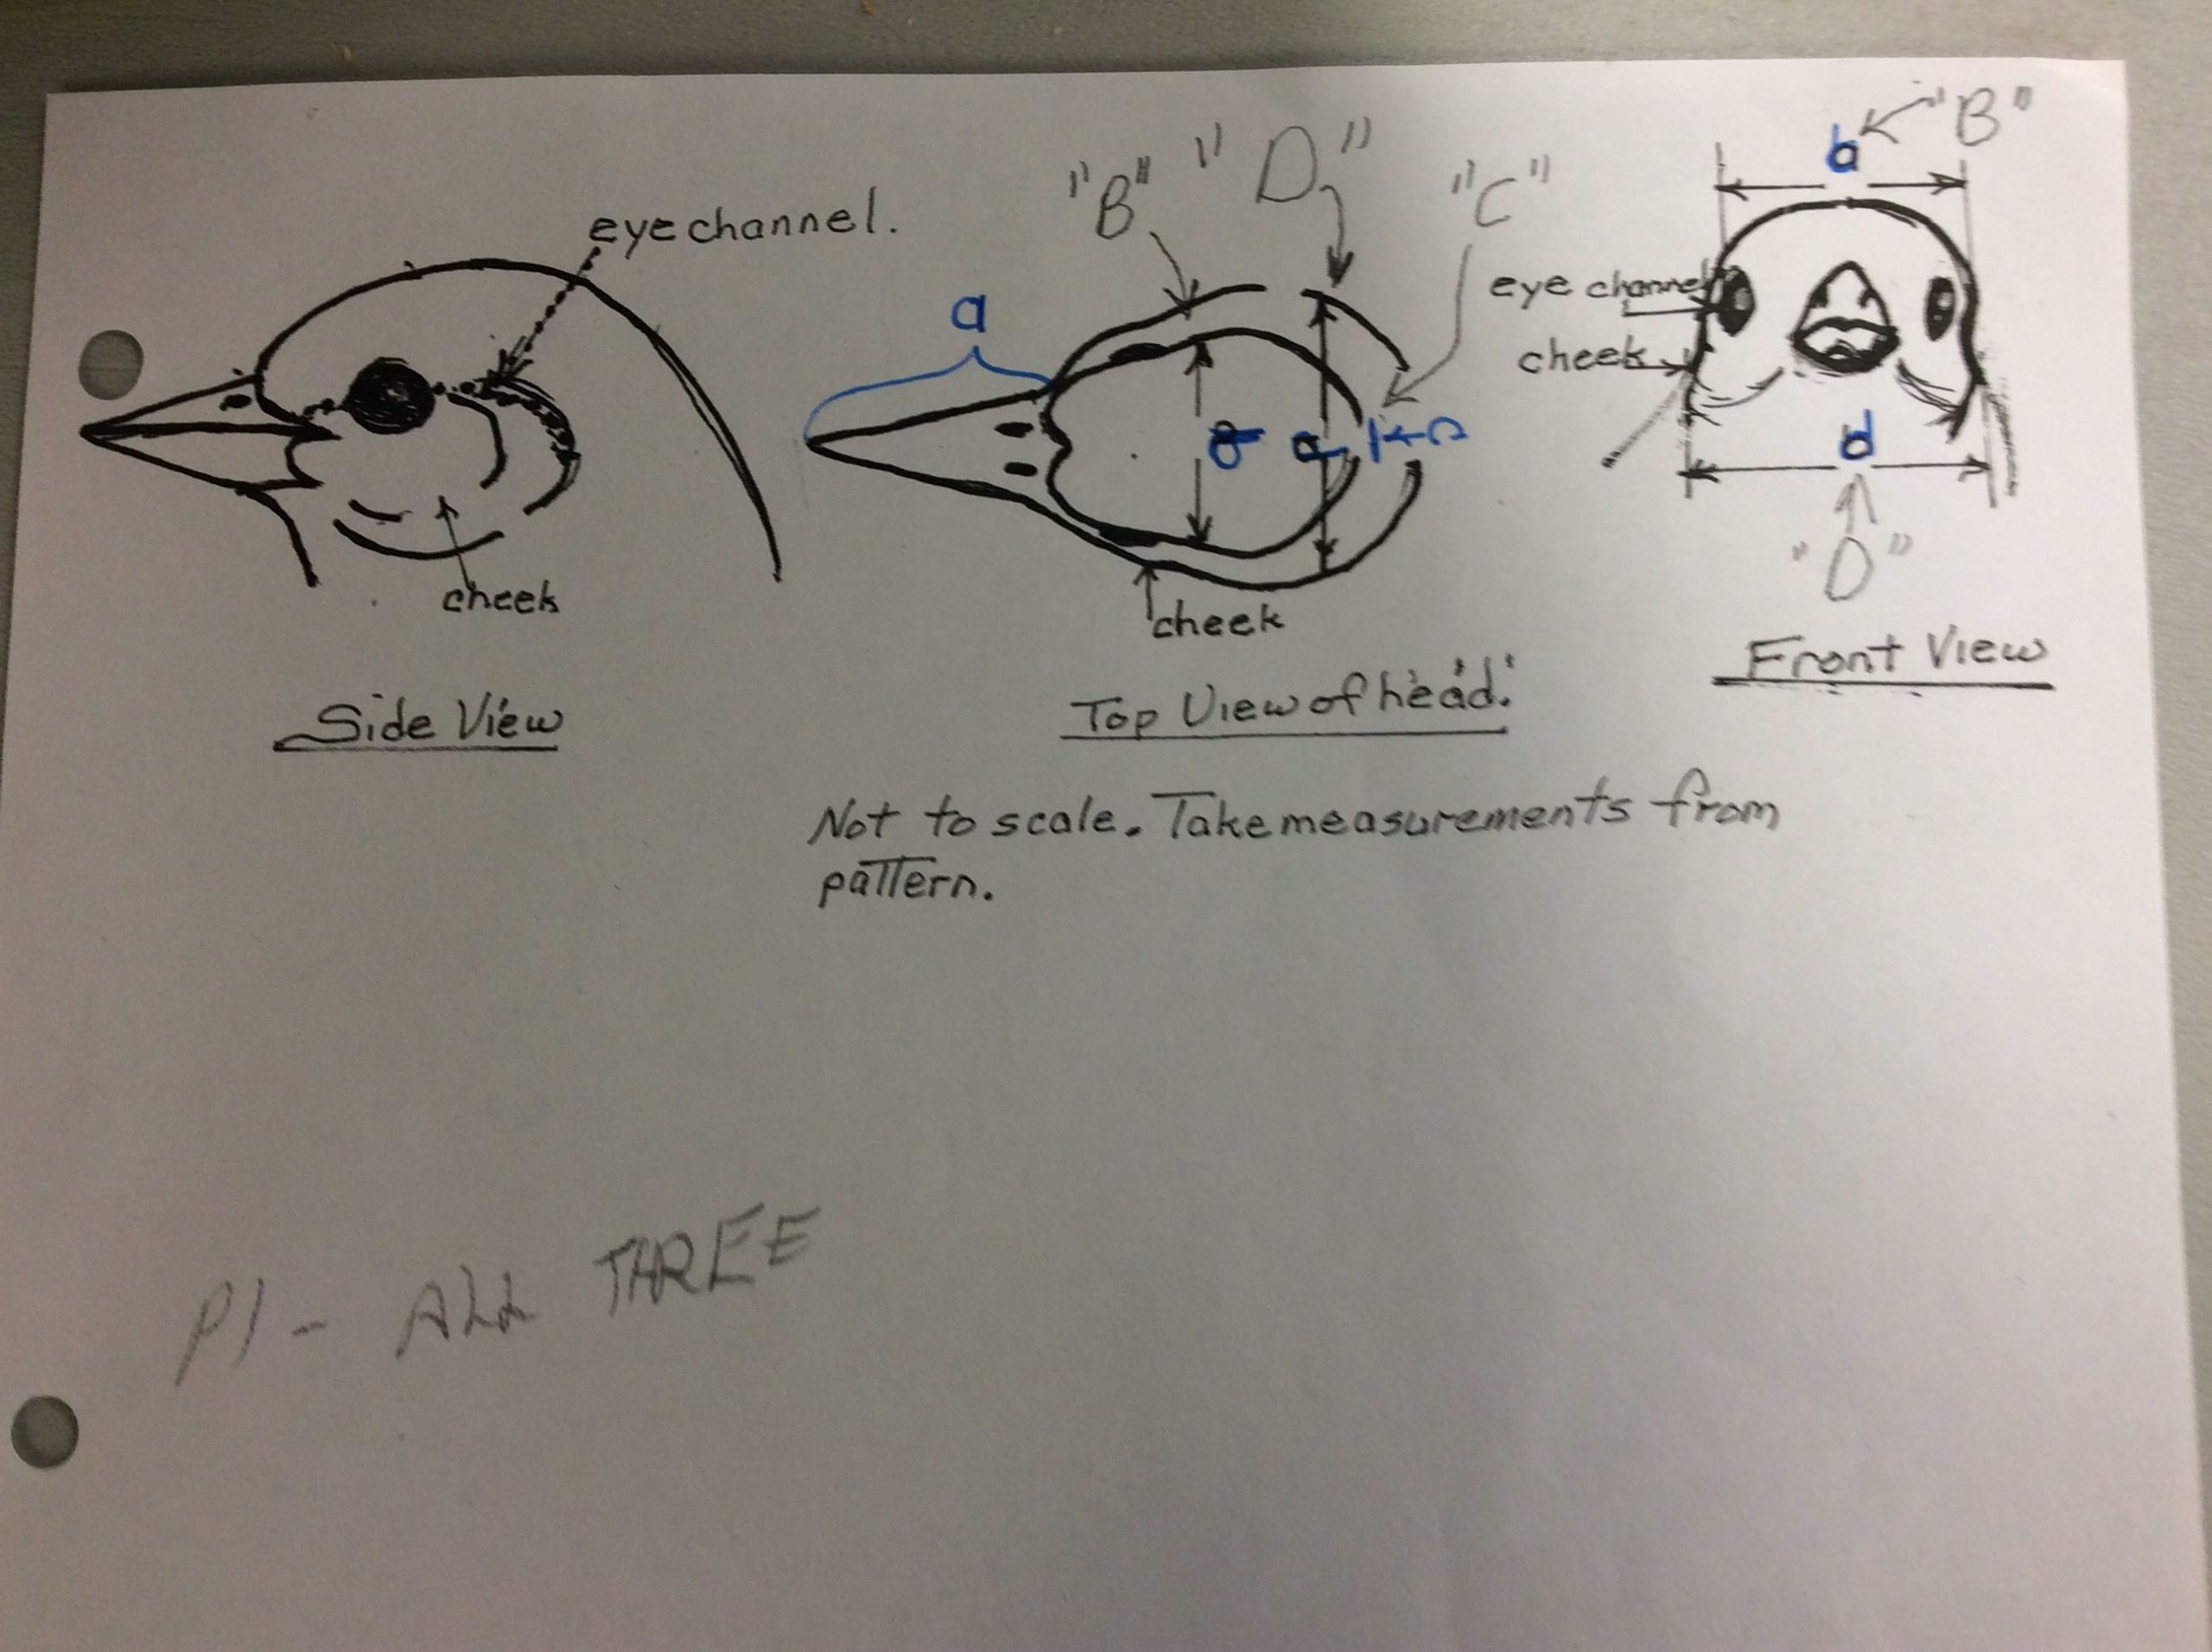
Take all measurements from your pattern not from my drawings.
Step 1:
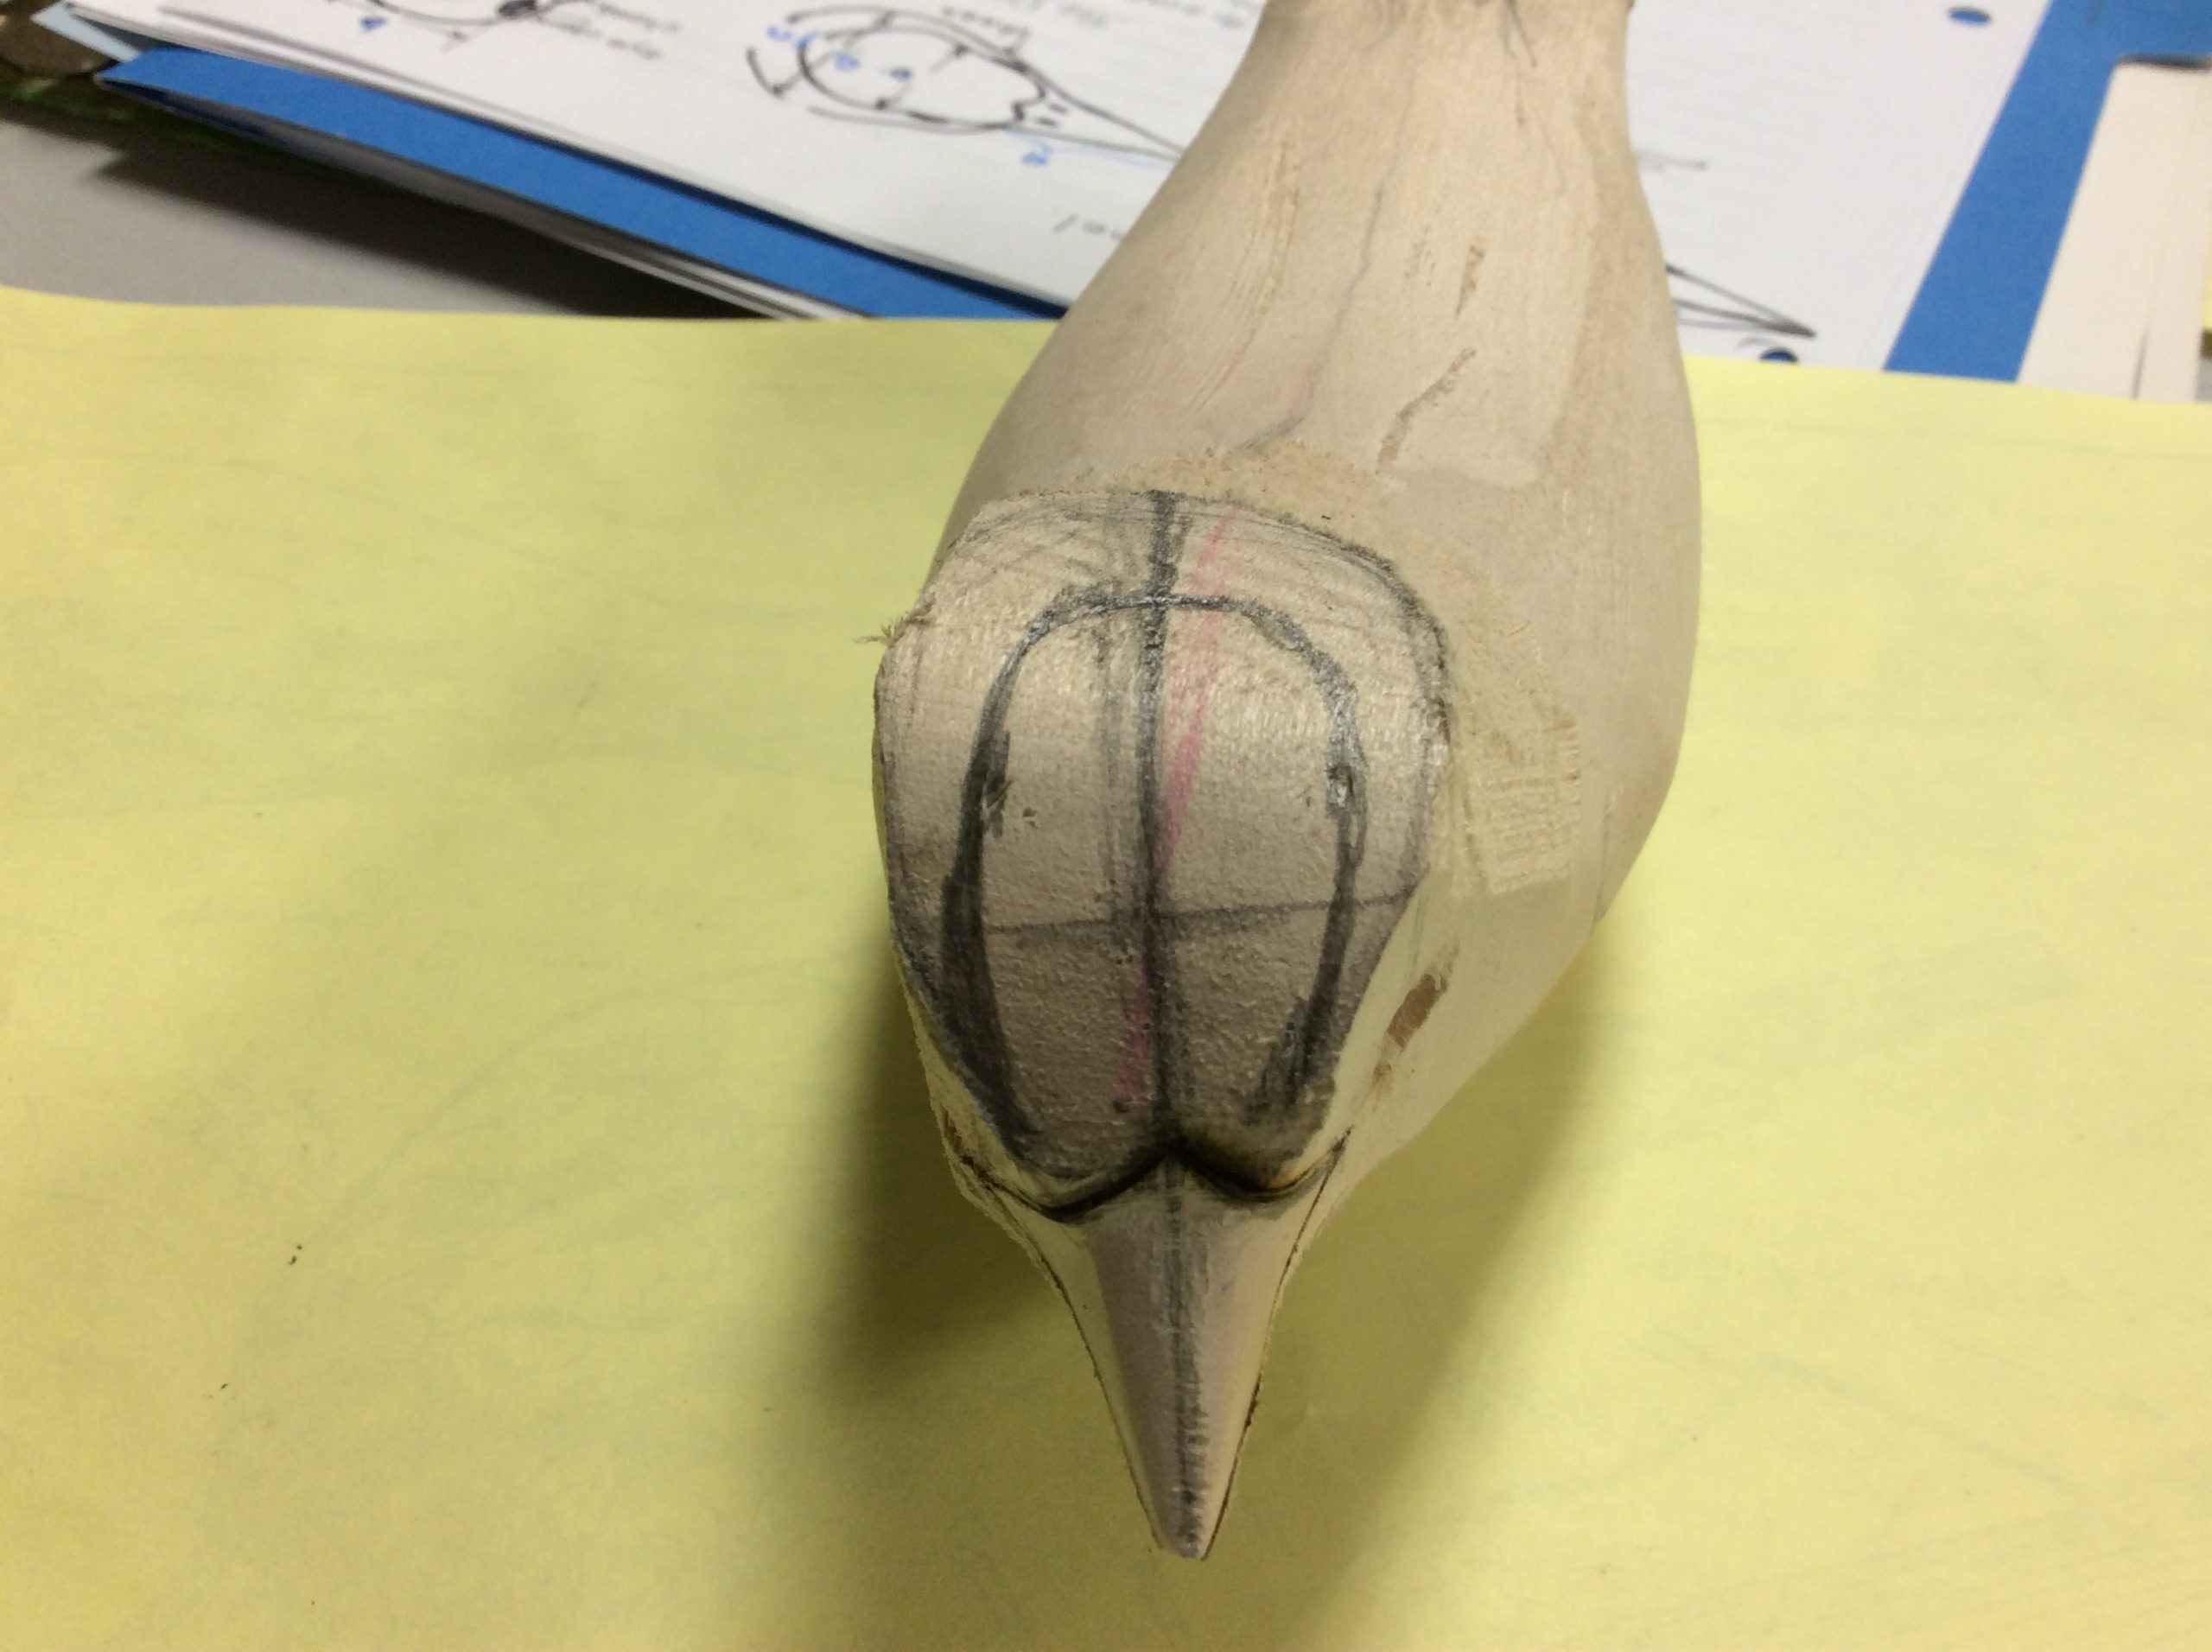
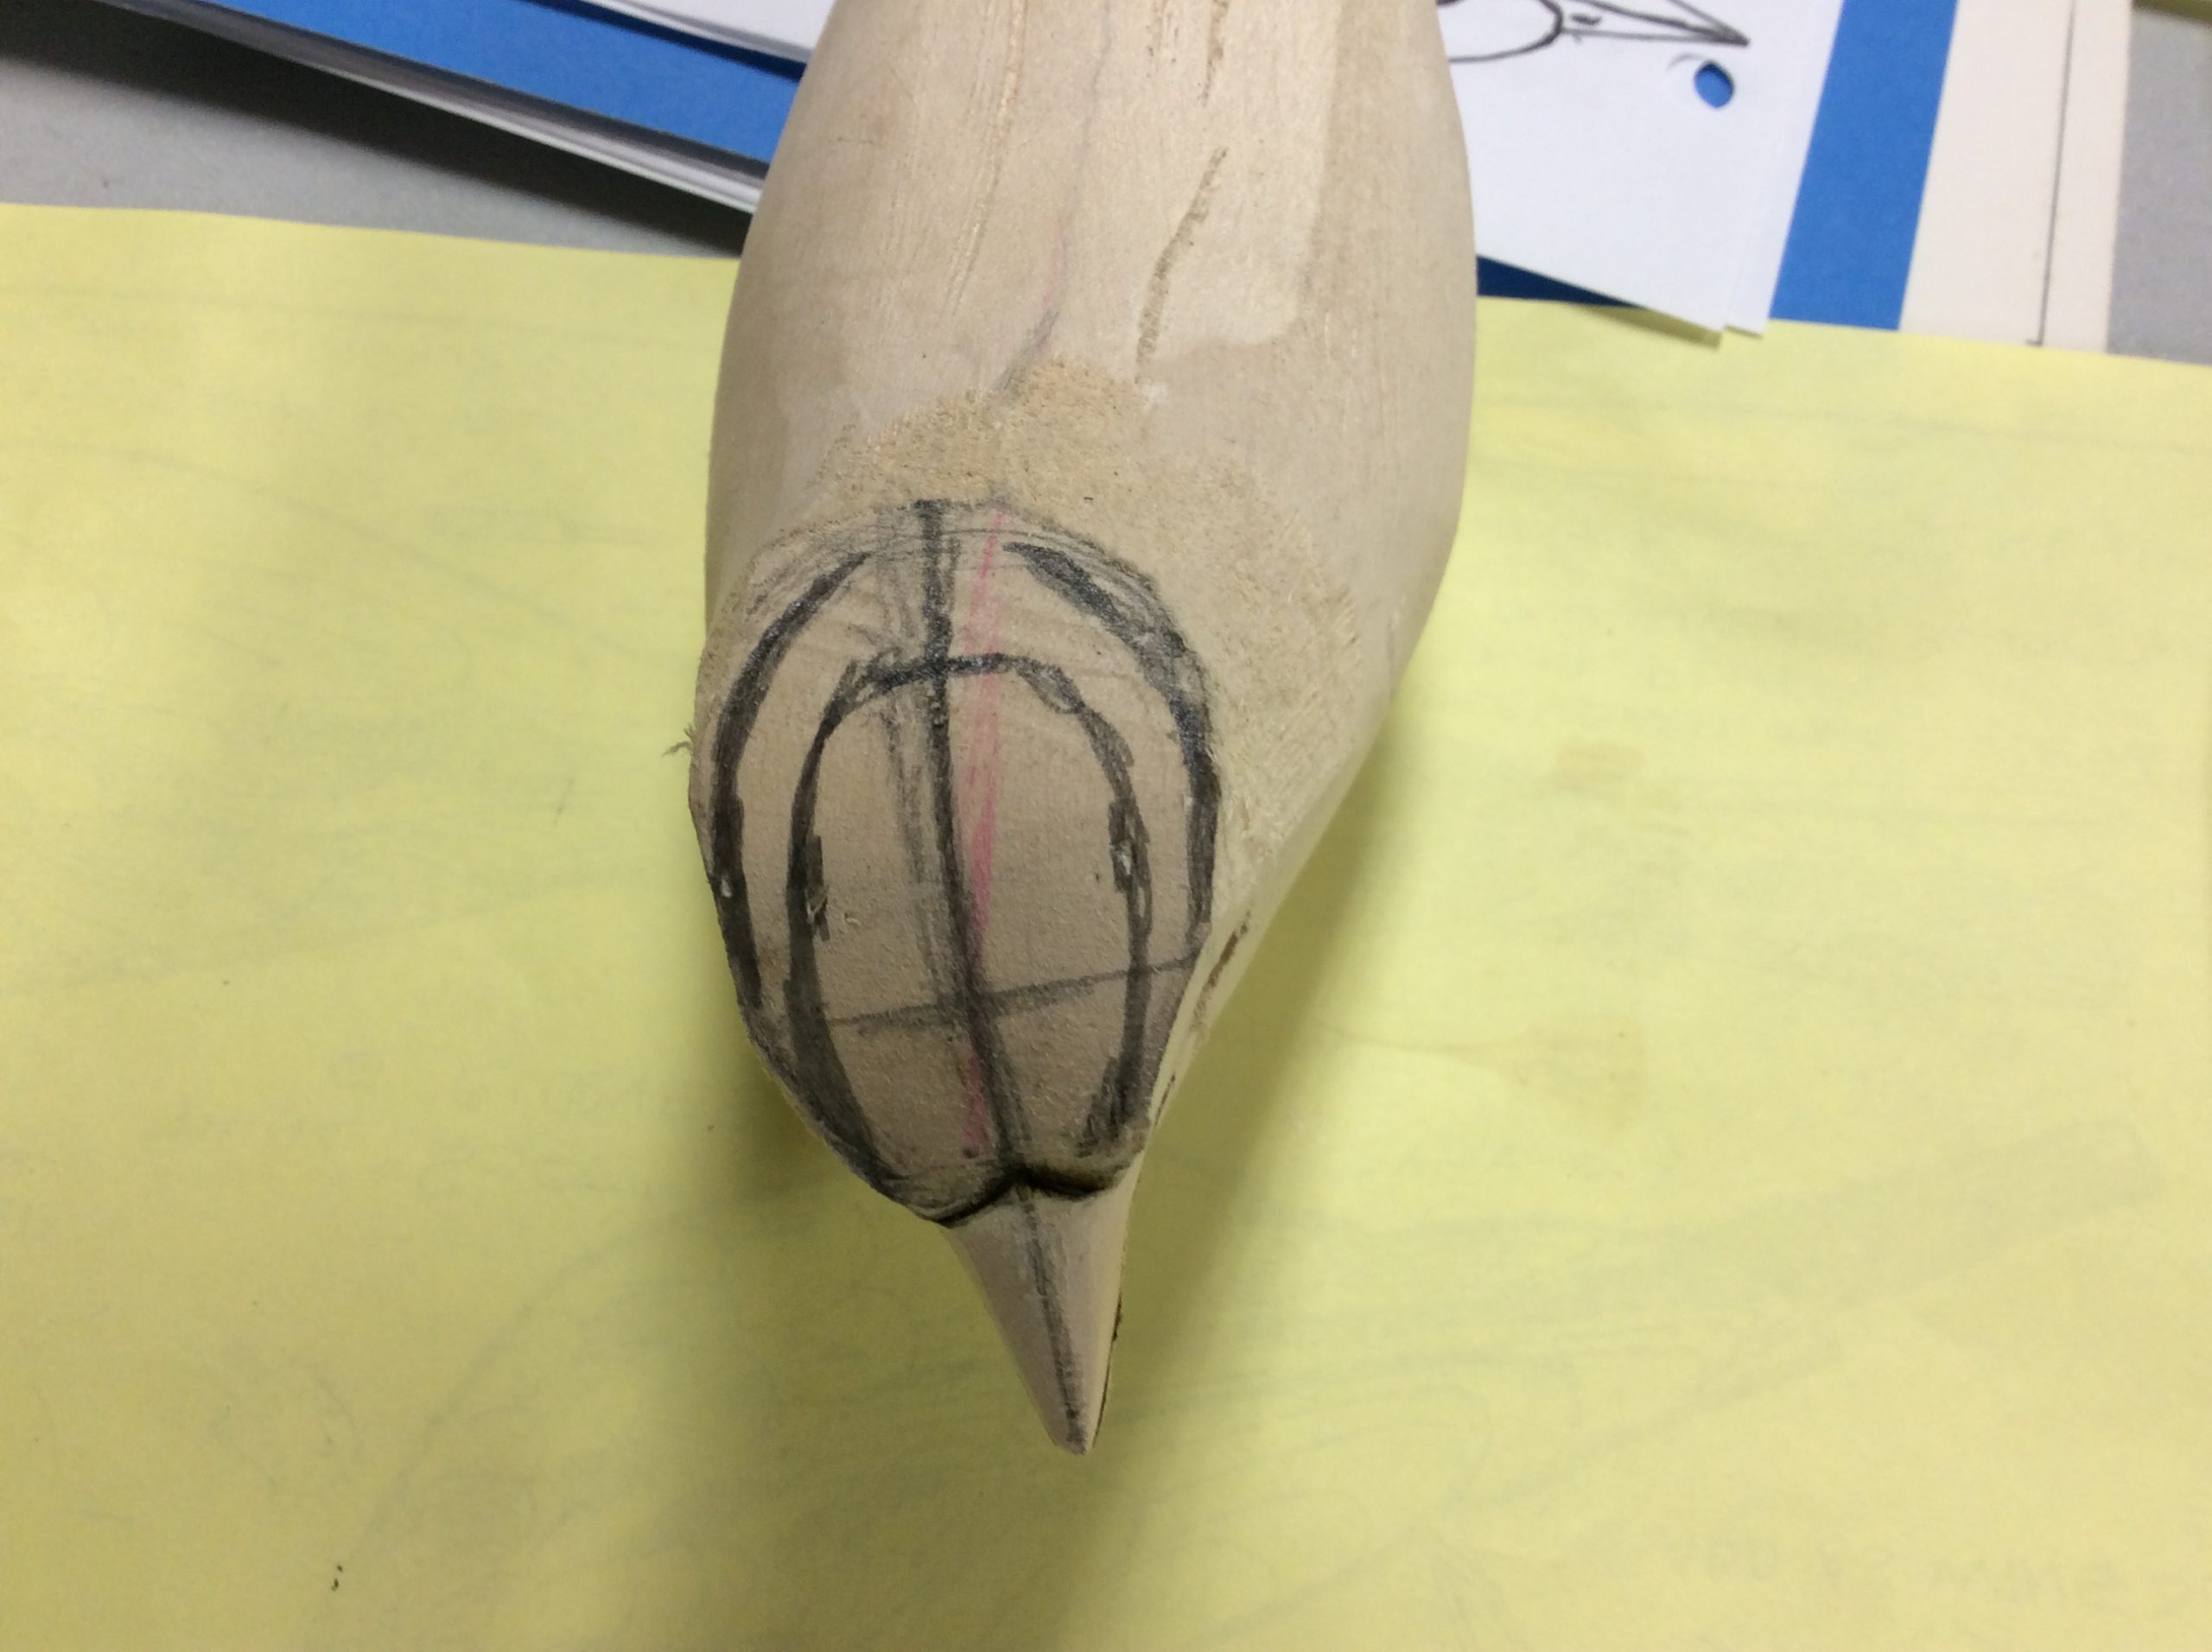
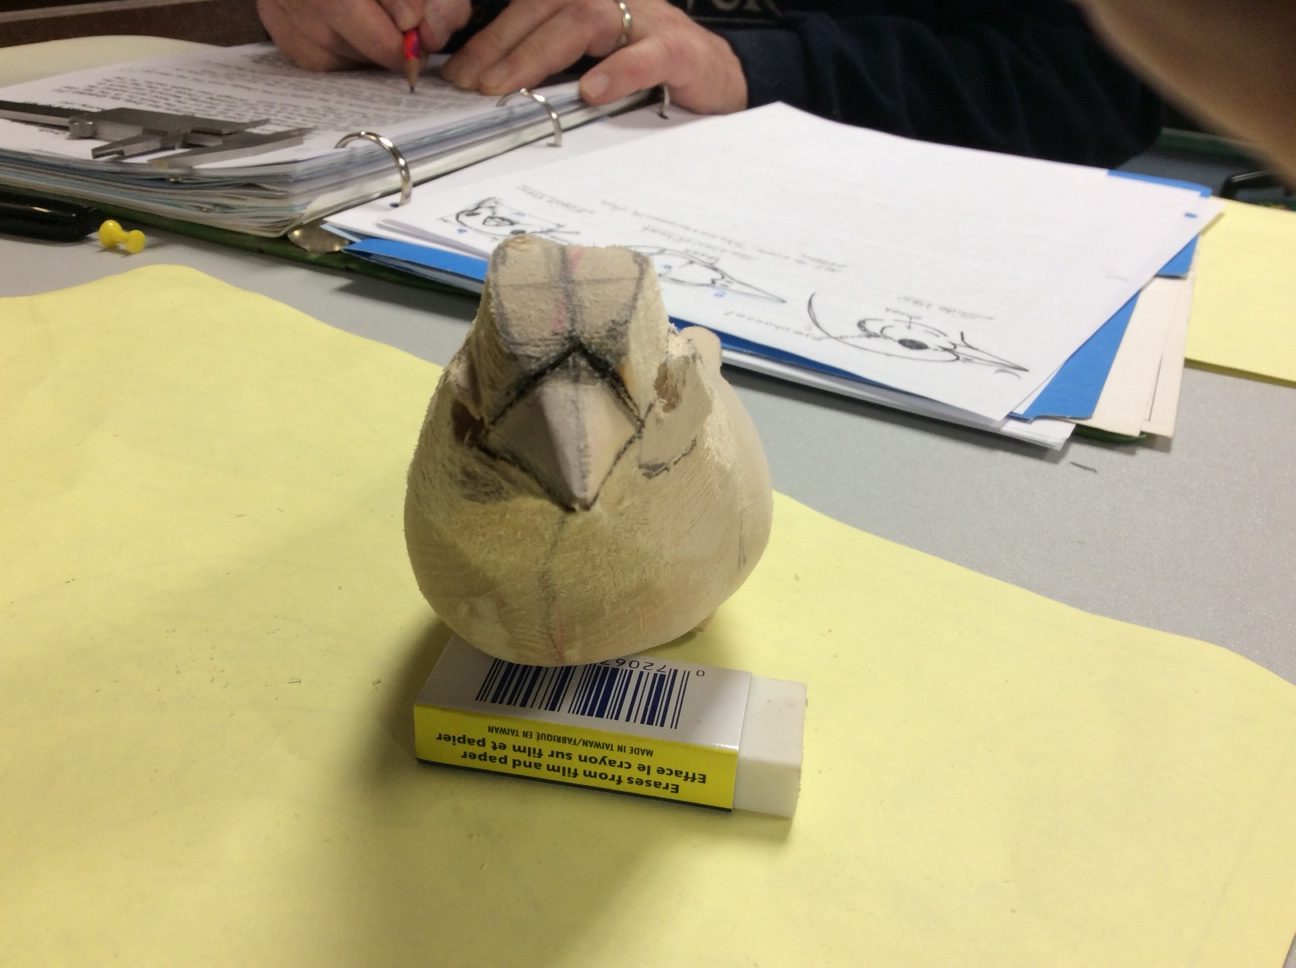
Check the width of beak near the forehead.[(a), in the top view drawing]. Measure the width of the top of the head just behind the eyes from your pattern.[(b) in top view drawing] Measure and mark on the back of the head. [(c) in top view drawing]. Draw on the top of the head, curving it from the beak base, through your width marks, to the back of the head. It will be surprisingly small.
Step 2:
Measure and mark on the width of the cheeks from the top view.(d)
Step 3:
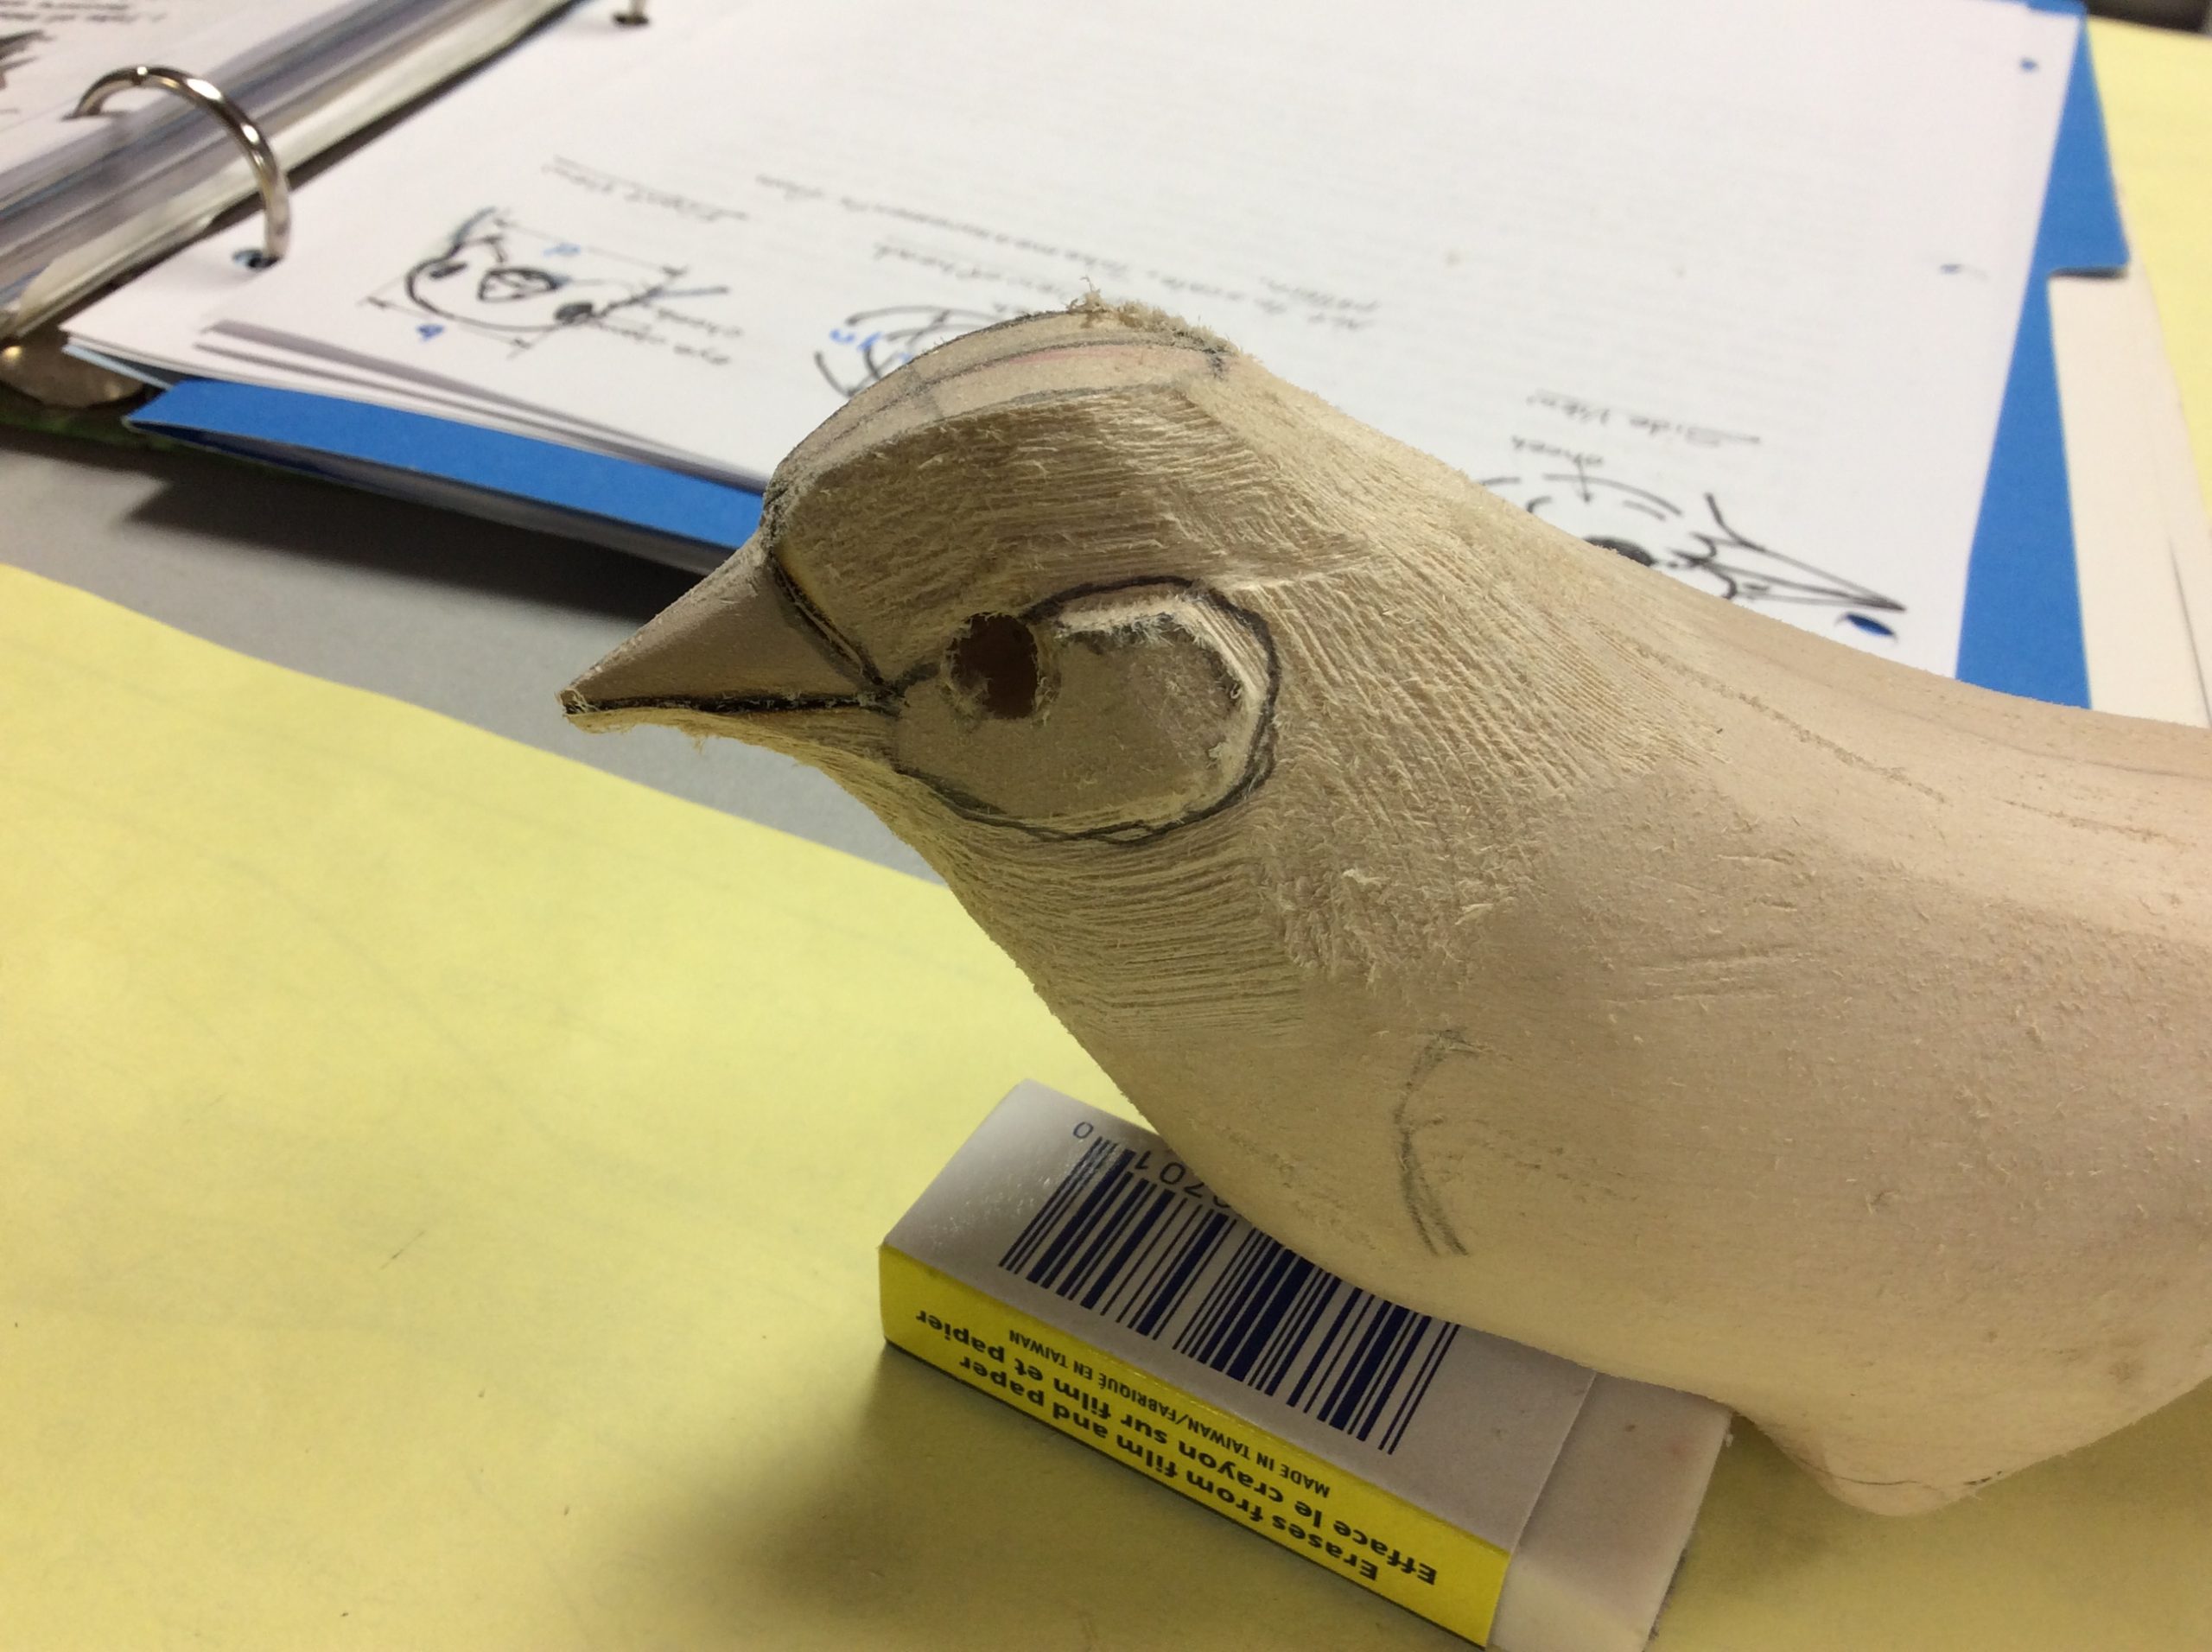
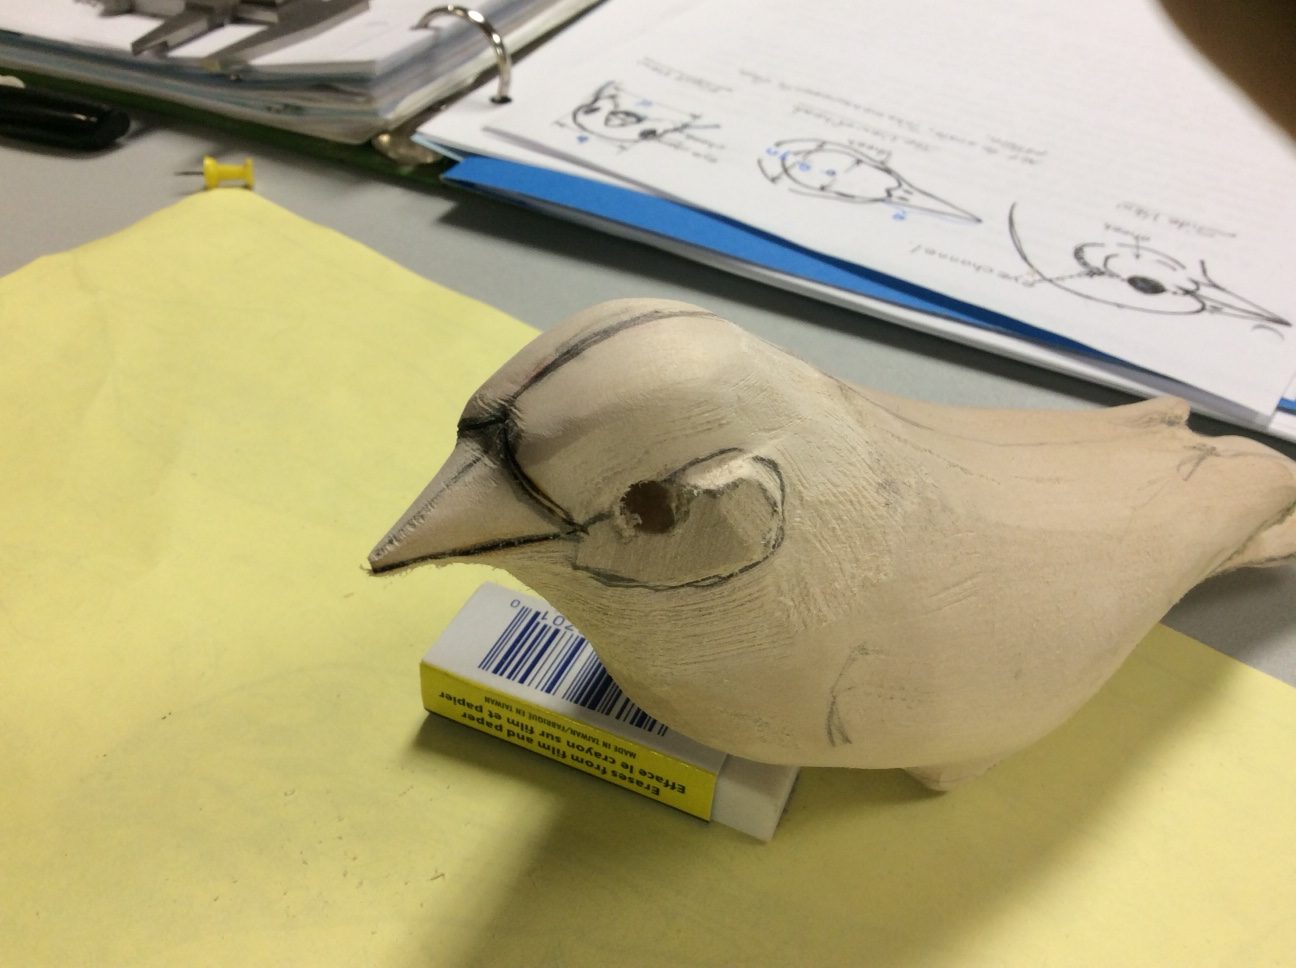
Draw on the side view of the eye channel. Be sure to check that the cheeks are symmetrical. Then cut in the eye channel with a gouge or a rotary tool, to the depth of the inner line you drew on the top of the head. It should curve from the base of the beak opening, through the eye, and down around the cheek. Be sure to check the distance between the eyes. Narrow this area if needed. If you find drawing on the details of the head a problem, a copy of the side view of the head will fit against your blank’s head at this point. Use it to check your work.
Step 4:
Remove wood straight down from the outline you drew of the top of the head to the base of the eye channel.
Step 5:
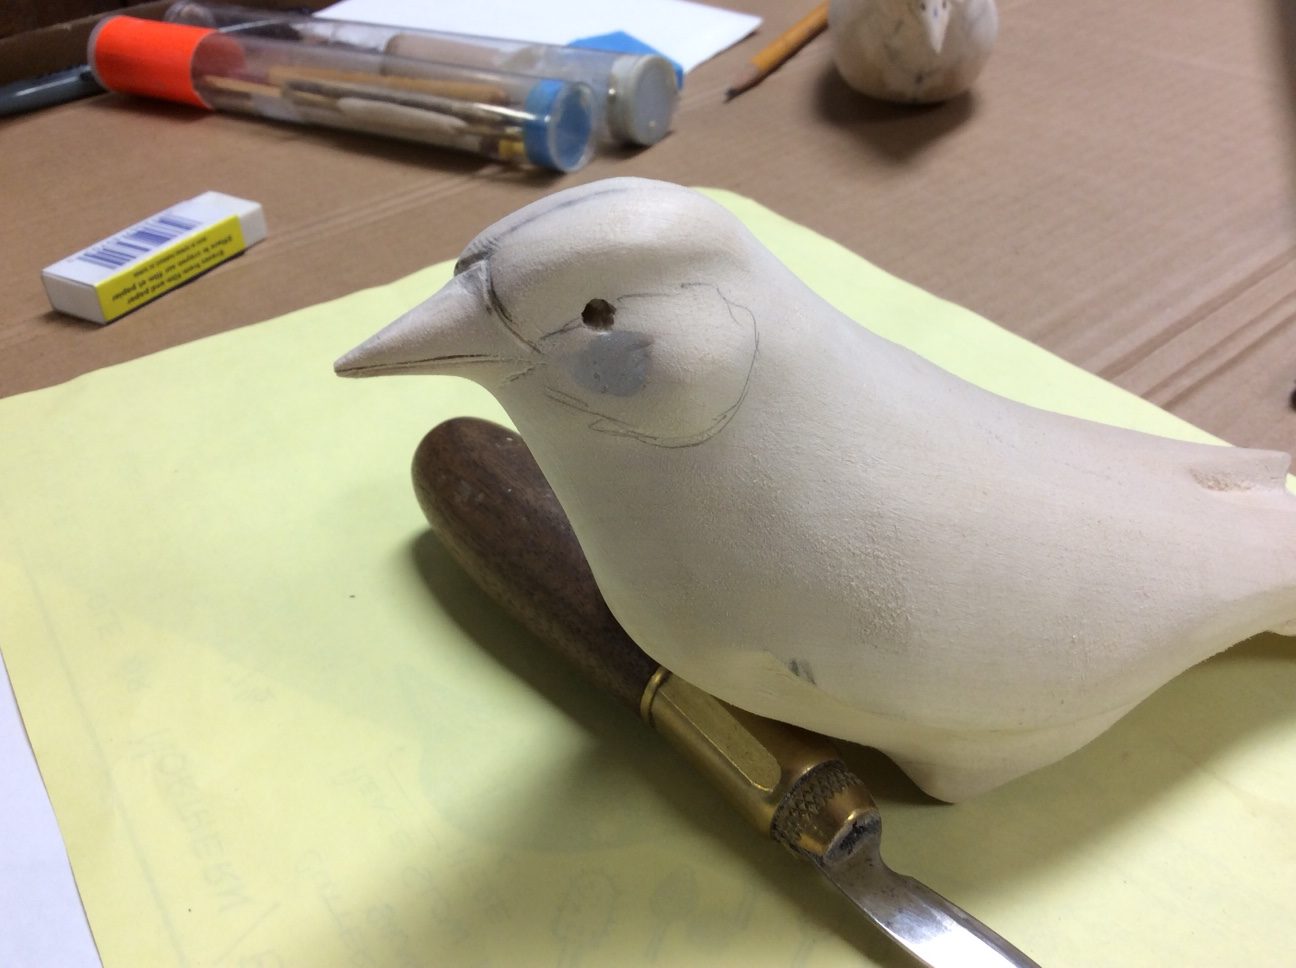
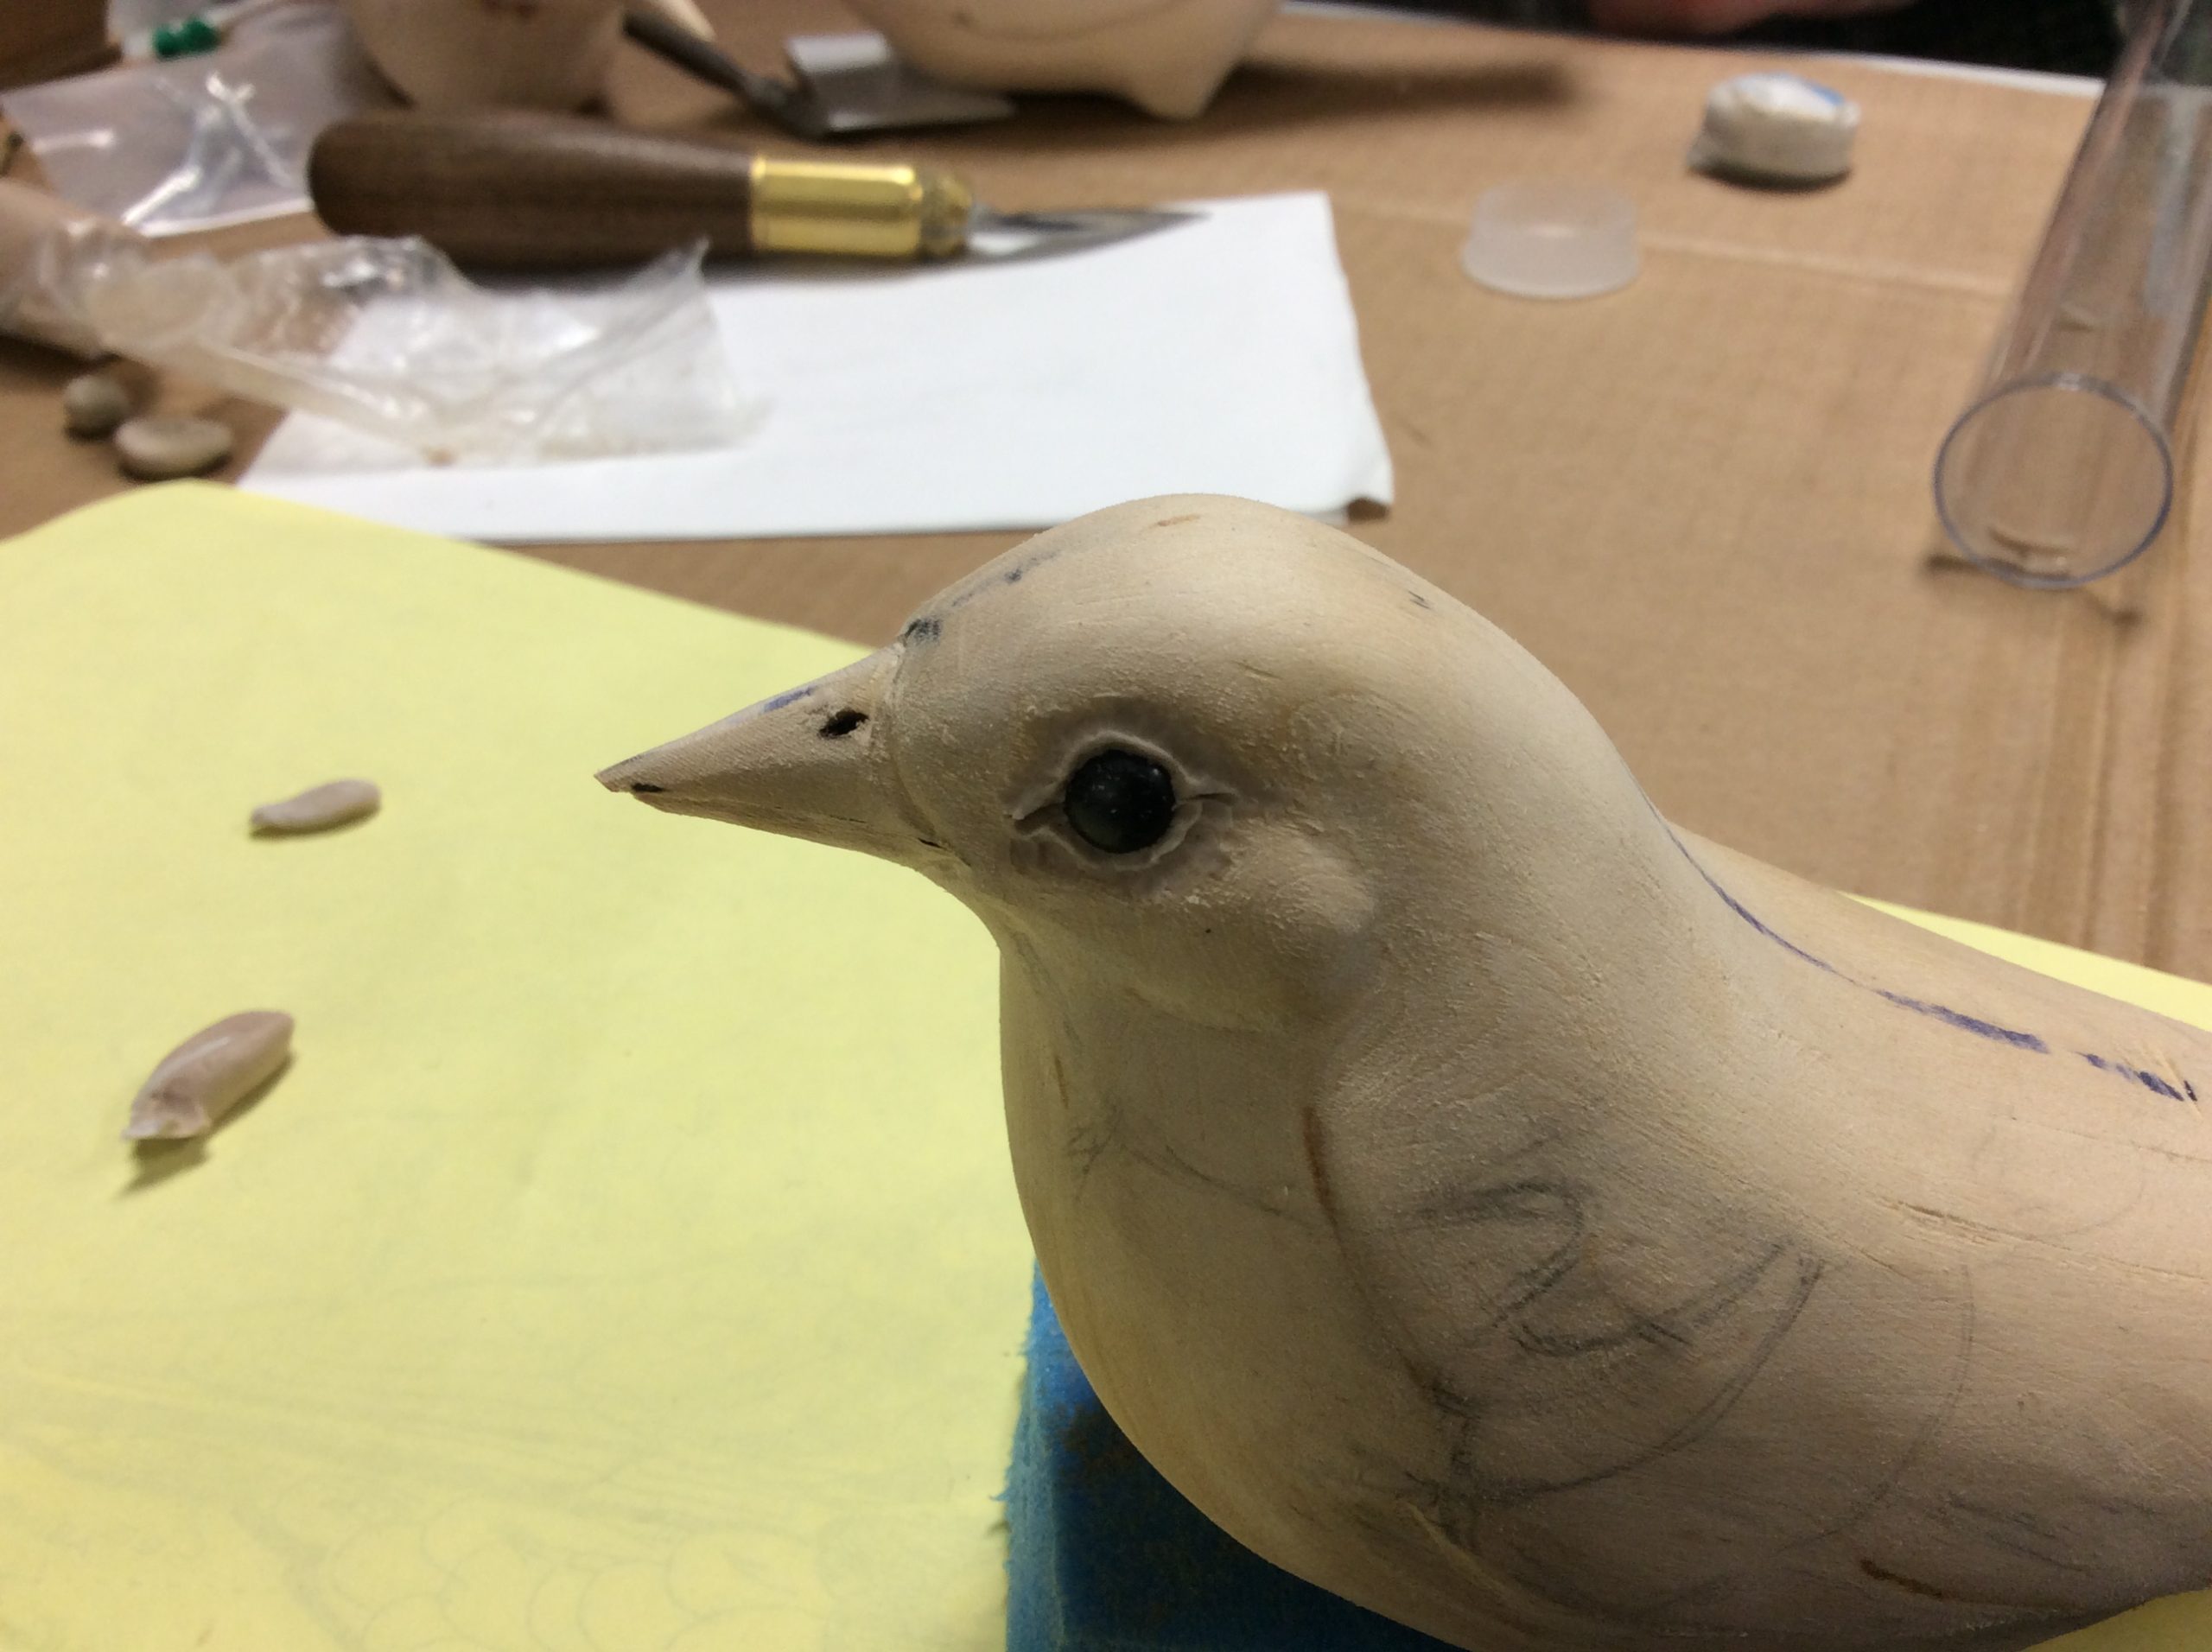
Gently, shave and sand the top of the head. Round it from the centre line on the top, to the top of the eye channel. Work slowly and be sure to leave room for its brains. Then round the back of the head and blend it into the back.

Step 6:
Re-draw the cheek outlines and sand them lightly to create soft pillow shapes behind and below the eyes.
Step 7
There will be extra wood under the beak and under the cheeks, remove it and blend the head into the bird’s body. Birds have necks but they are covered with feathers so we only see a gentle curve into the back and chest, not a pronounced neck. If your bird looks like a football player, now is the time to take a little off.
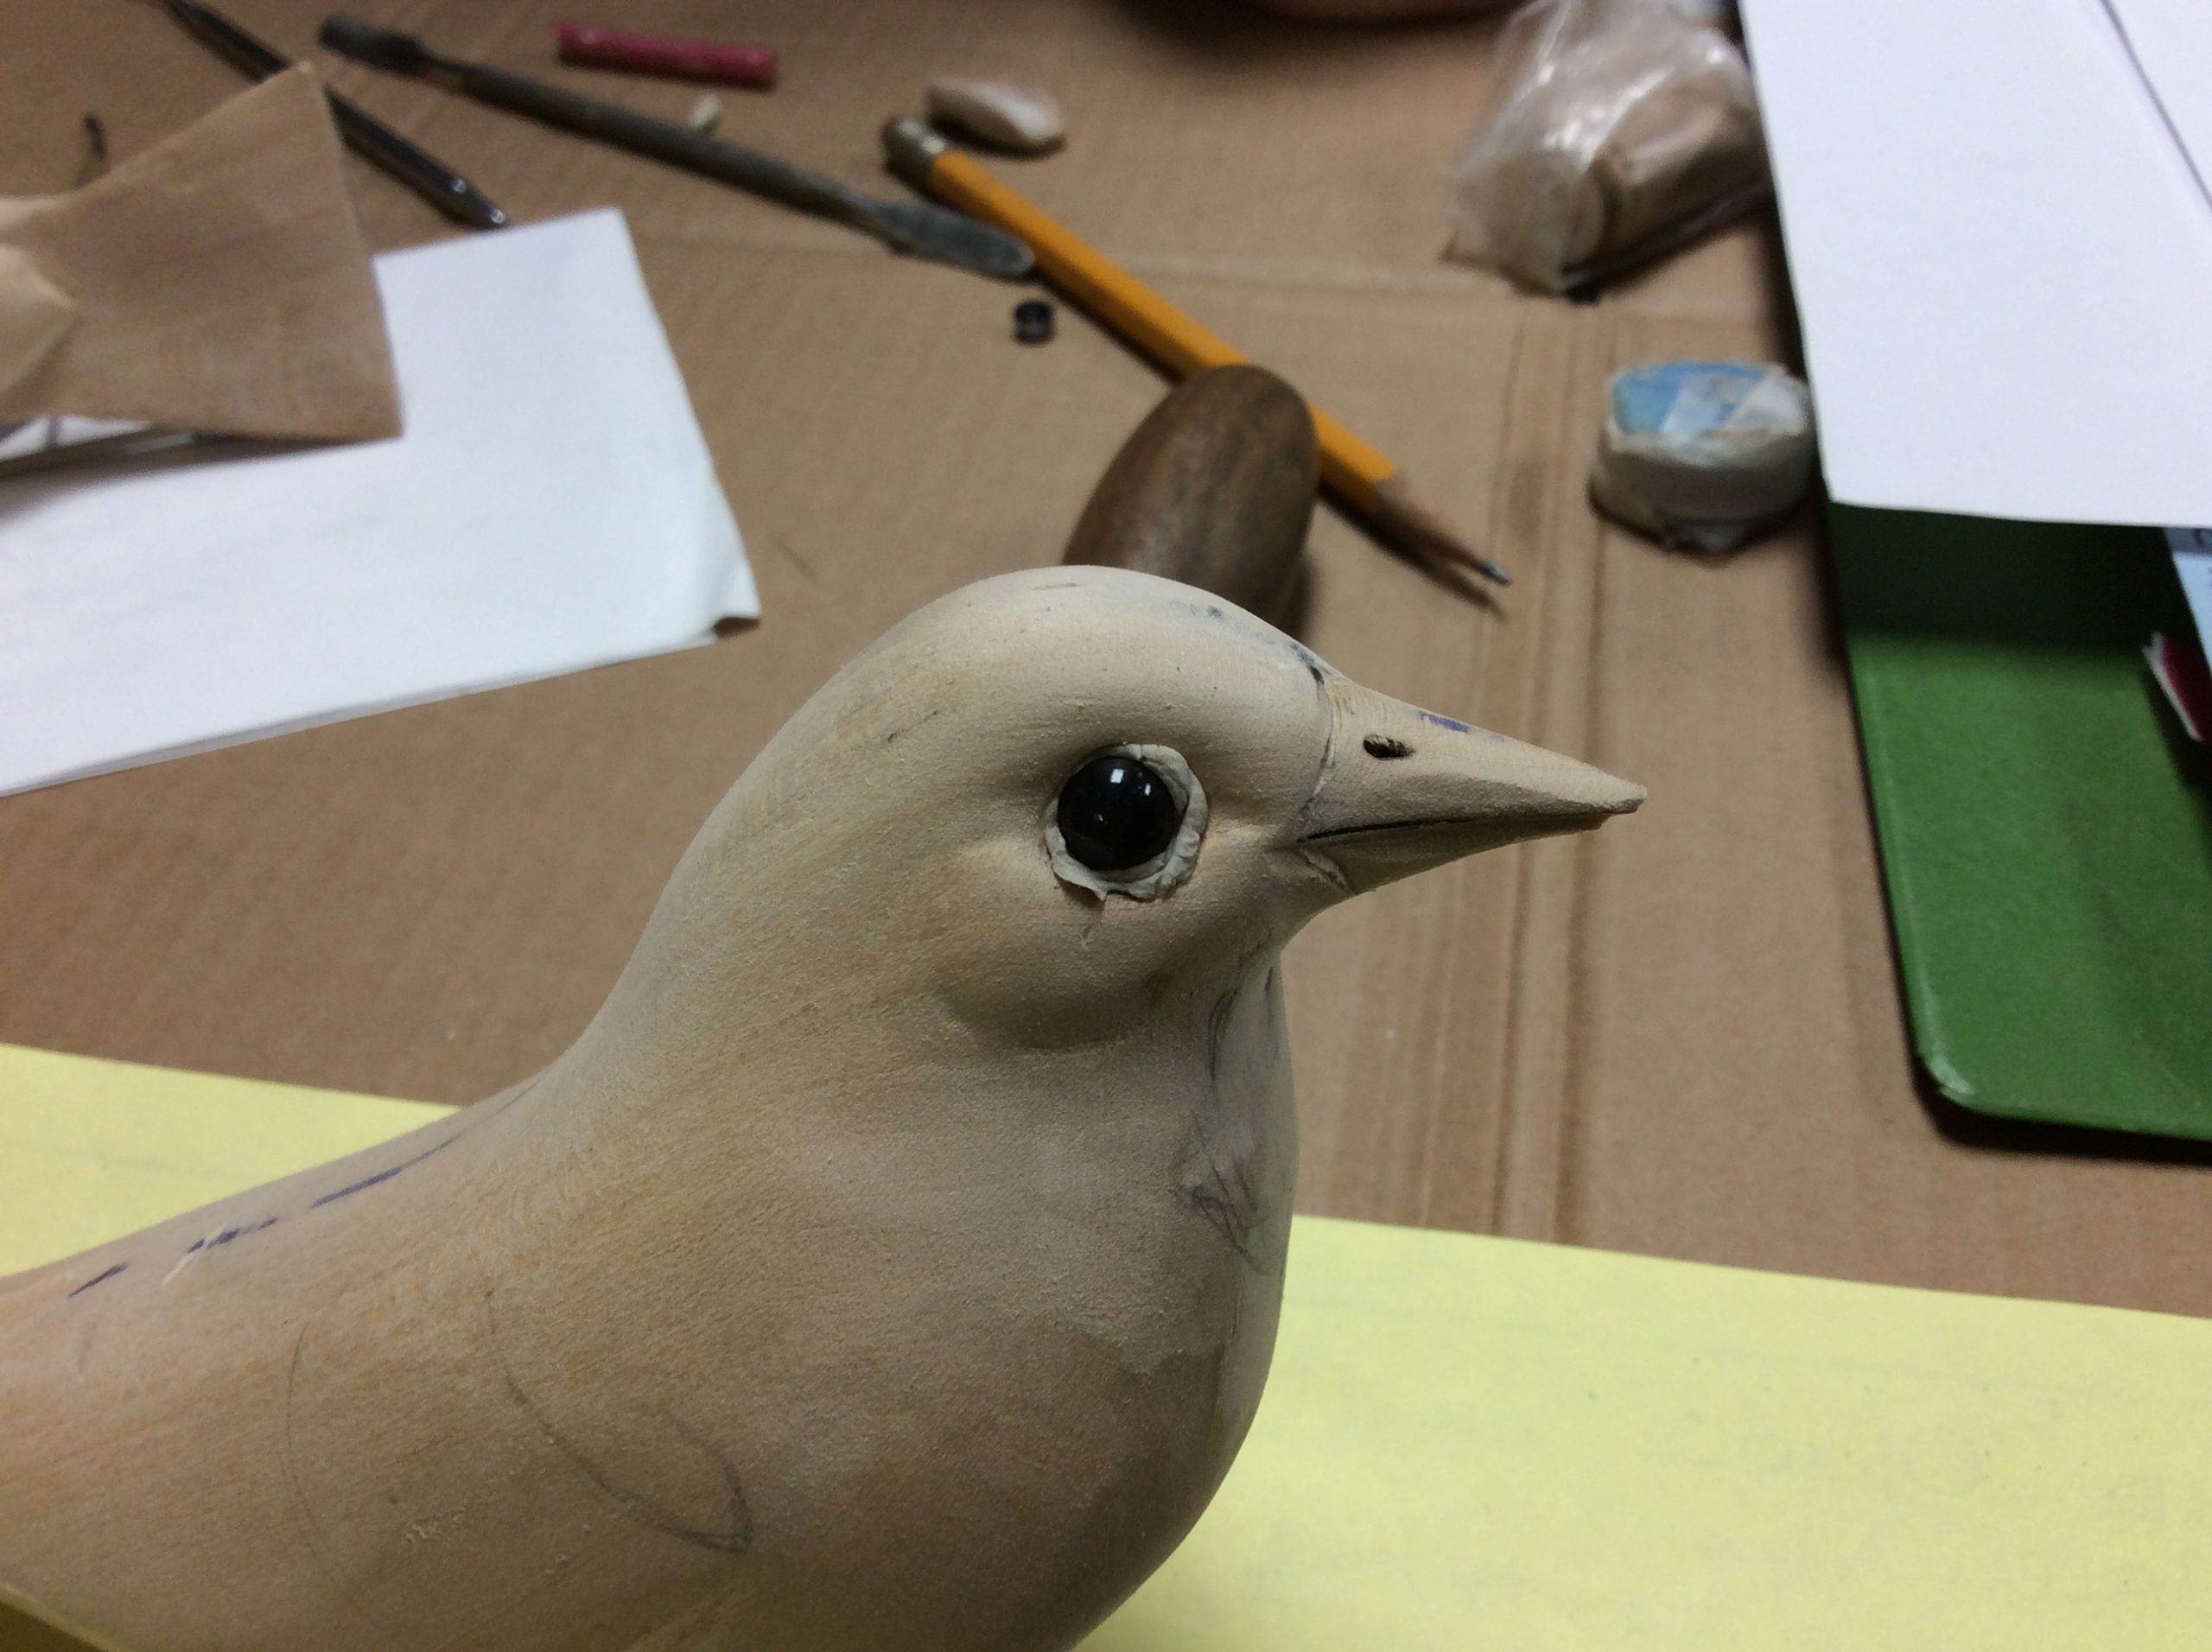
Step 8
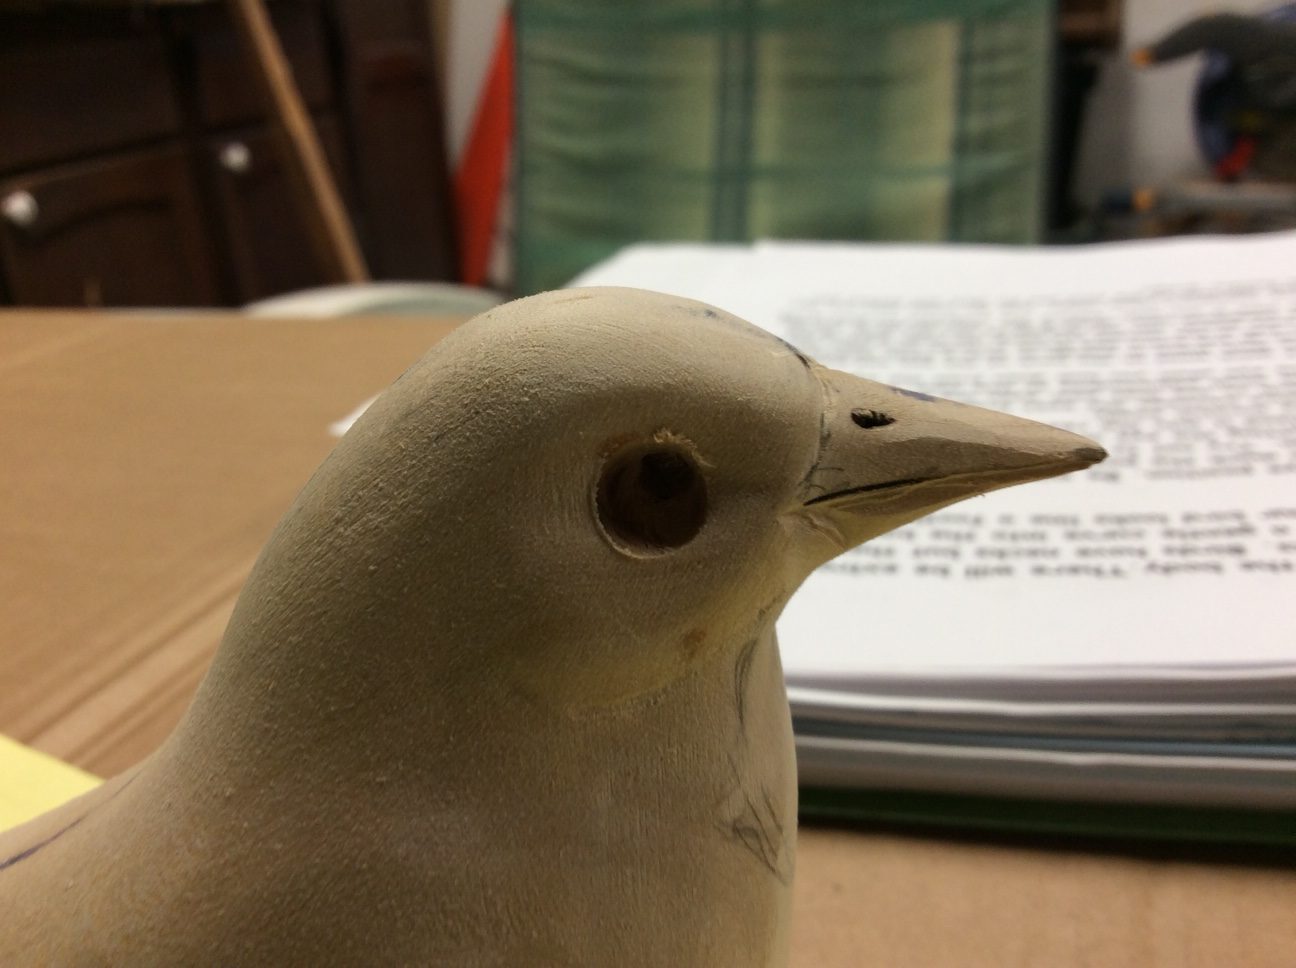
Check and recheck the eye position. Be sure that both sides match. If in doubt use two pins to mark the positions and look from all angles. Cut in the eye holes, 6 mm. Try not to make the opening much wider than the eye size. Try putting the eye in place to check the size. Sand around the eye hole to blend it into the rest of the head before you put in the eyes.
They scratch easily.
Step 9
Measure the distance between the eyes from the top view before you set them in and check to see that your eyes are not “bugging out” too much. You can make small adjustments at this time. You should be able to see a bit of the eye when you look down from the top.
Step 10
Put a small ball of quick wood on the back of the eye and push it into the hole. Be sure that there is enough so that a little squeezes out around the eye. Clean up the extra and check to make sure your eye is looking straight out. Put in the second eye using the same method and check to see that they match; not one looking up and one down. Work quickly before your compound sets, about 5 min. You can put in eye lids and details at this time if you wish, before the compound hardens.
Step 11
When you have completed these steps, look for areas that are flat or not blended into the rest of the bird and fix them now before you start drawing on feather groups.