
We will divide this project into several steps:
- The Body (View Instructions)
- The Tail (View Instructions)
- The Beak (View Instructions)
- The Head (View Instructions)
- Feathering (View Instructions)
- Details (Texturing the Tail) (View Instructions)
- Details (Texturing the remainder of your Bird) (View Instructions)
- Details (The Feet) (View Instructions)
- Painting (View Instructions)
We will try to post a new step each week. Try not to rush. If you have questions, or require clarification e-mail me at ron.greenwood47@gmail.com or jbdonaldson@ymail.com, and I will try to be at John Donaldson’s shop on Monday afternoons from 1 to 3. If you would like to come for help, BUT please contact John or Ron and let us know so we can social distance. You will need a mask.
We will try to find evening time for those who can not make it during the day.
1 – The Body
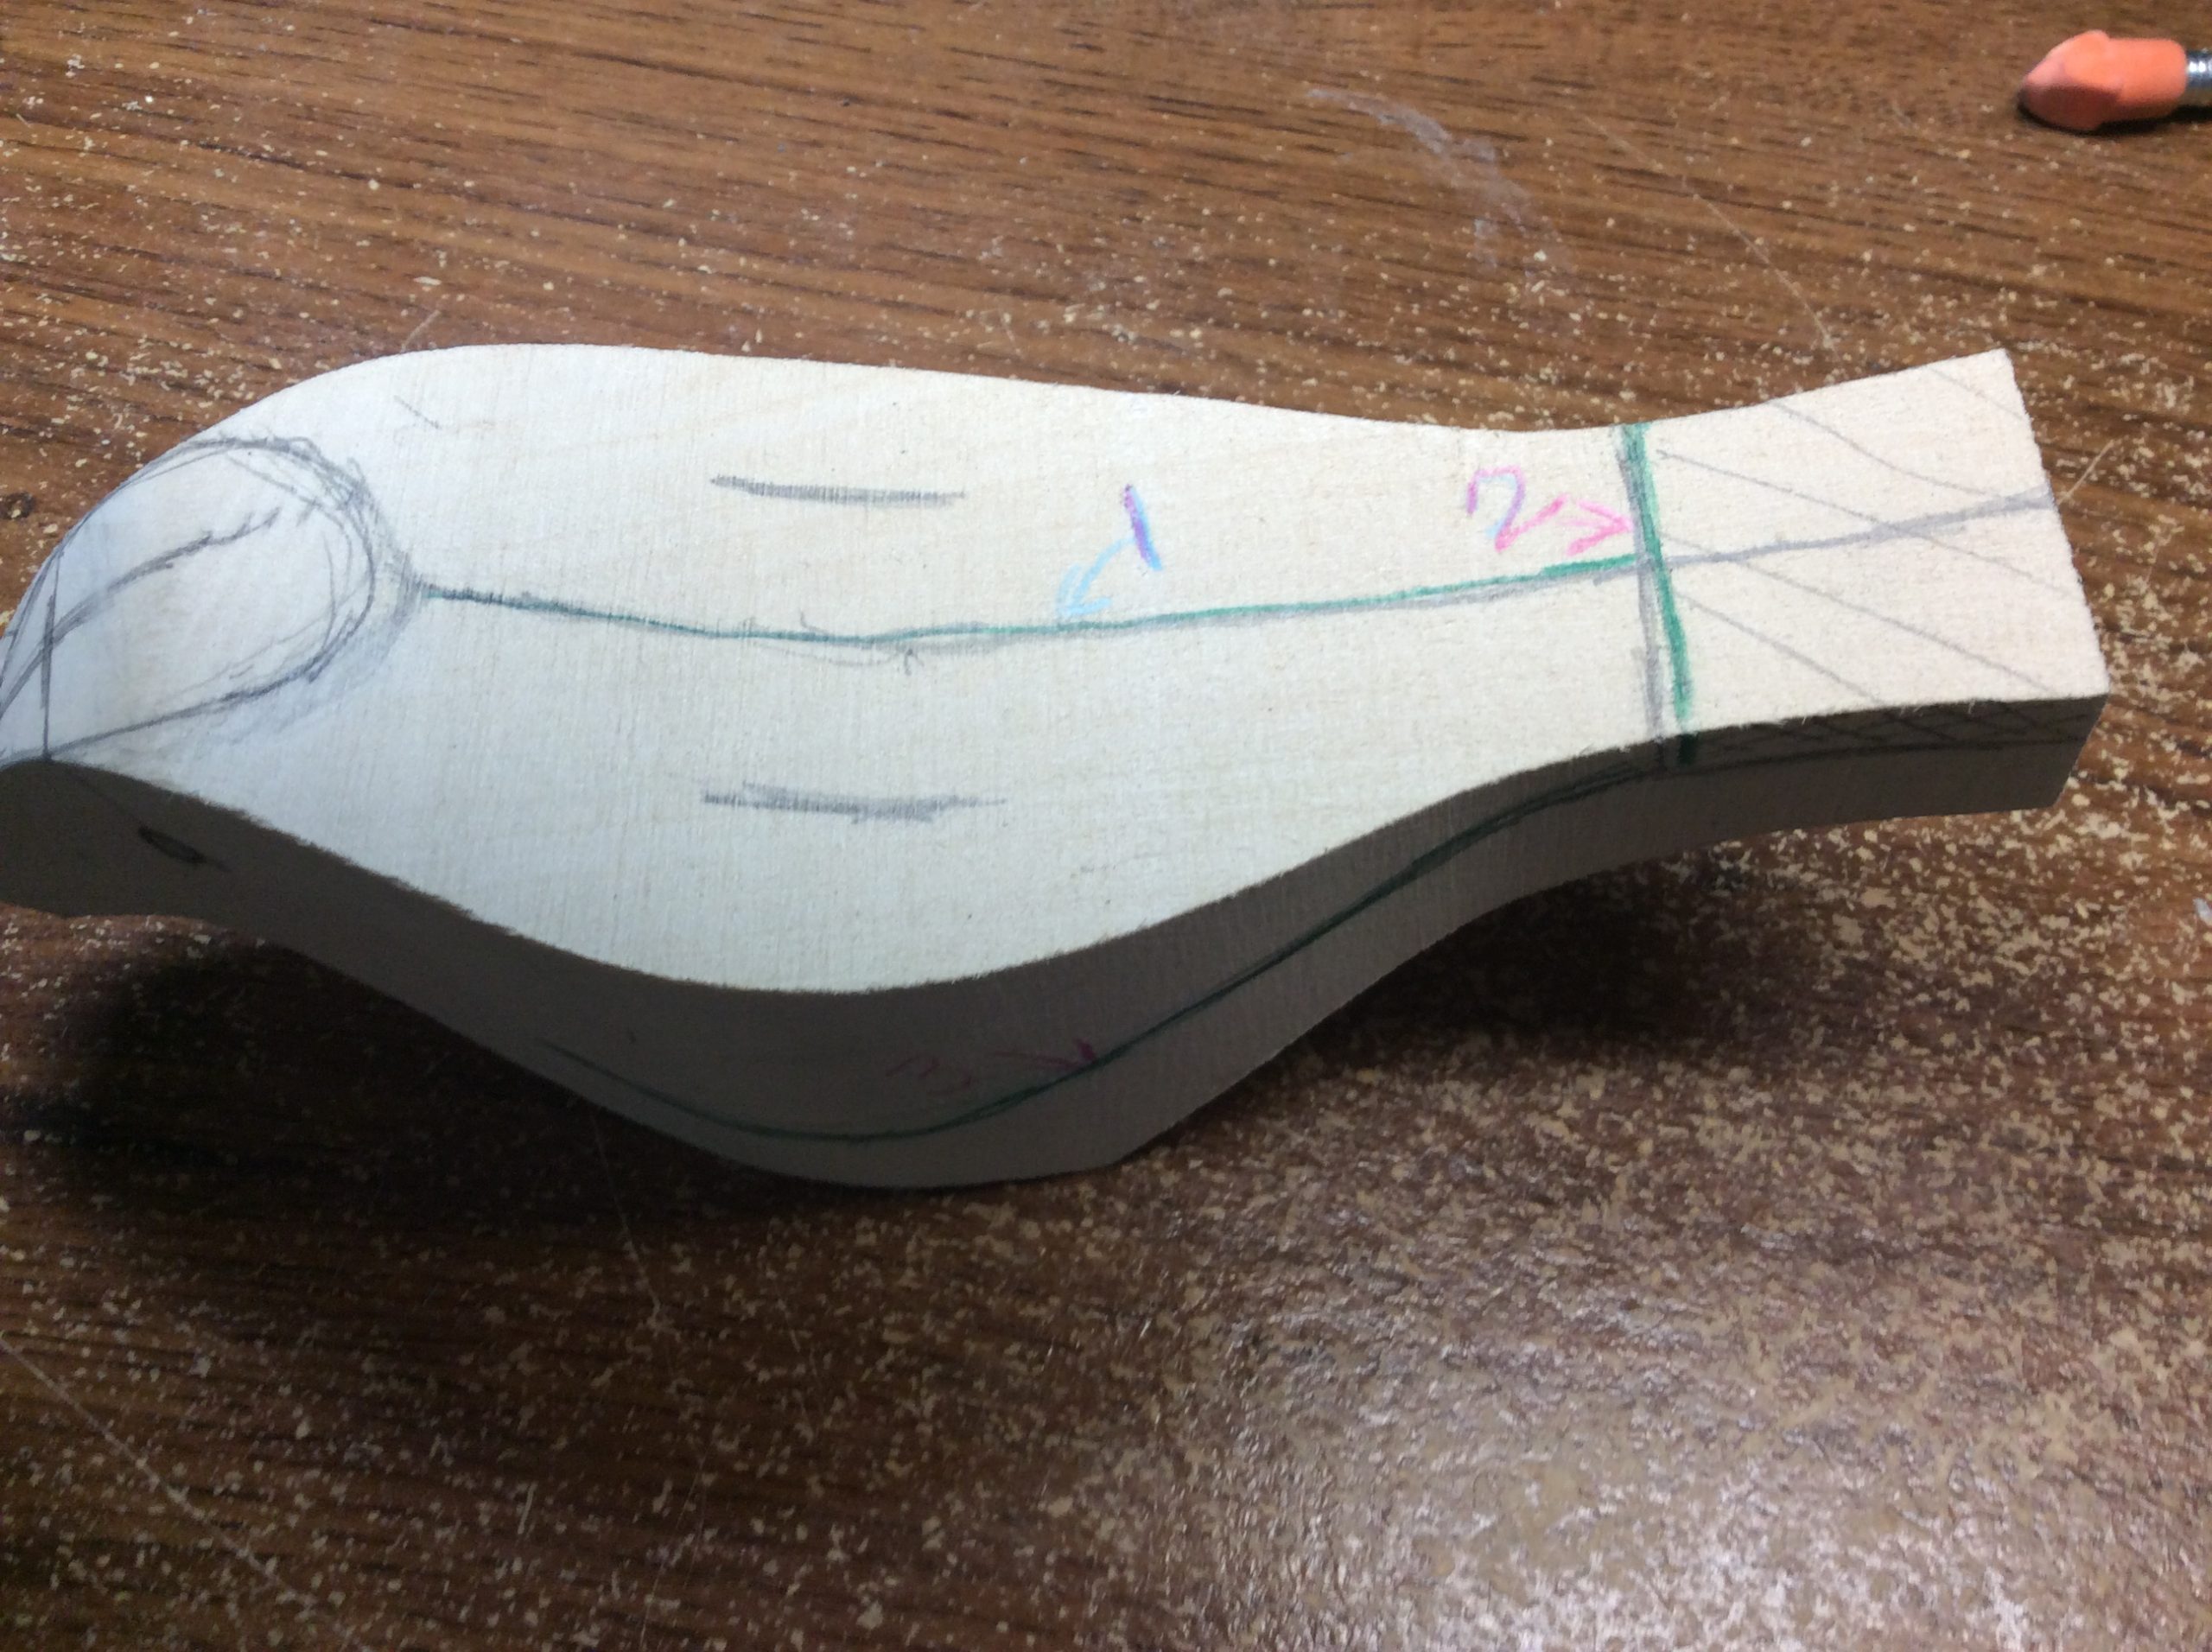
Step 1 & 2:
Draw a centre line around the whole bird.
Measure from the end of the tail to mark on the primary wing tips. Mark the extra wood to remove from the top of the tail

Step 3:
Draw on the bottom edge of each wing. Try to make them match.
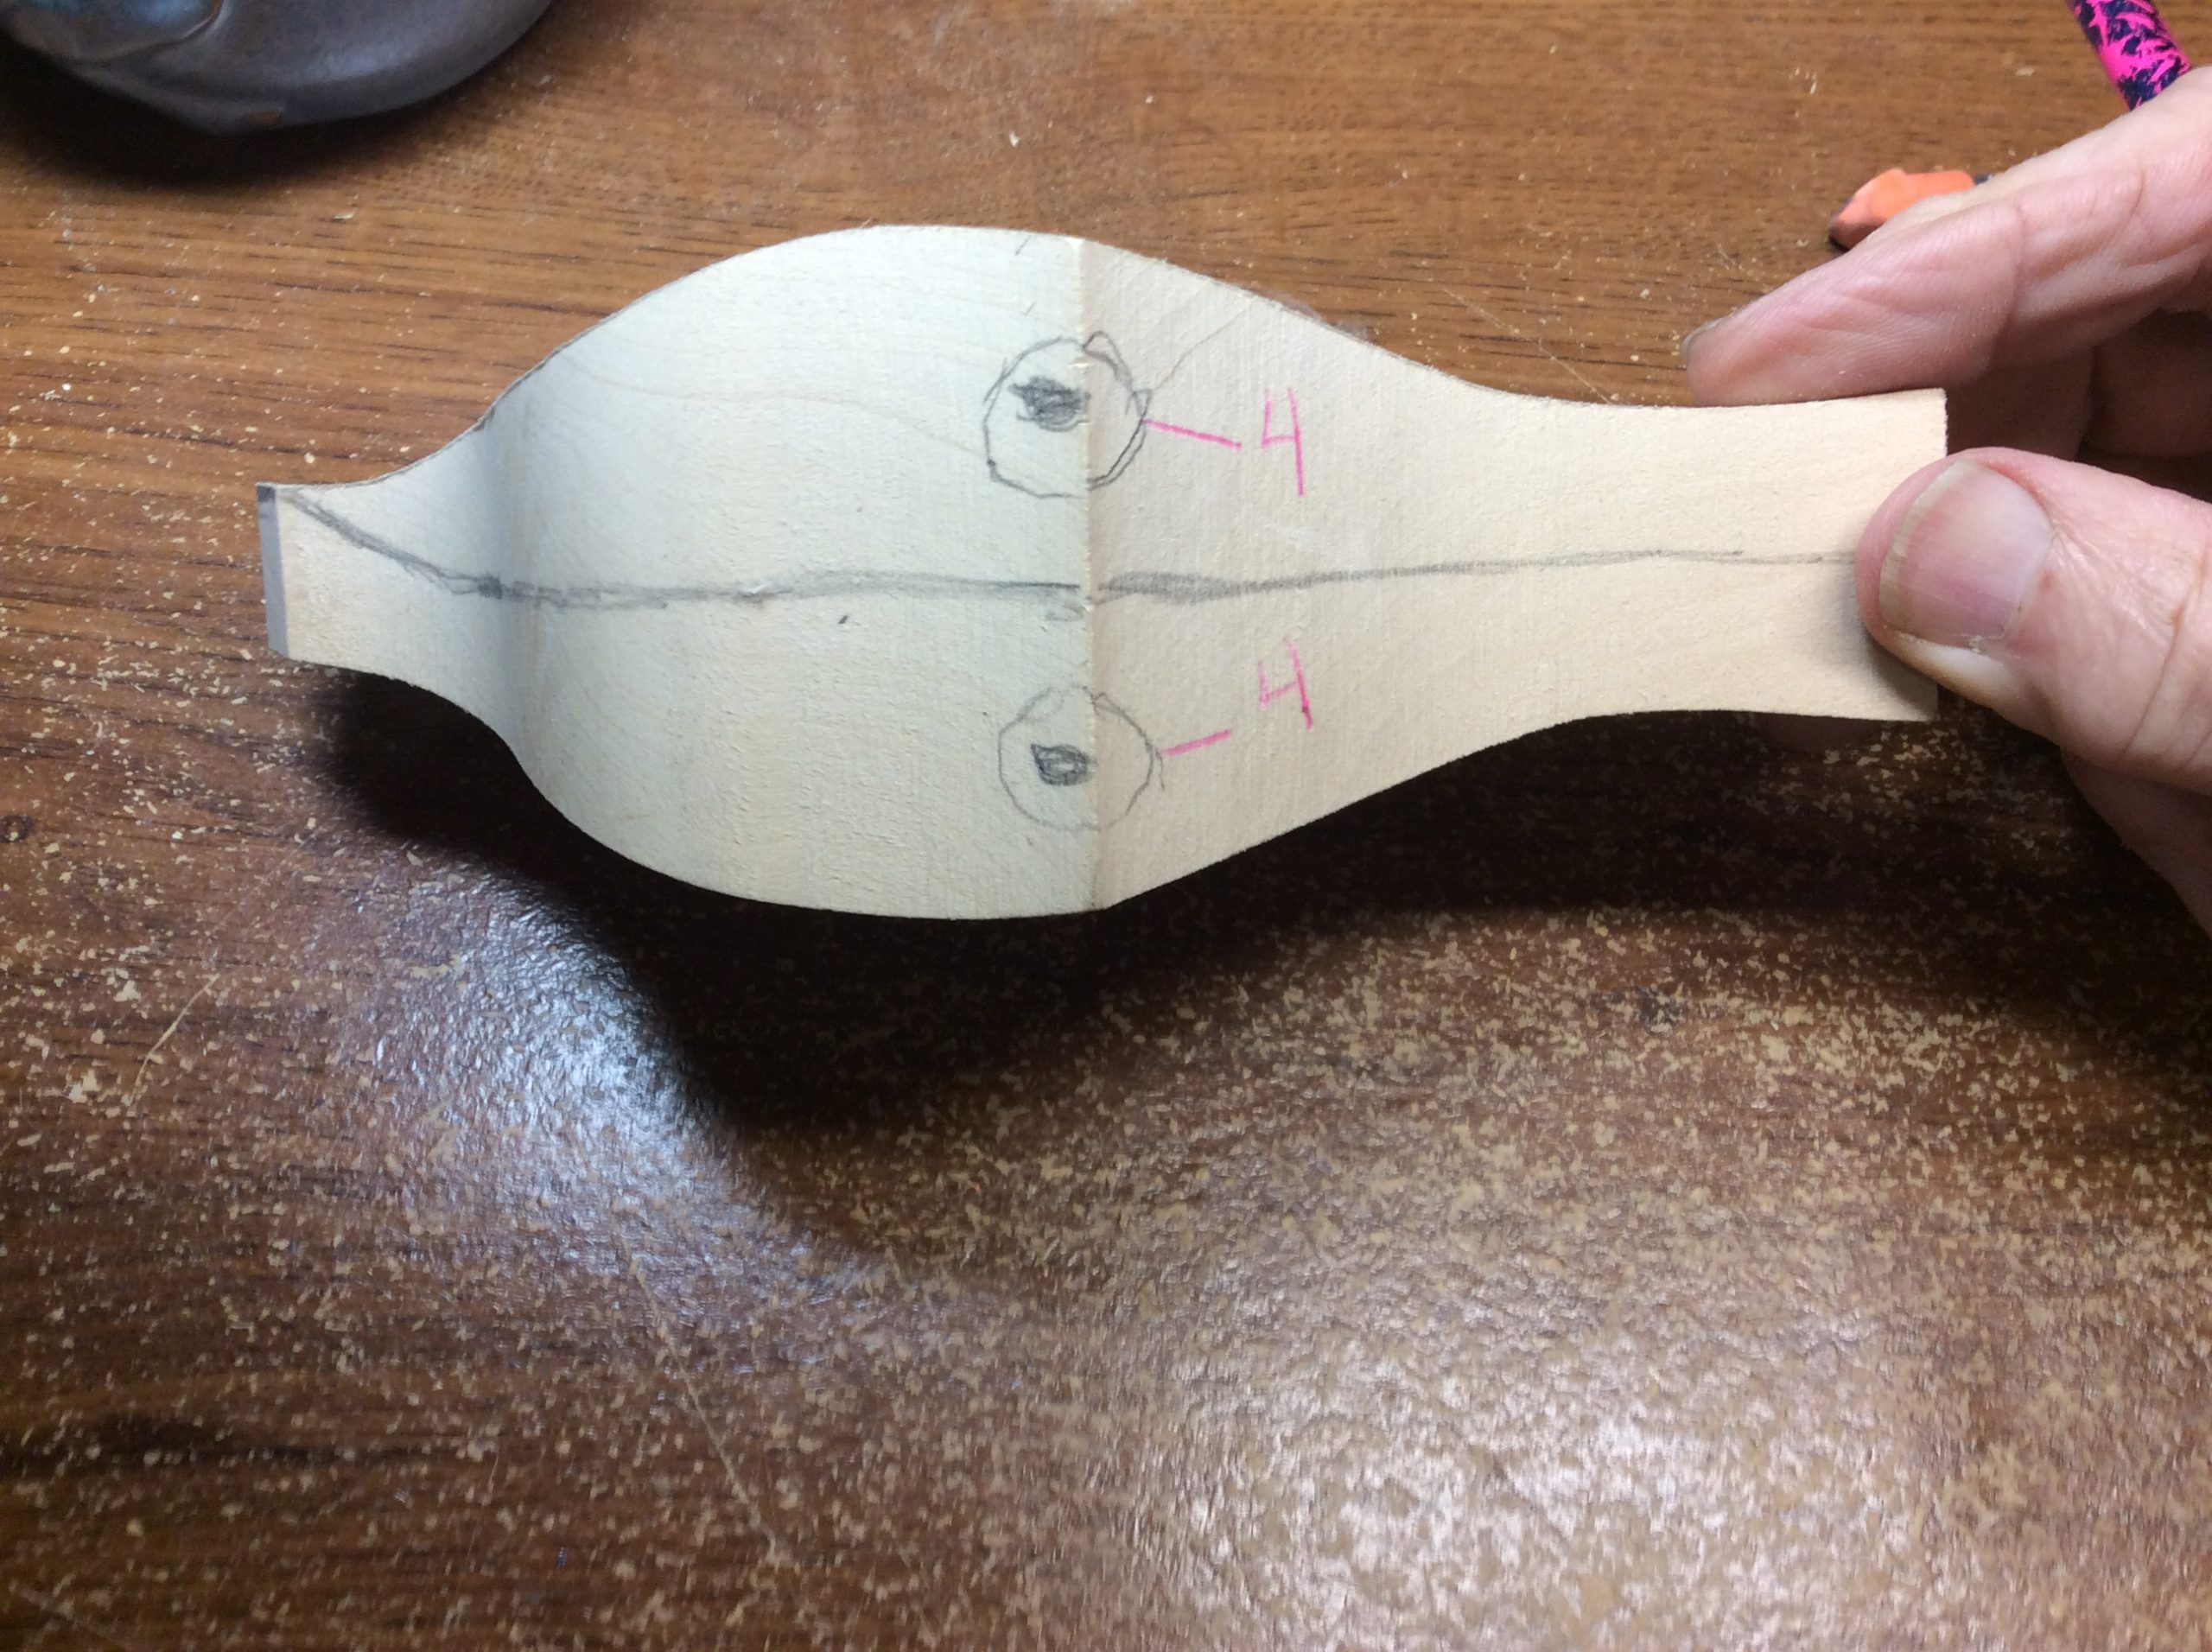
Step 4:
Mark on the leg location and leave this area alone at this time.
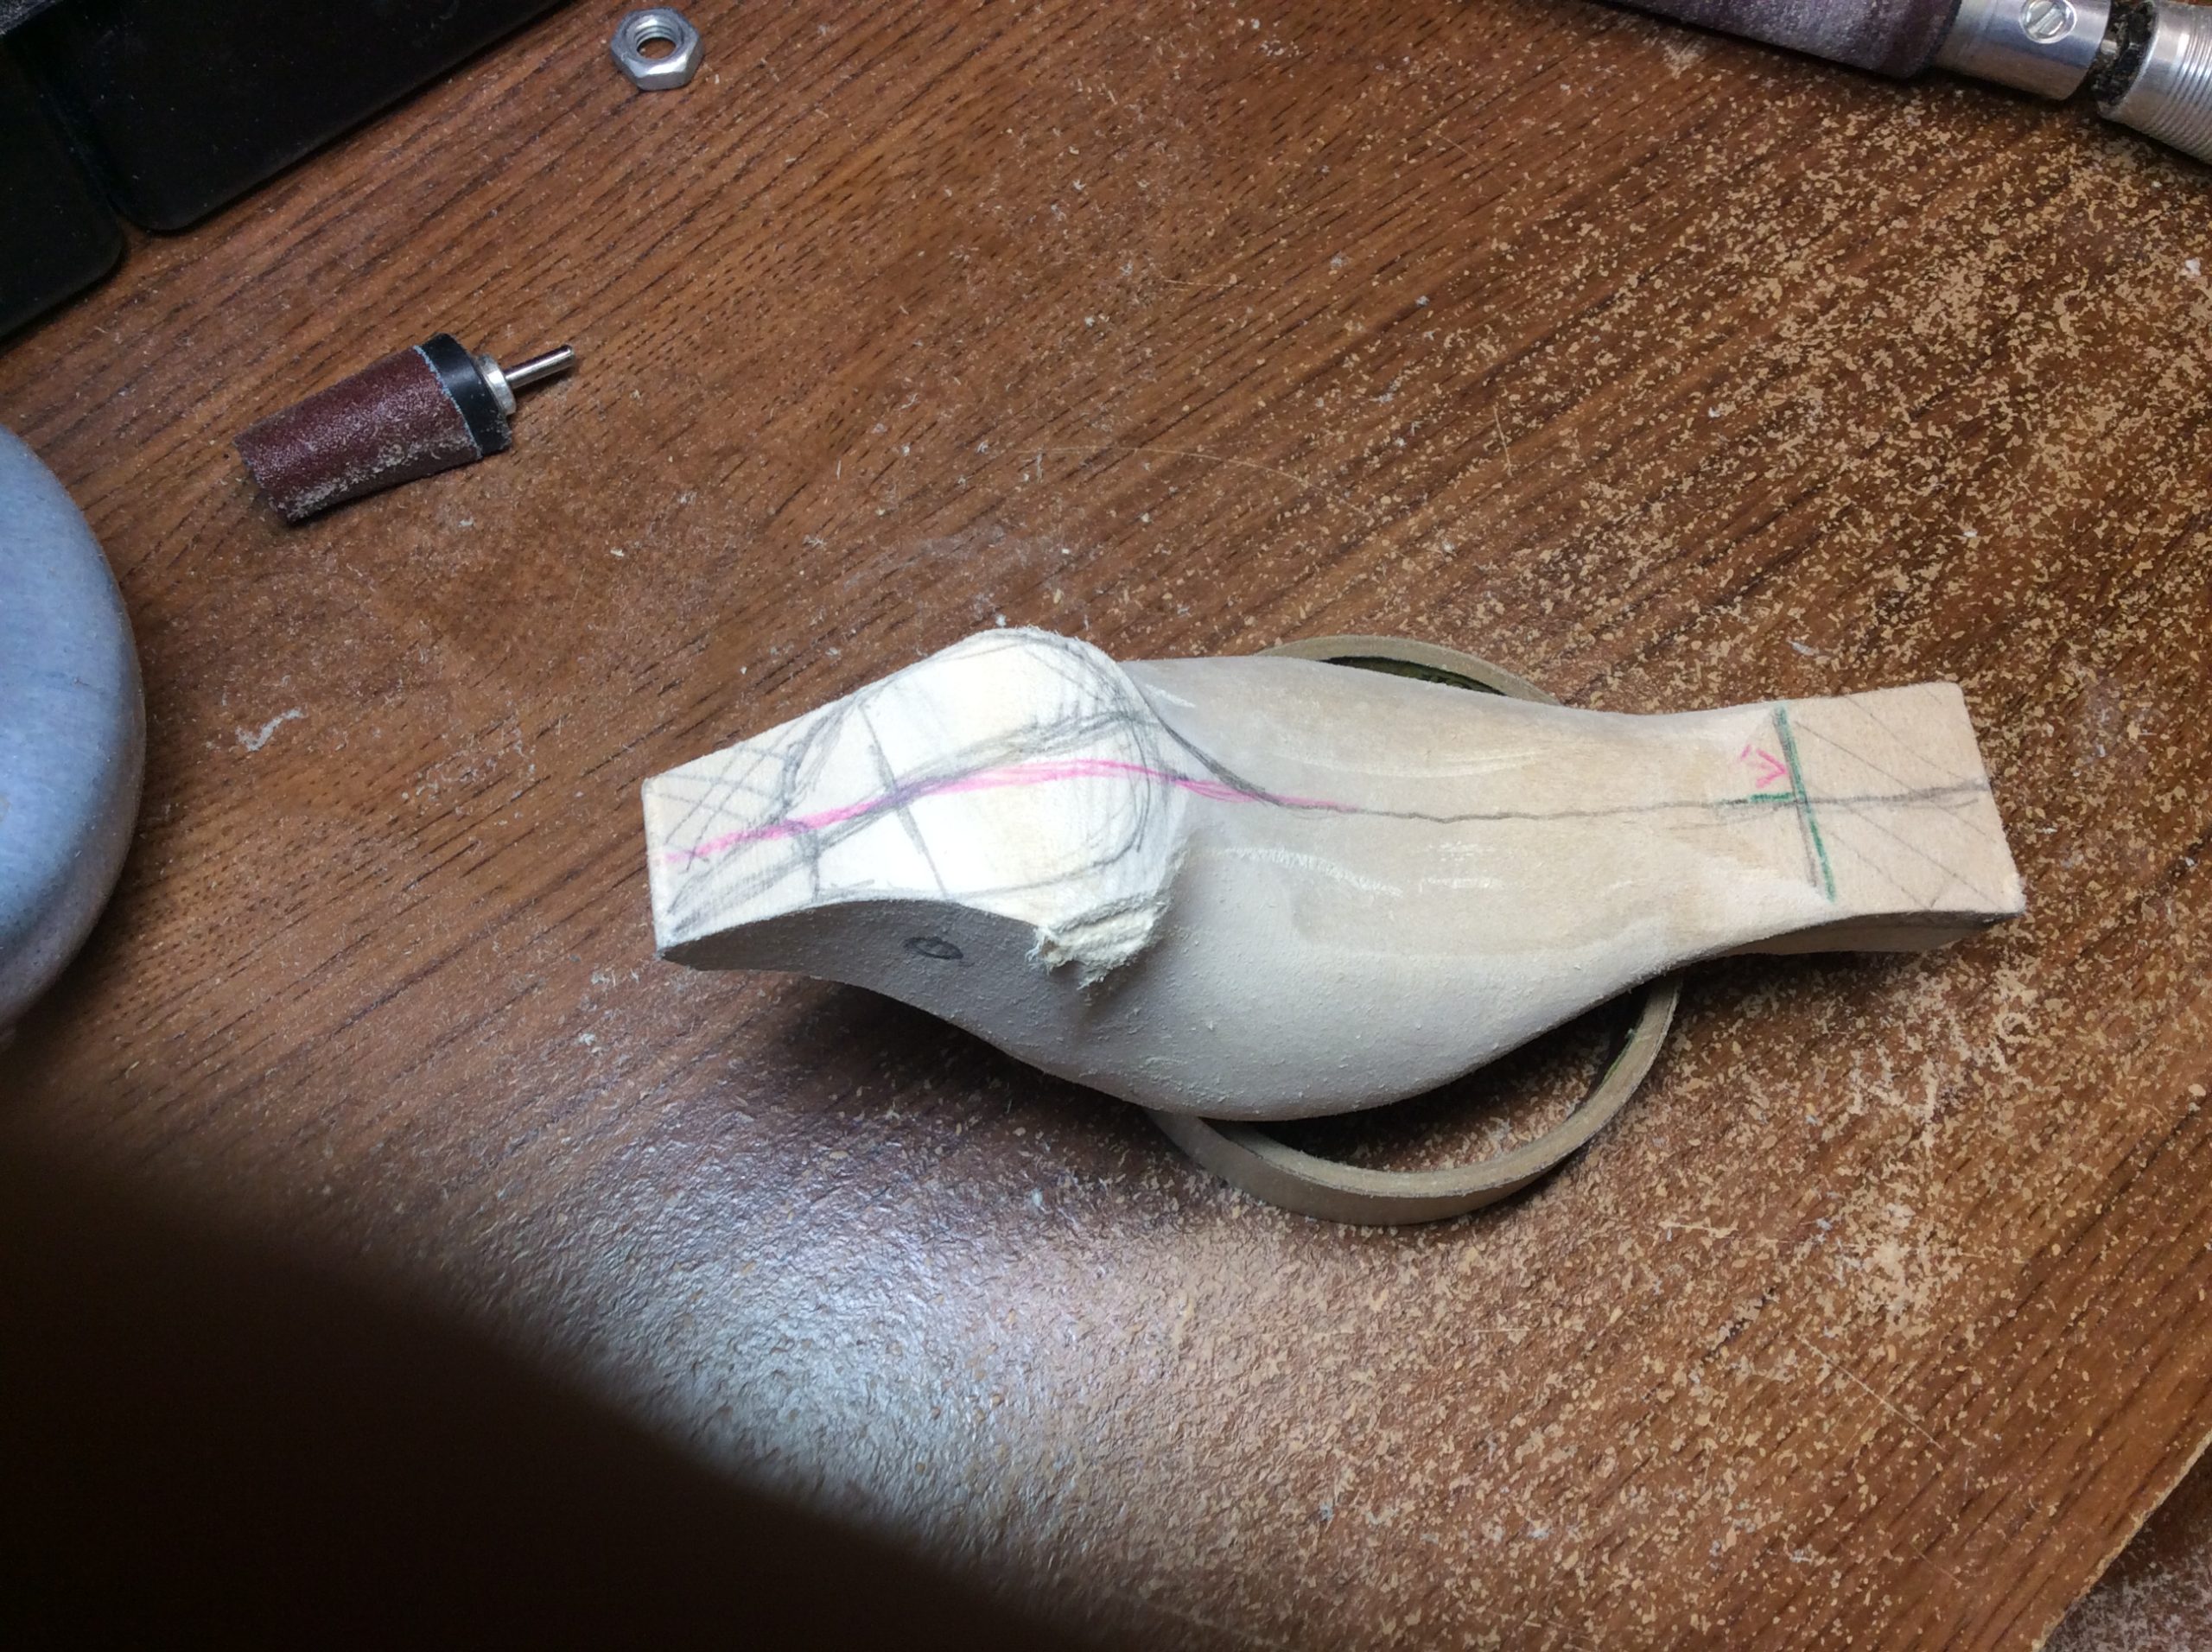
Step 5:
This blank allows you to turn the head a little. If you wish to try this, draw the centre line from the tip of the bill ( turned to right or left) to the back of the head and on the bottom of the bill to the throat. ( see picture) Join these head turned lines to the rest of the body by curving them to the centre line.

From the pattern, measure and draw lines across the top of the head at right angles, to mark on the top of the beak and the eye position. This can to done at this time for straight or turned heads.
Round the back from the centre line down to the wing edge on both sides. Check frequently to be sure that both sides are similar, and they curve. Leave the head and tail area for now.
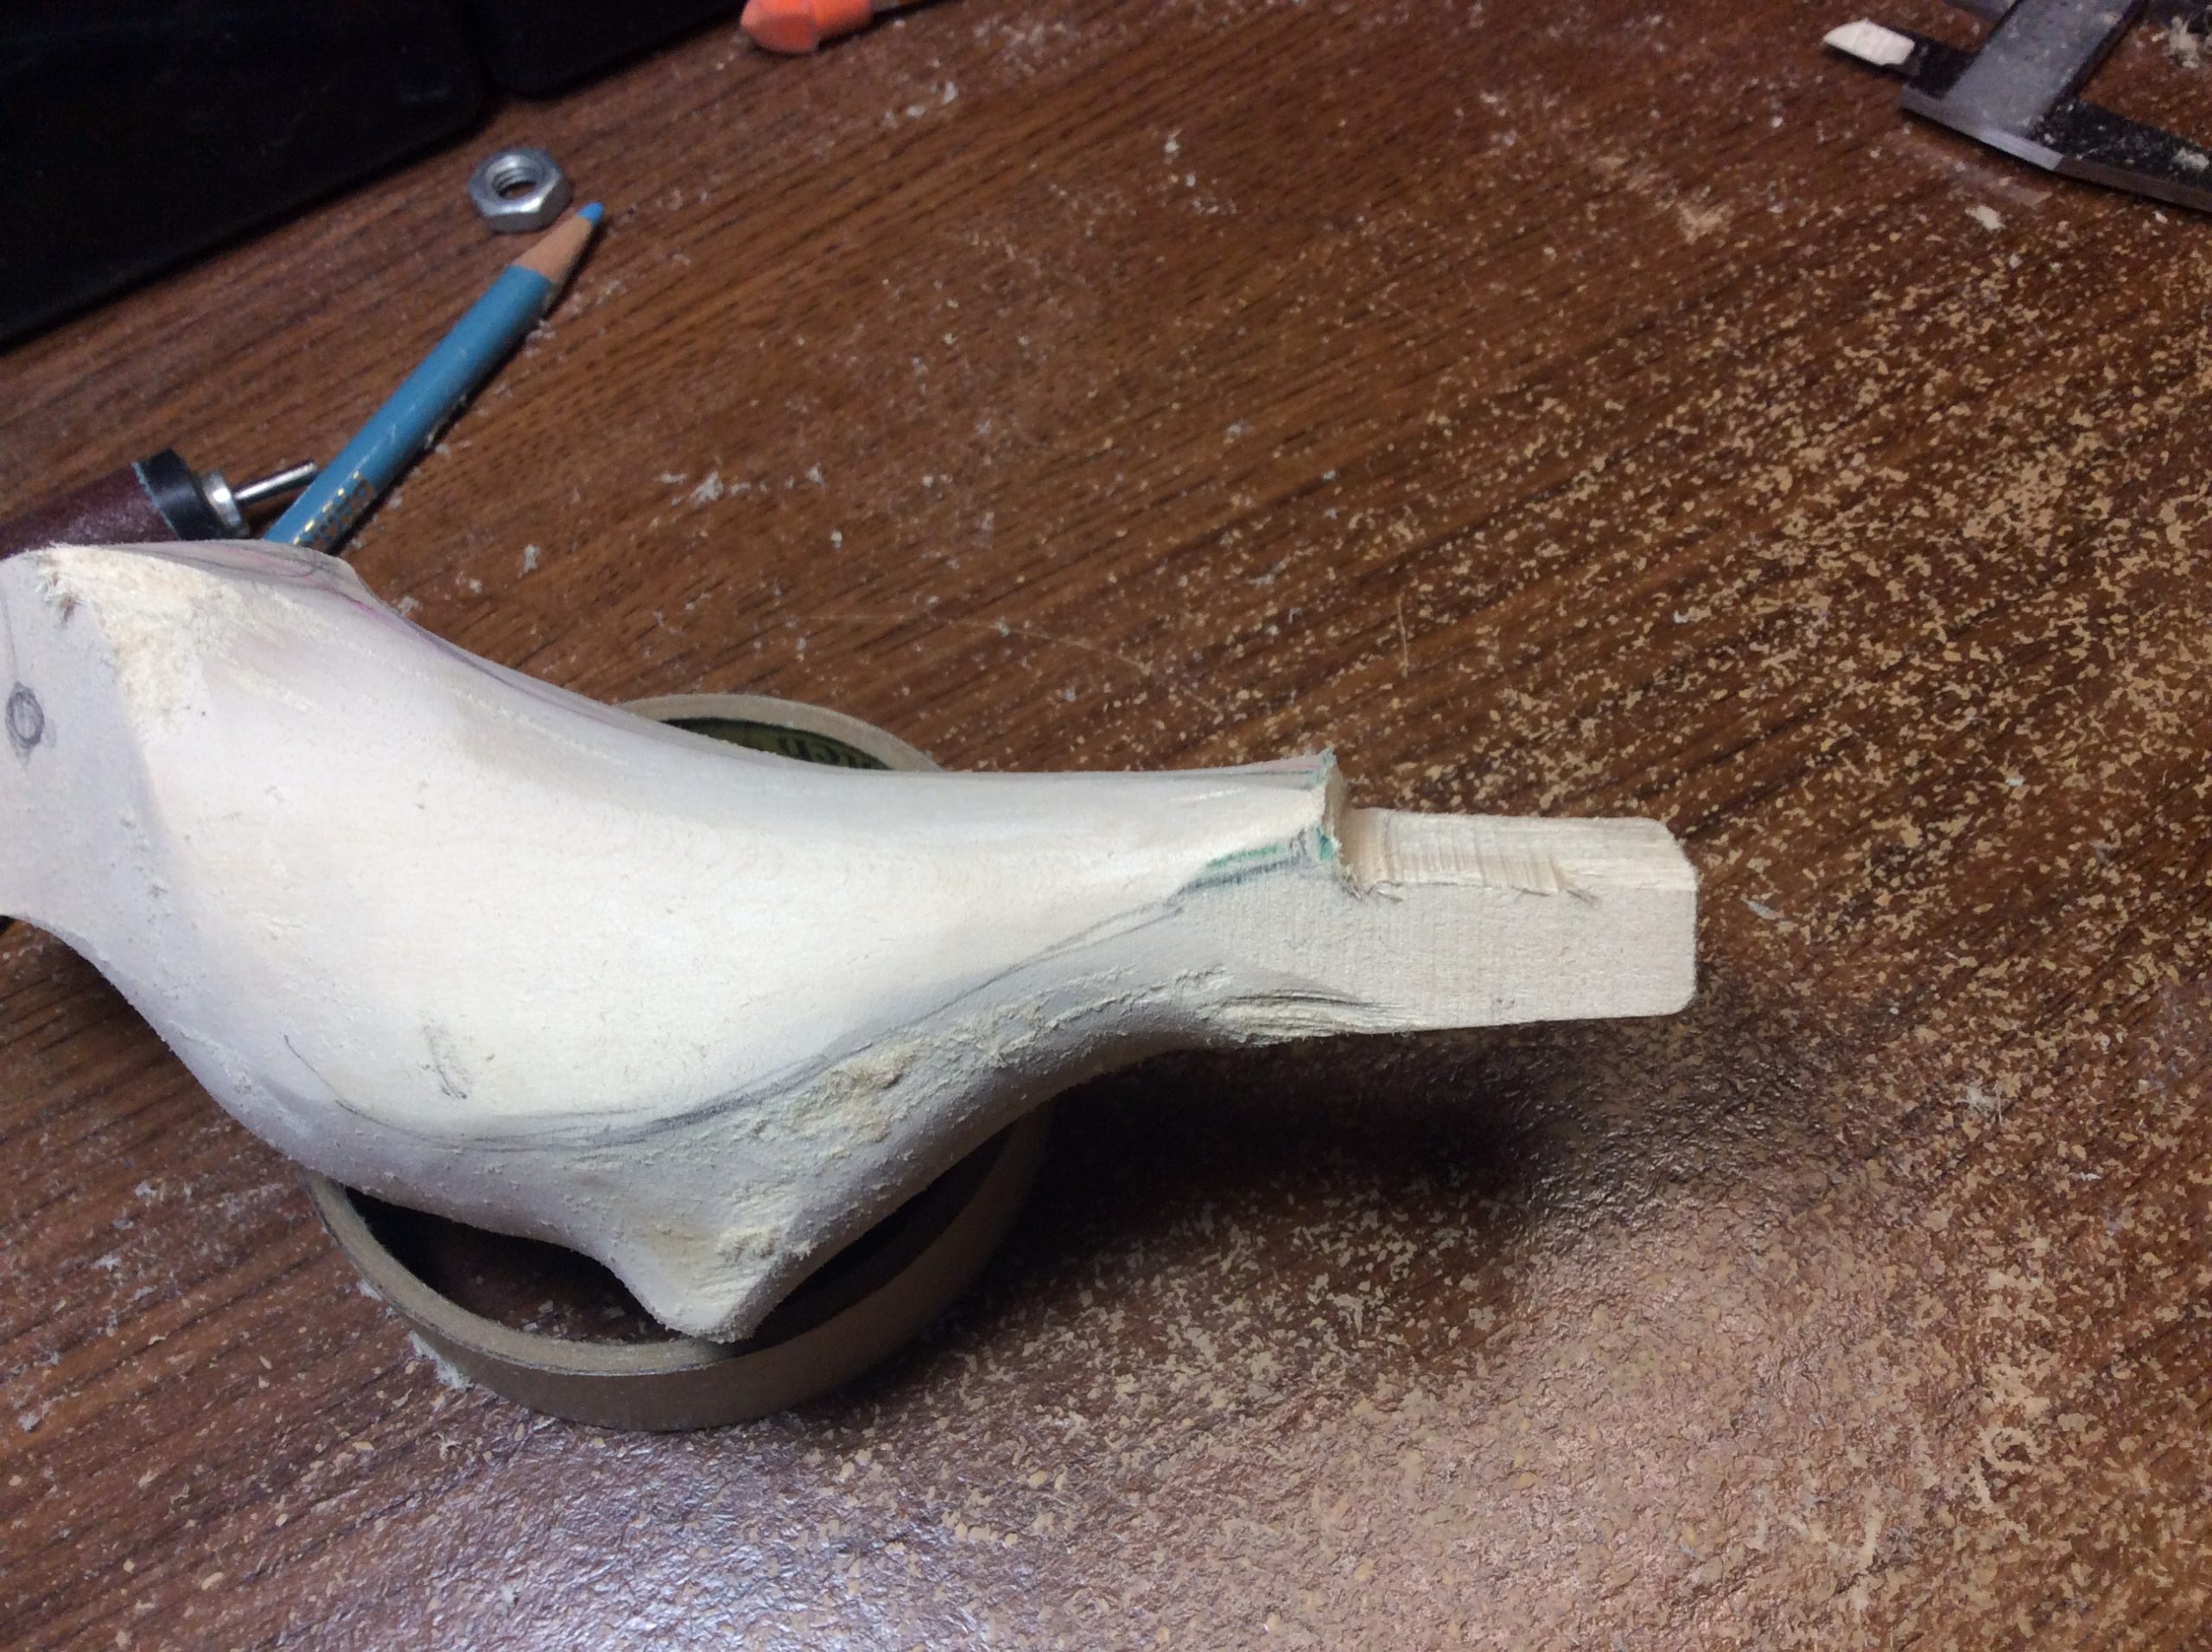
Step 6:
Round the chest and vent area from the centre line to the lower edge of the wing. Be sure to leave the leg position untouched.