
Use the following links below if you have not completed the previous steps:
- The Body (View Instructions)
- The Tail (View Instructions)
- The Beak (View Instructions)
- The Head (View Instructions)
- Feathering (View Instructions)
- Texturing the Tail (View Instructions)
- Texturing the Remainder of your Bird (View Instructions)
- Details (The Feet) (View Instructions)
These are a few basic notes that may help you to paint your carving. I have reduced the colours and steps to give you a good paint job but there are always extra details that will enhance your work. Some of these steps can be done with an air brush to give you a soft blended colour. We will be trying to achieve the same effect with blending and dry brush as most of us do not have an air brush.
General notes:
Wash Thin paint for a wash to about the consistency of milk. Draw a brush through the paint puddle, it should flow back in behind the brush.
Additional coats. Always allow a coat of paint to completely dry before trying to put another layer over it.
Blending. Apply a little paint to the edge of the area you wish to blend. Rinse out the brush or use another to add water to the wet paint and pull the thinned paint into the adjacent area. This will allow the colour to fade or blend into the rest of the area.
Removing some colour or paint. Paint can be removed from your work if it is still wet. Gently rubbing wet paint with a clean wet brush will remove colour and lighten the area if desired.
Dry brush. After dipping your brush in the thinned paint remove most of it on a paper towel. Lightly apply the paint to your work for an irregular coverage or just a little hint of colour. Re-apply to darken the intensity. Do not over work the area.
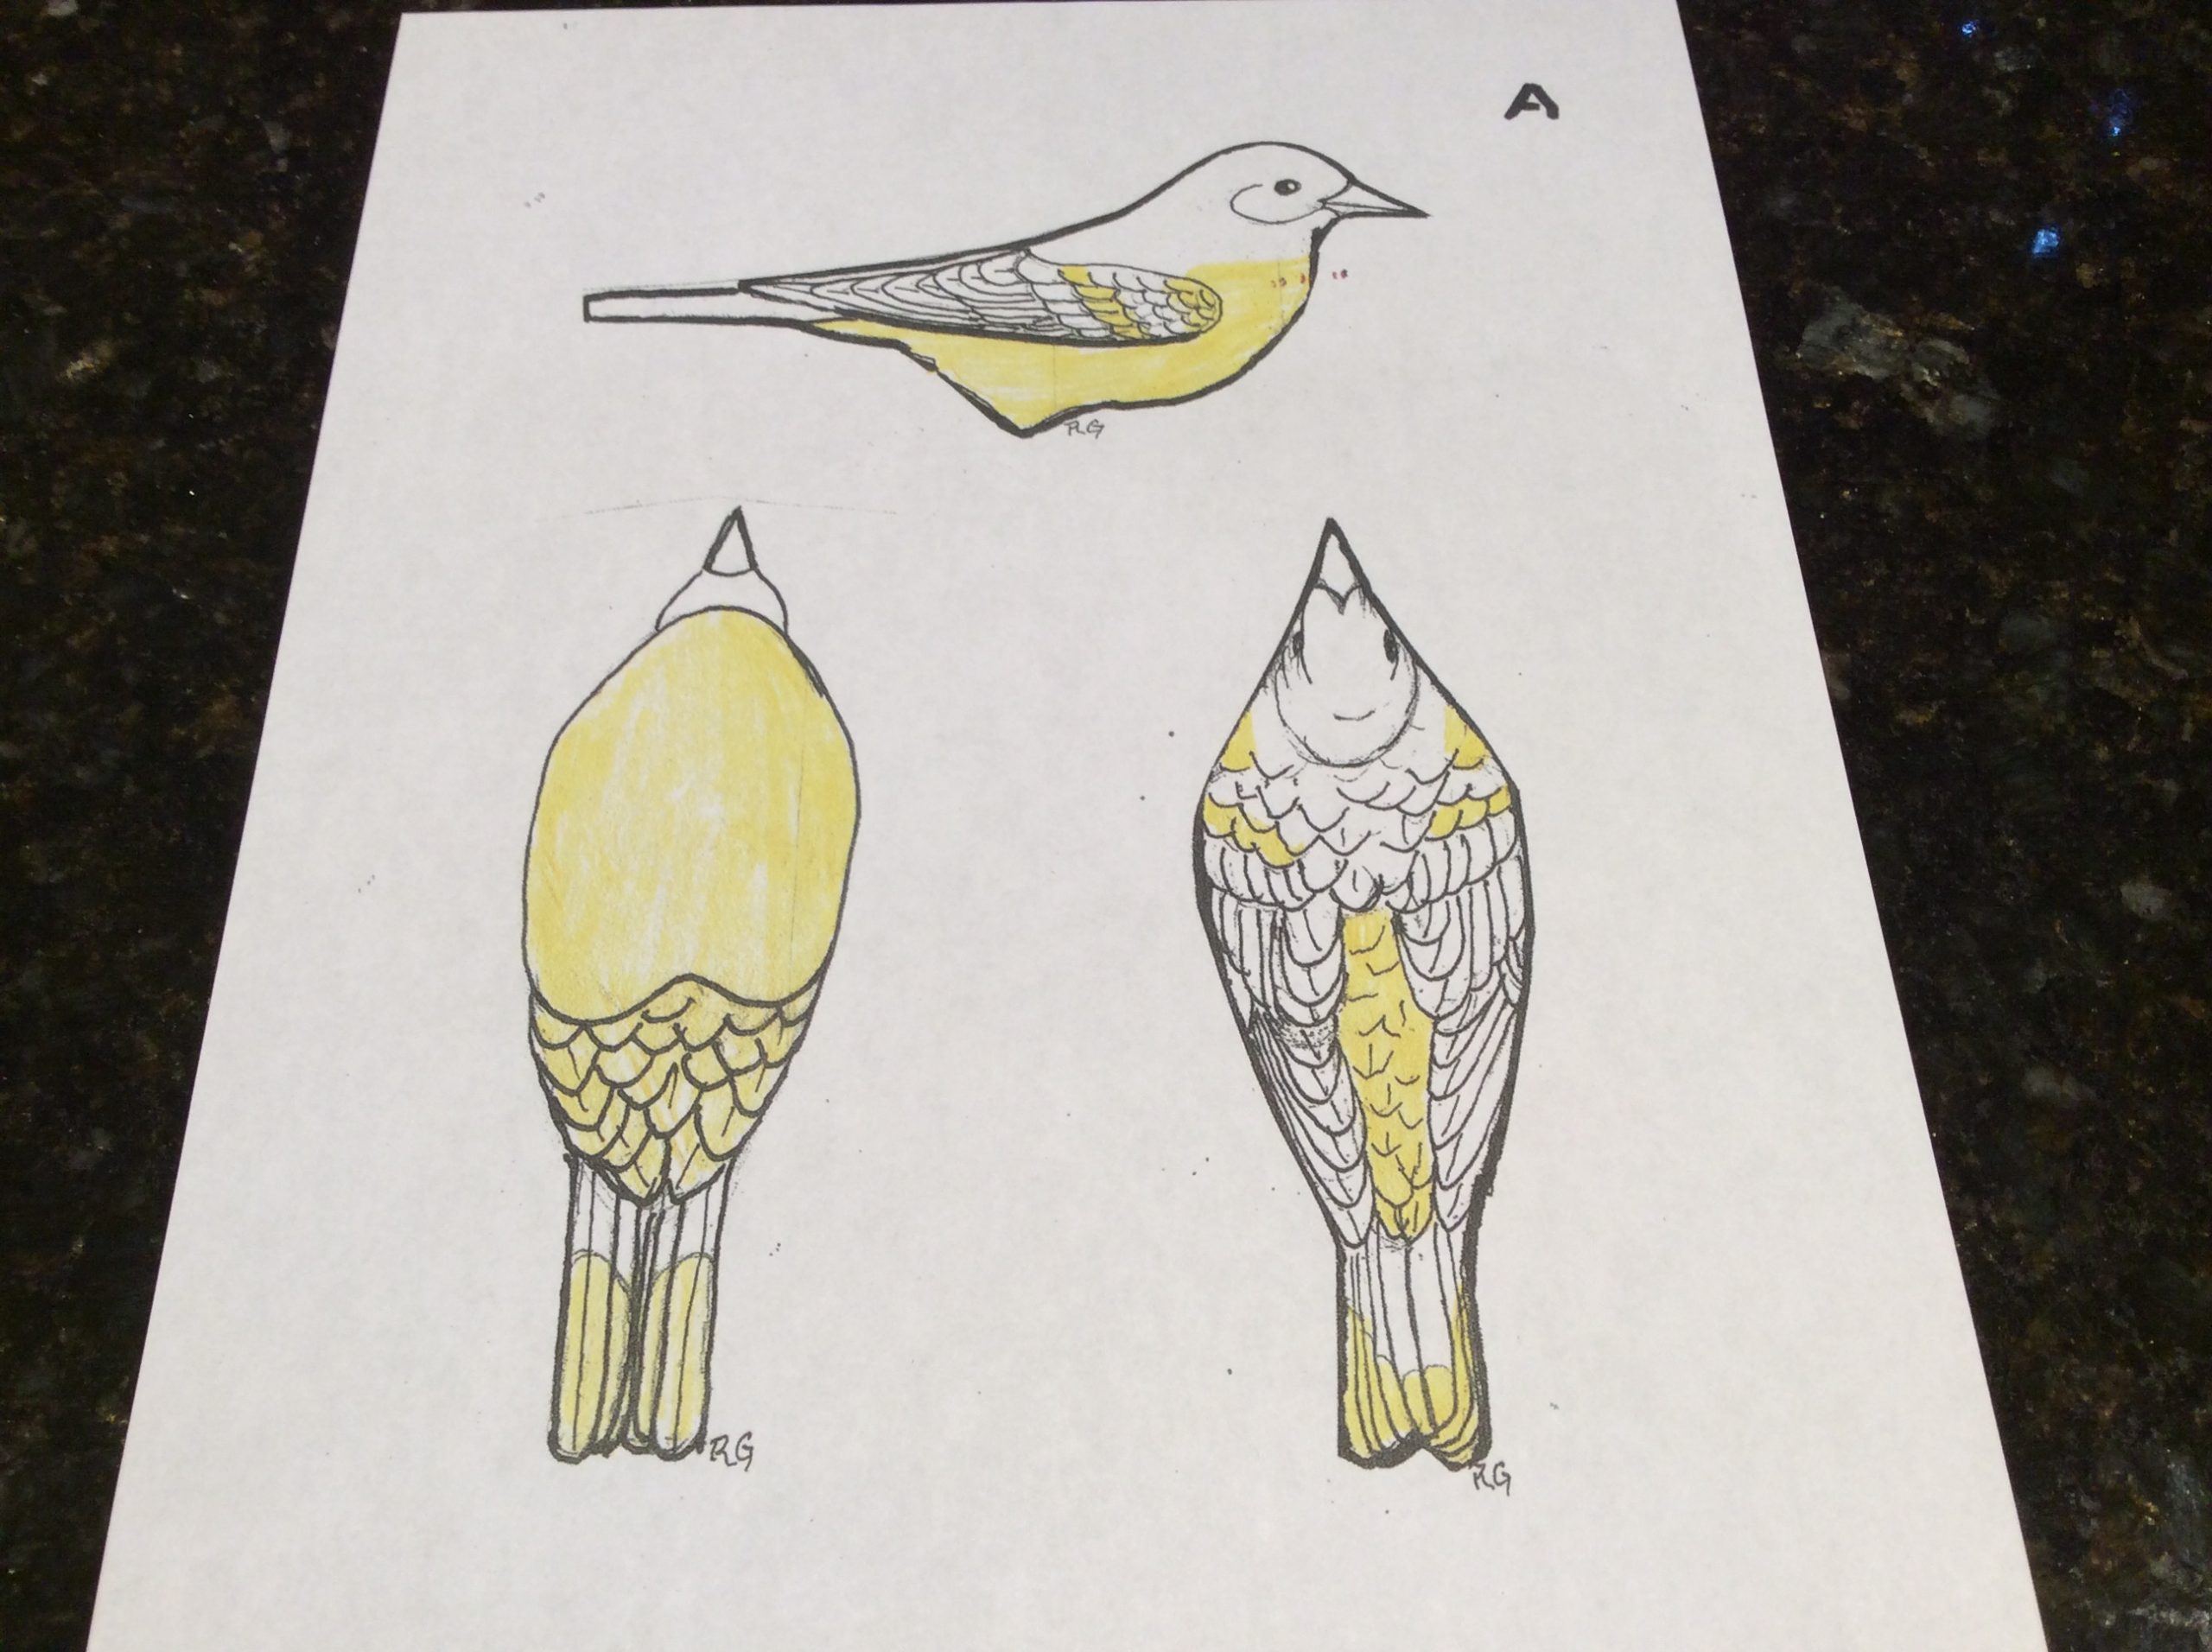
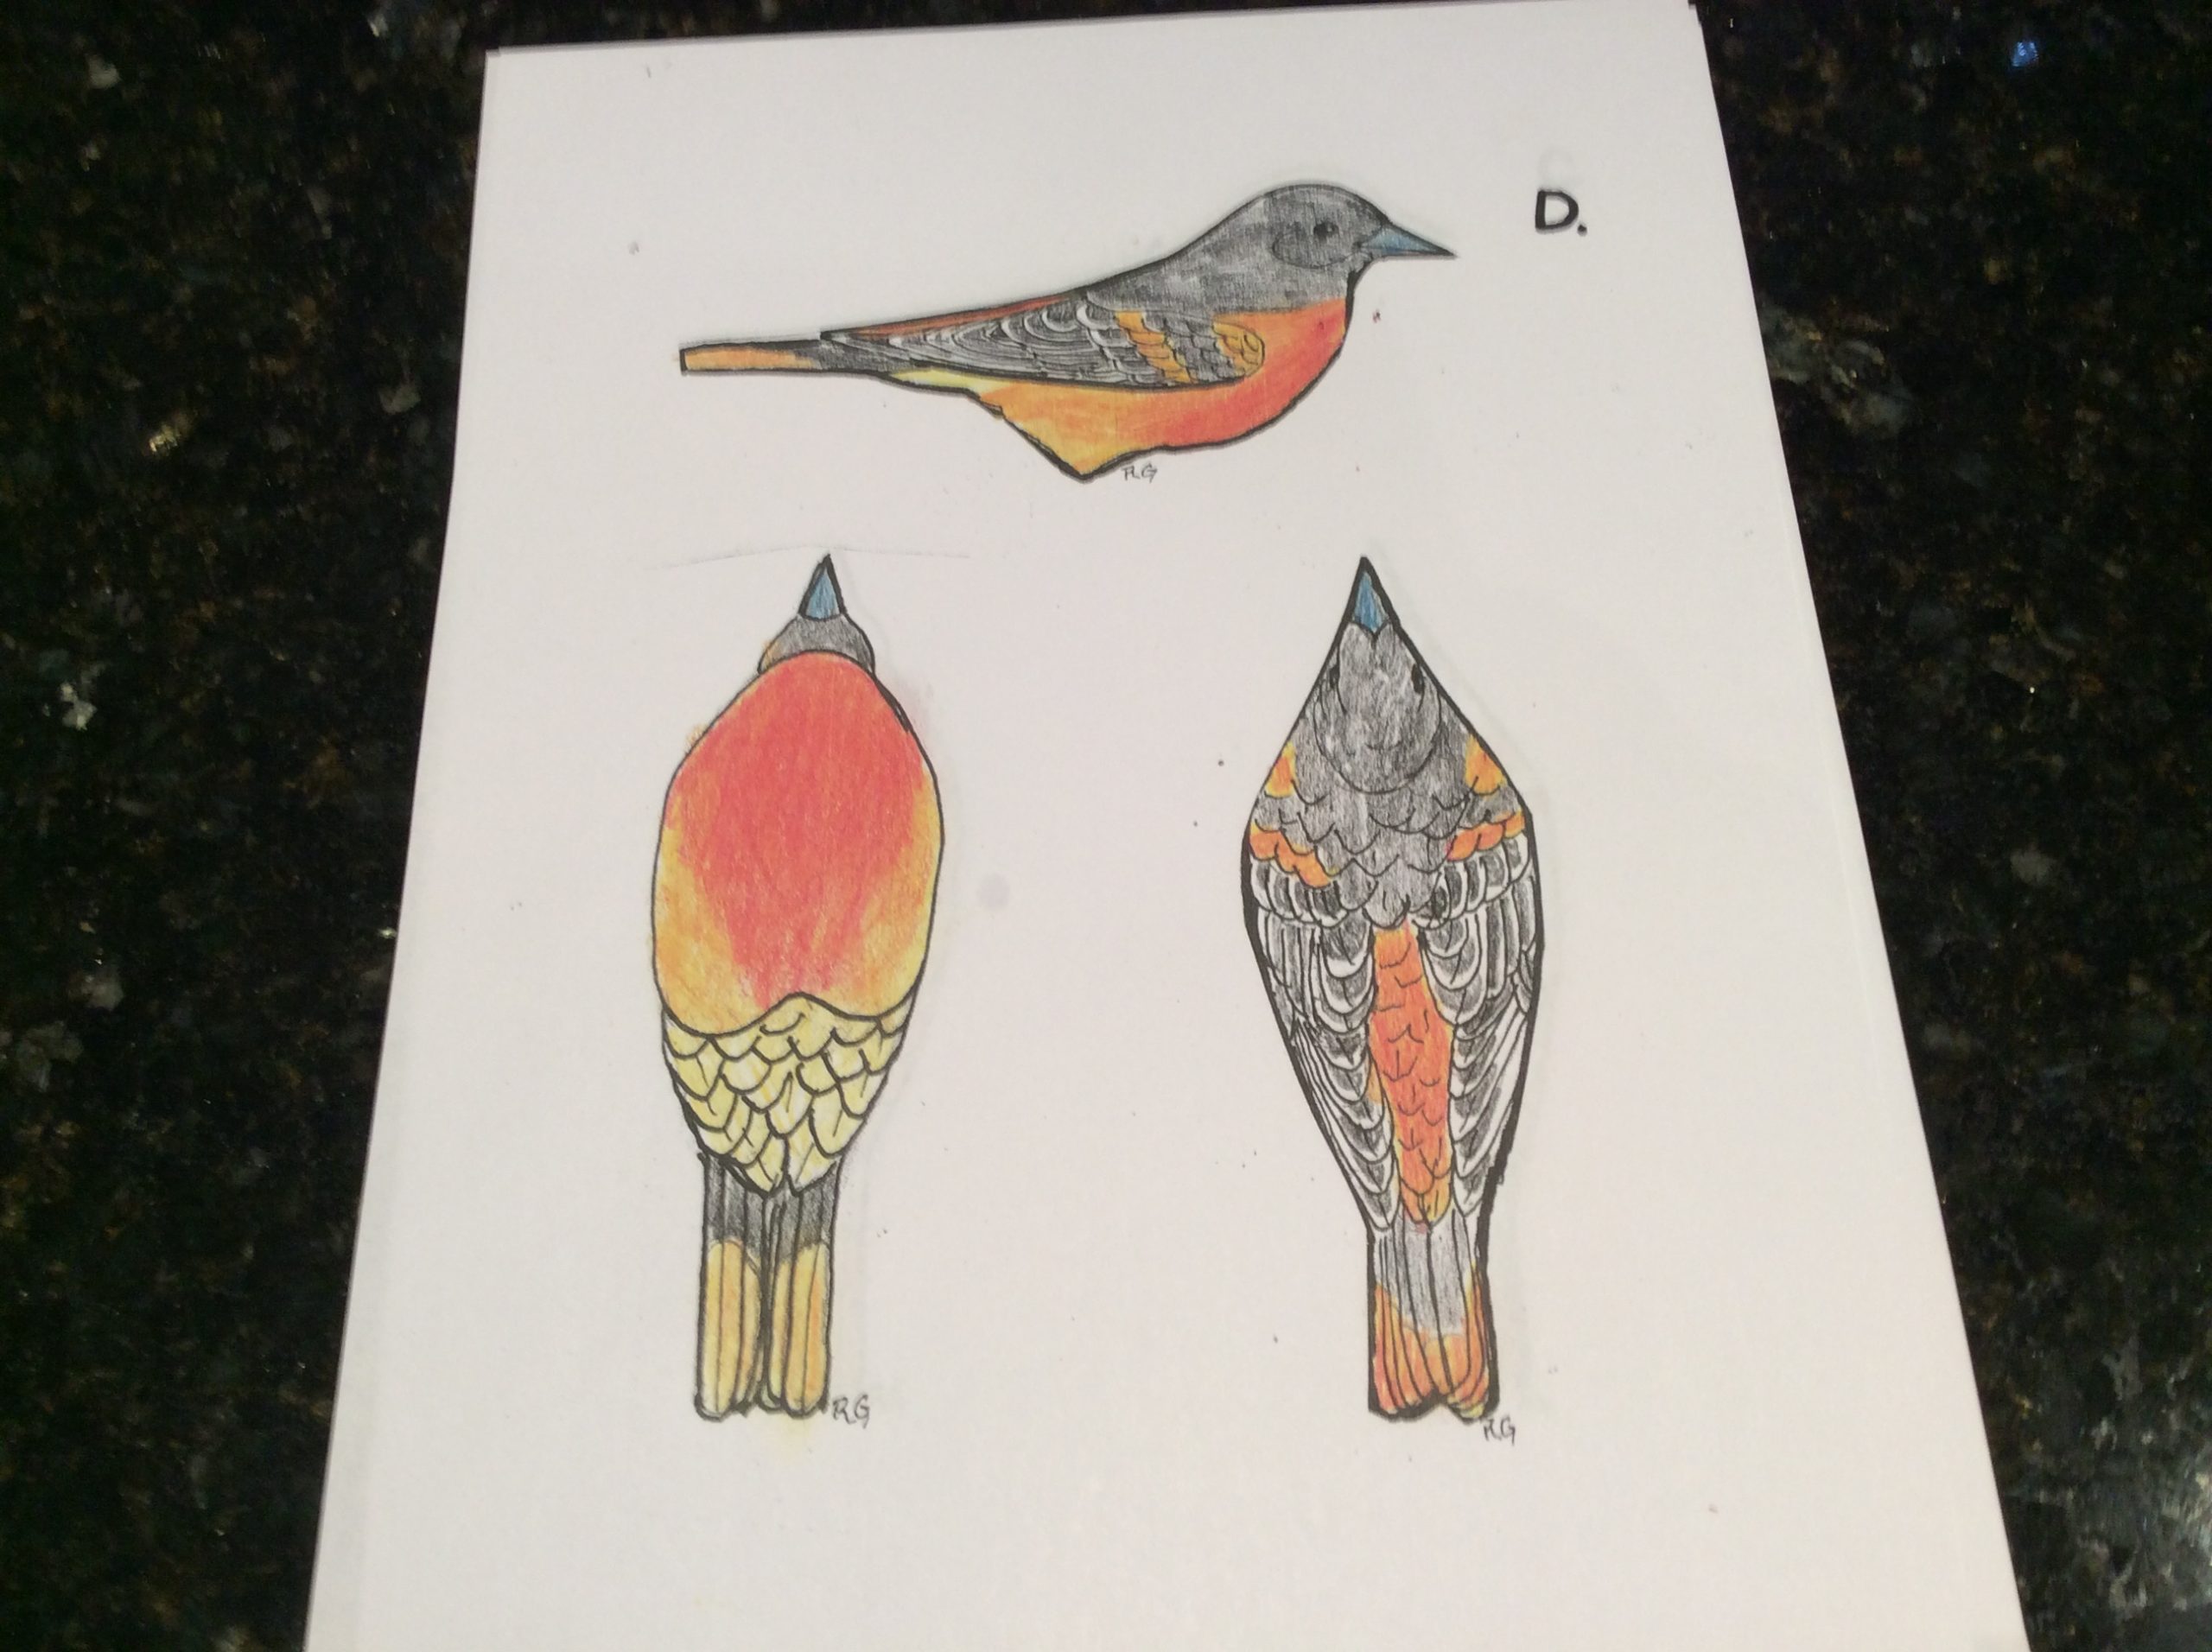
Always check your reference material to be sure of colour placement.
I have included some drawings but you should always check as many pictures as possible before you apply the paint to you work.
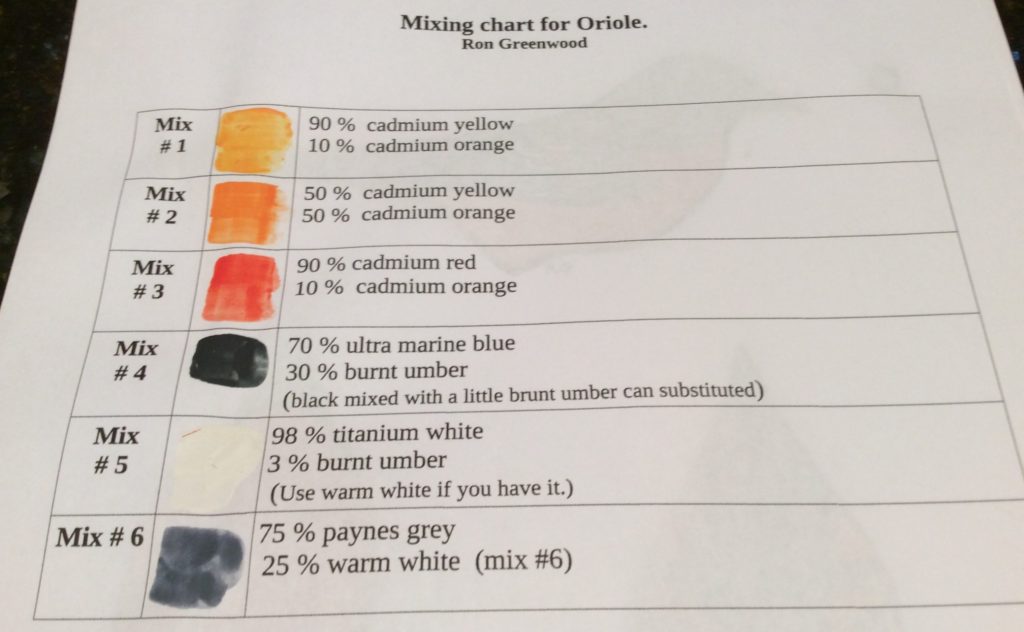
MIX #6 ON THE ABOVE CHART SHOULD READ:
75% Payne’s Grey
25% Warm White (mix #5)
Step 1:
Seal the whole bird with thinned Gesso (one or two coats) (see “wash” note above.) When completely dry, lightly, repeat lightly sand the burrs that have appeared with OOOO steel wool or very fine sand paper . ie. 220 grit. If necessary re-coat with Gesso.
Step 2:
Mark on the lines between the different colours on your bird very lightly using an orange pencil crayon or a water colour pencil.
Step 3:
Chest, under body, back, bars on wings and tail
Wash with several coats of #1 to get an even colour.
Step 4:
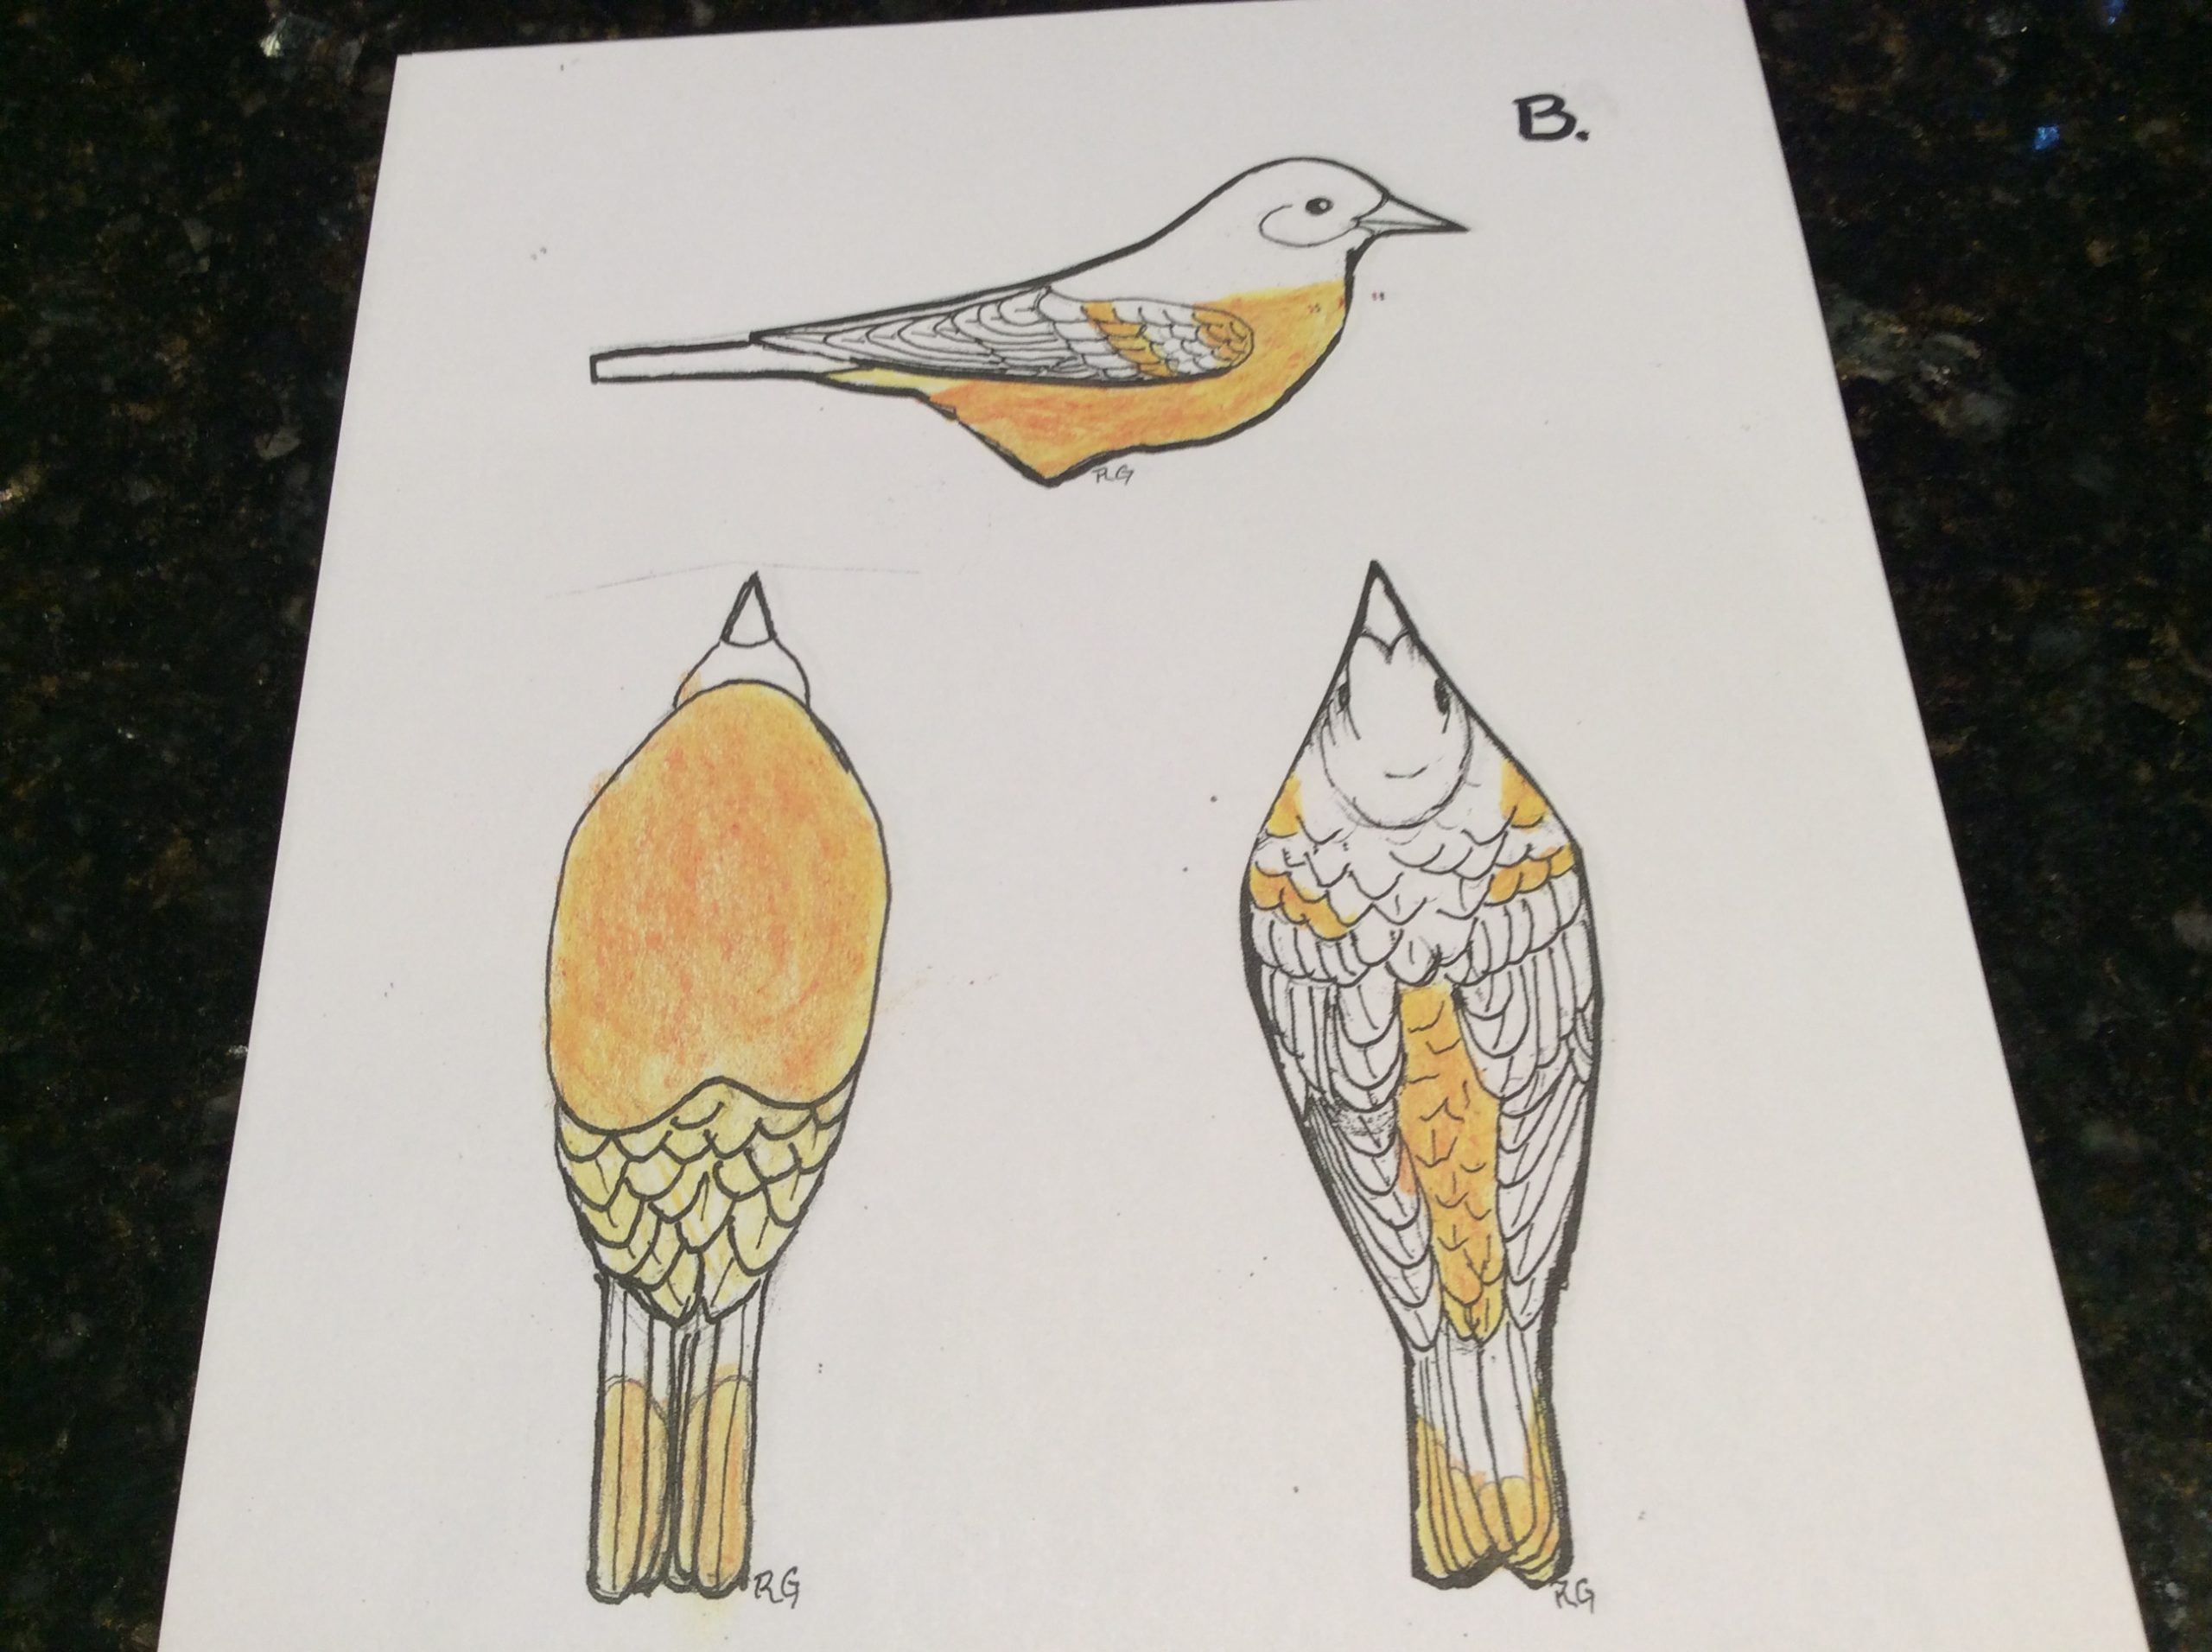
When these orange areas are completely dry, wash using #2 except the under tail coverlets and the rump.
Step 5:
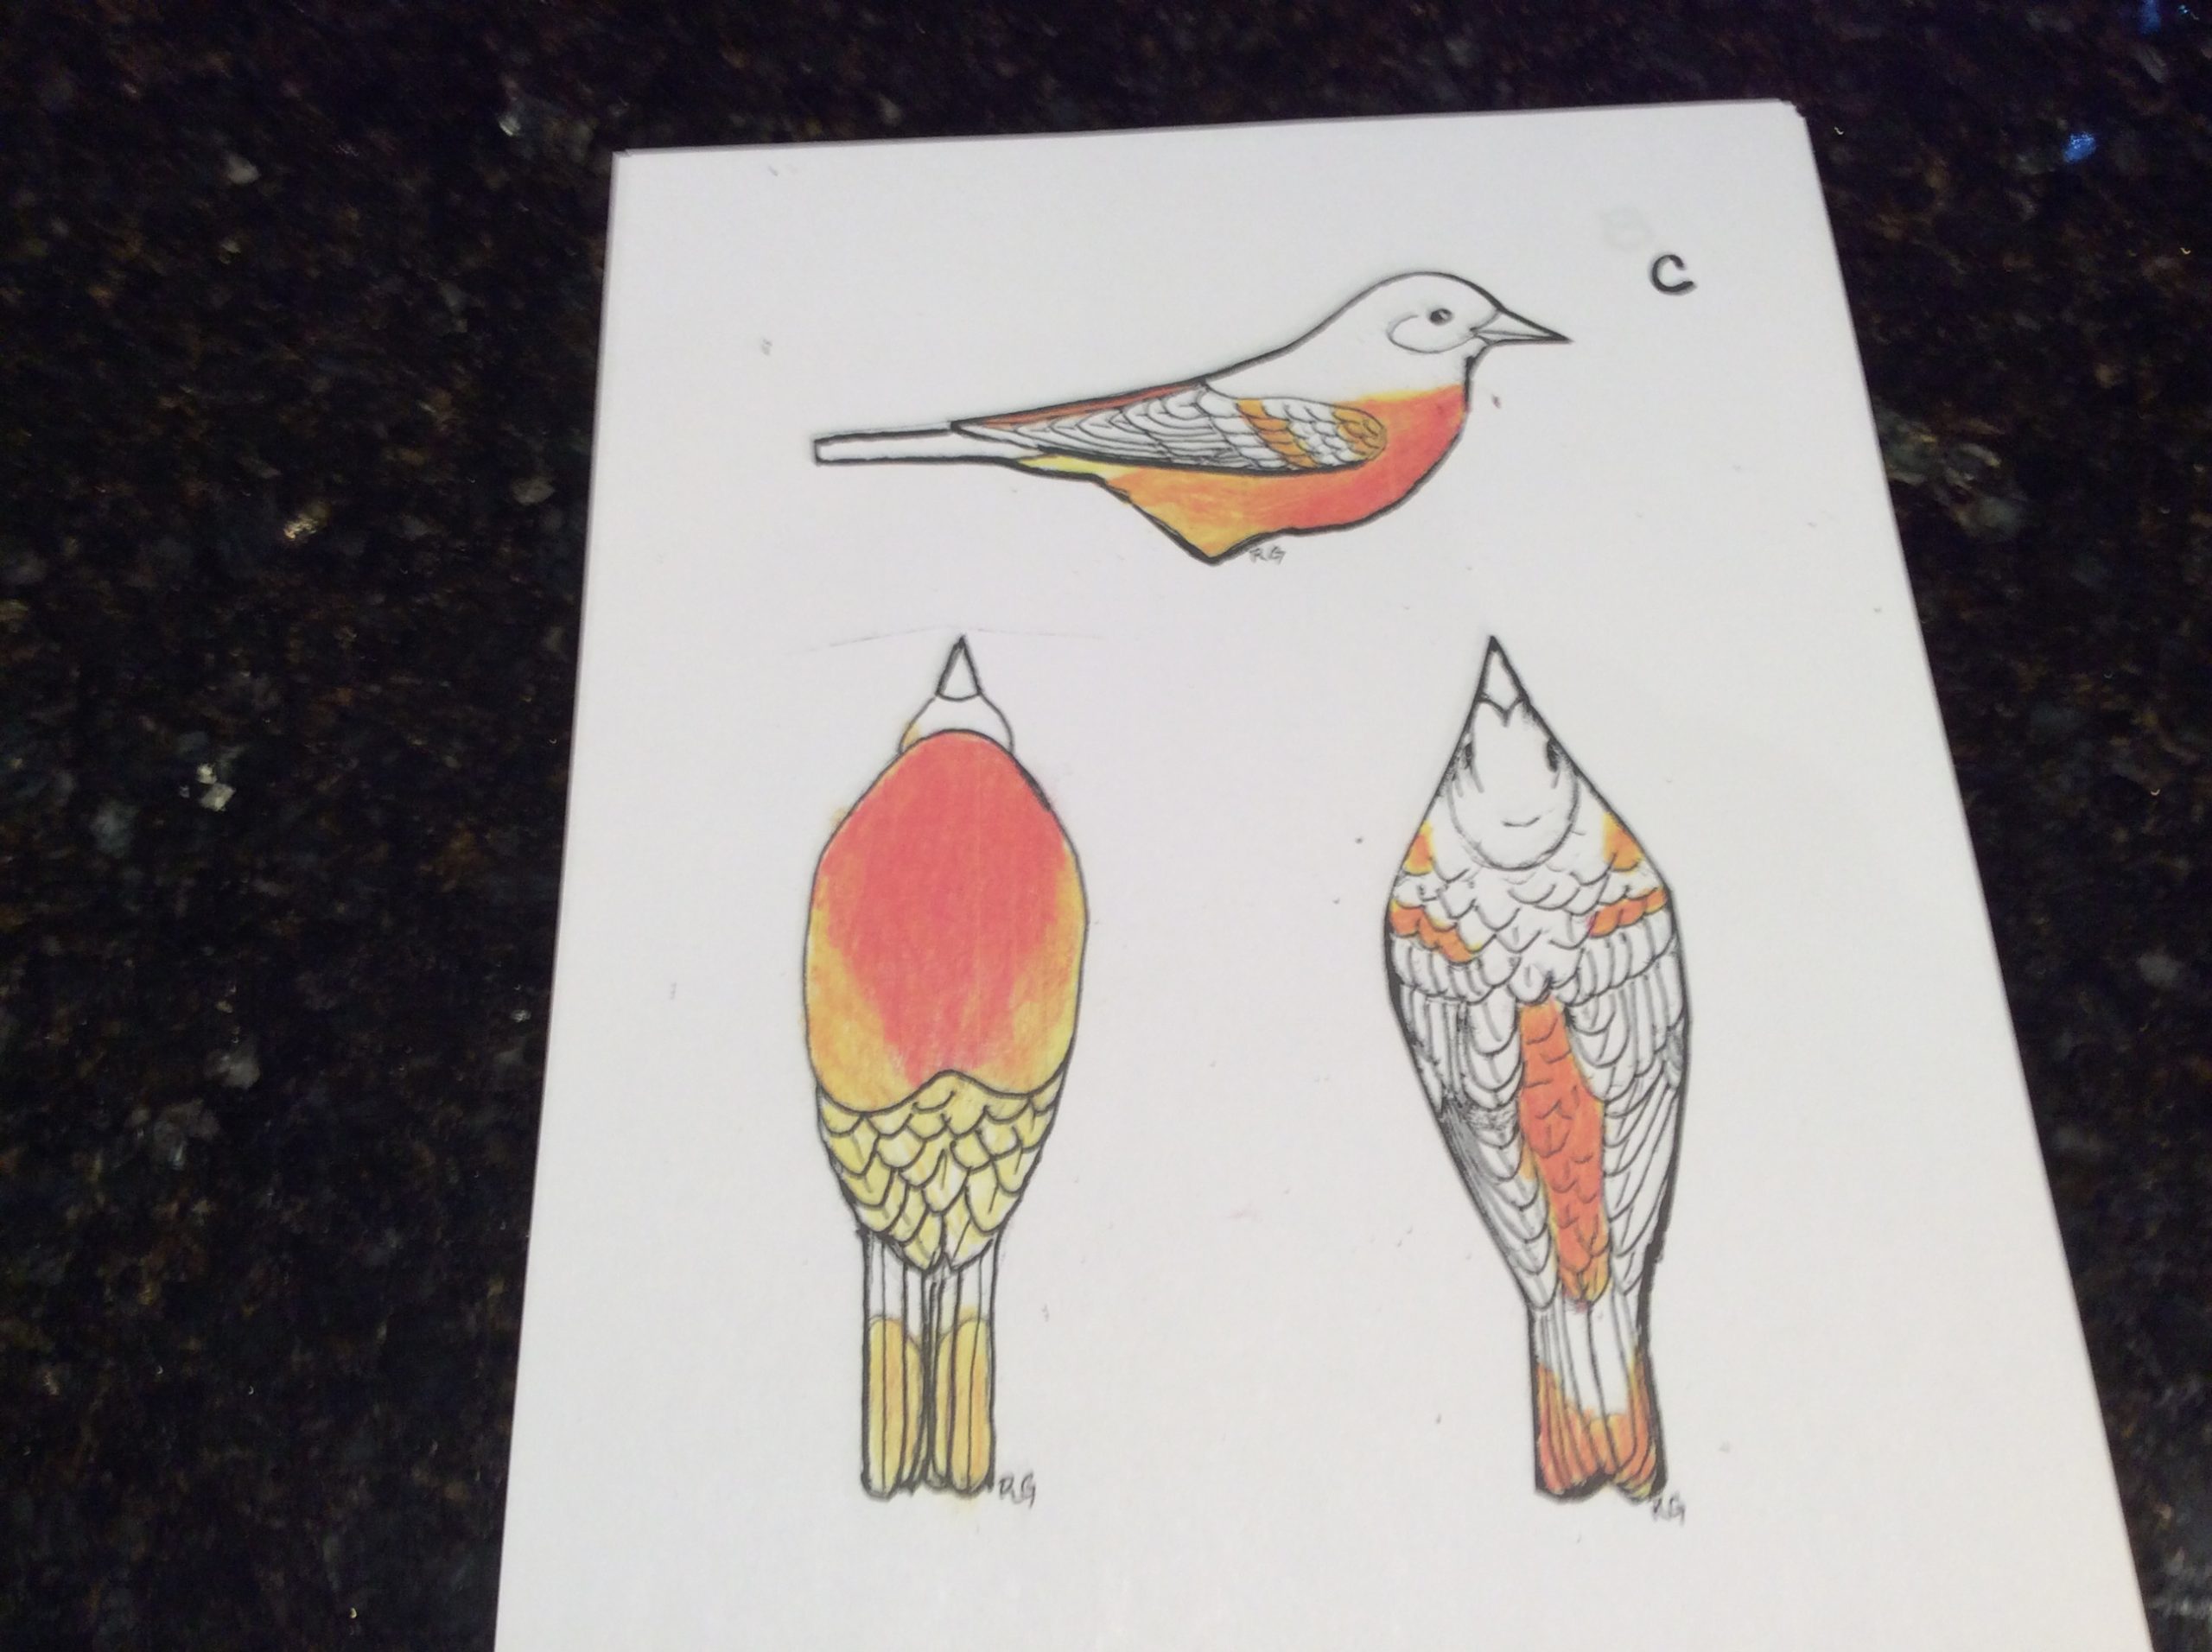
The upper and central chest area, back, wing and tail bars are then dry brushed with #3 blending it into the surrounding areas.
Step 6:
Head, cape, throat, tertials, primaries, secondaries and bands on the top and bottom of the tail.
Wash all of these with # 4 until you get the deep colour that you wish. Try to leave the white areas.

Step 7:
Tertials, secondaries, primaries and secondary coverlets.
Edge all of these feathers with 2 or 3 coats of #5.
Step 8:
If you wish, yellow highlights can be added to a few feathers to brighten the look.
Step 9:
Beak and feet. Paint with #6
Step 10:
Paint the nails black and then glaze the beak and the nails with a clear gloss.
You may need to touch up the toes after you have glued them to your base so save a bit of colour # 6