
Use the following links below if you have not completed the previous steps:
- The Body (View Instructions)
- The Tail (View Instructions)
- The Beak (View Instructions)
- The Head (View Instructions)
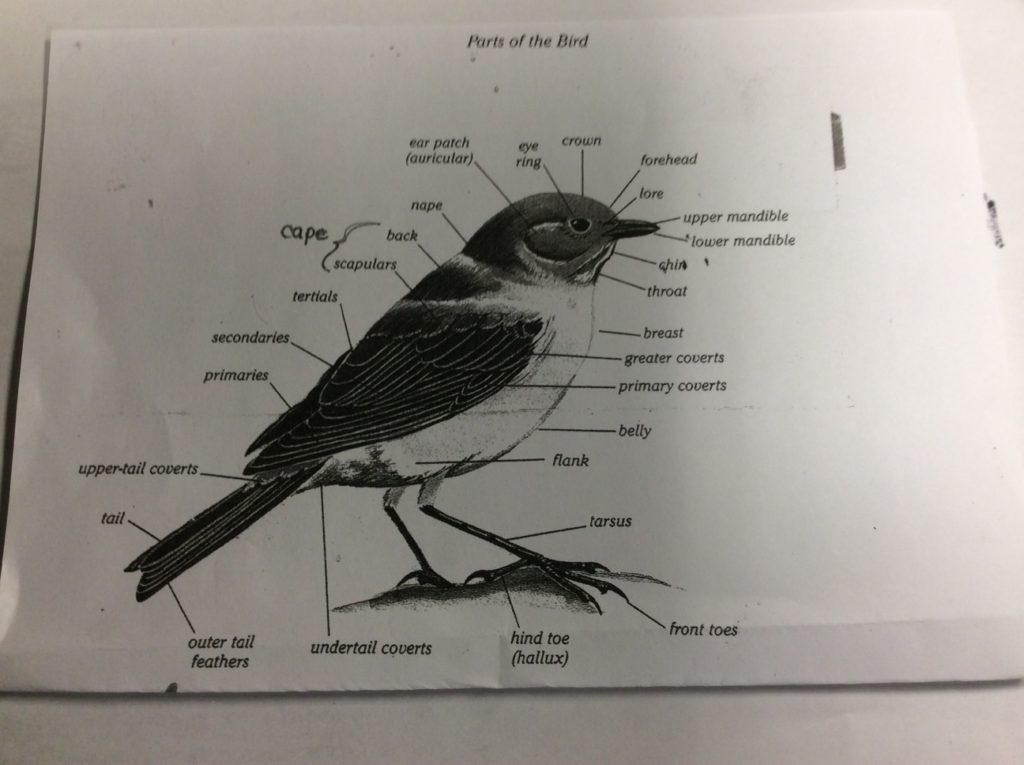
Someone asked for a picture of the parts of a bird. It might make our instructions clearer.
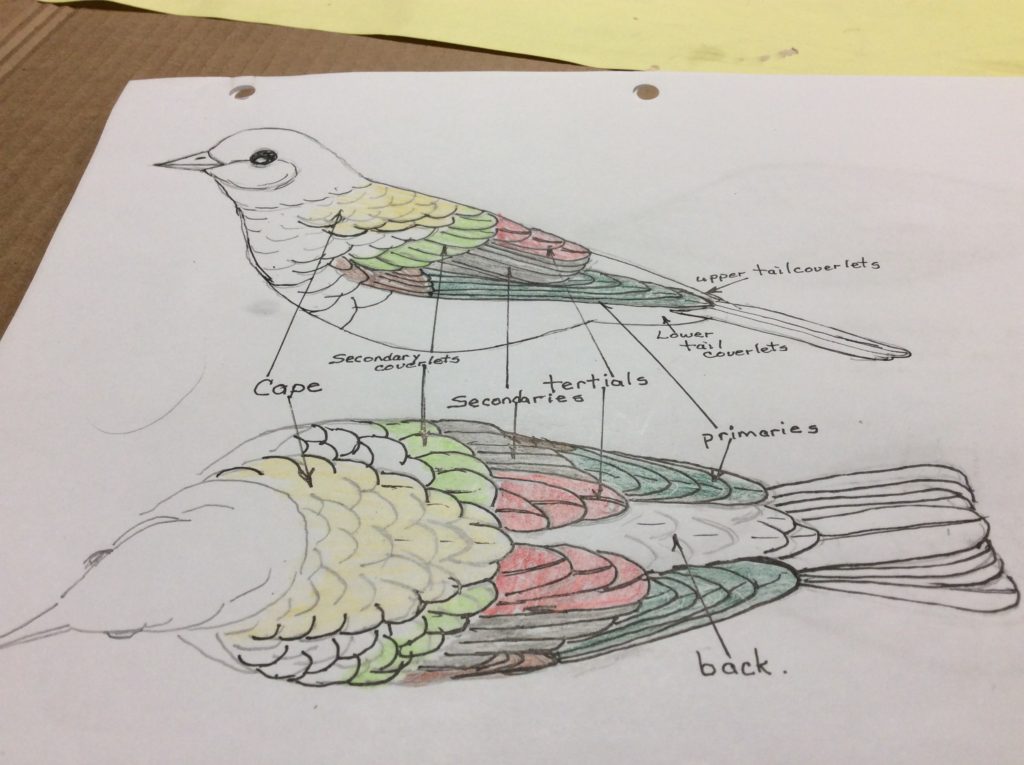
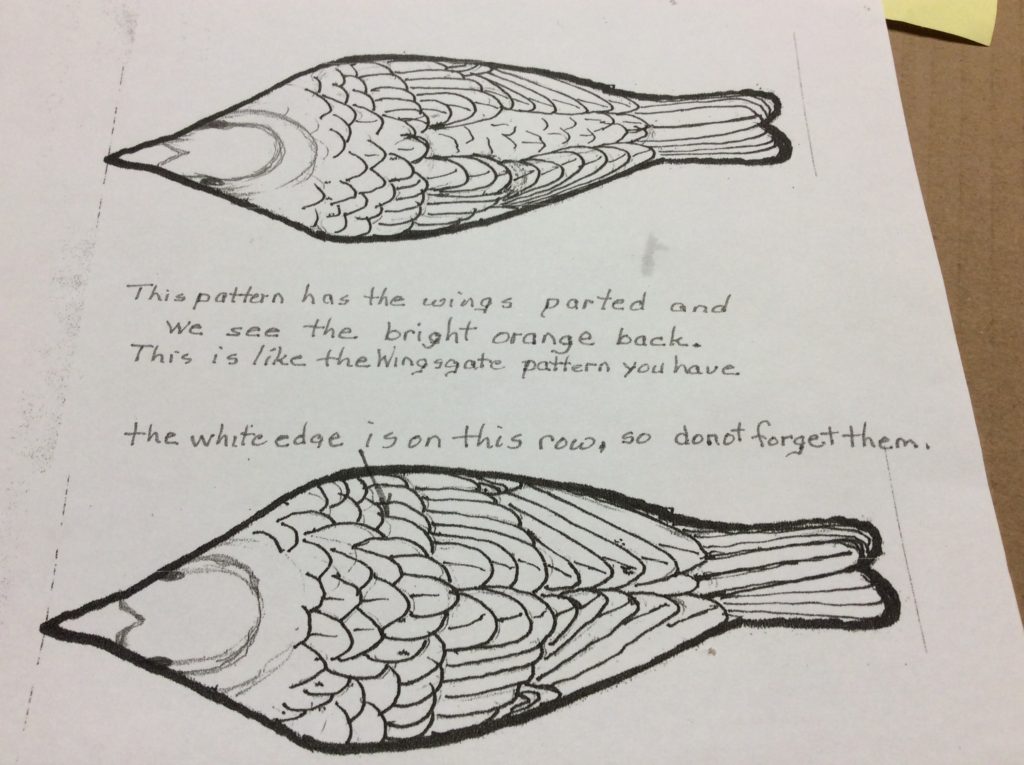
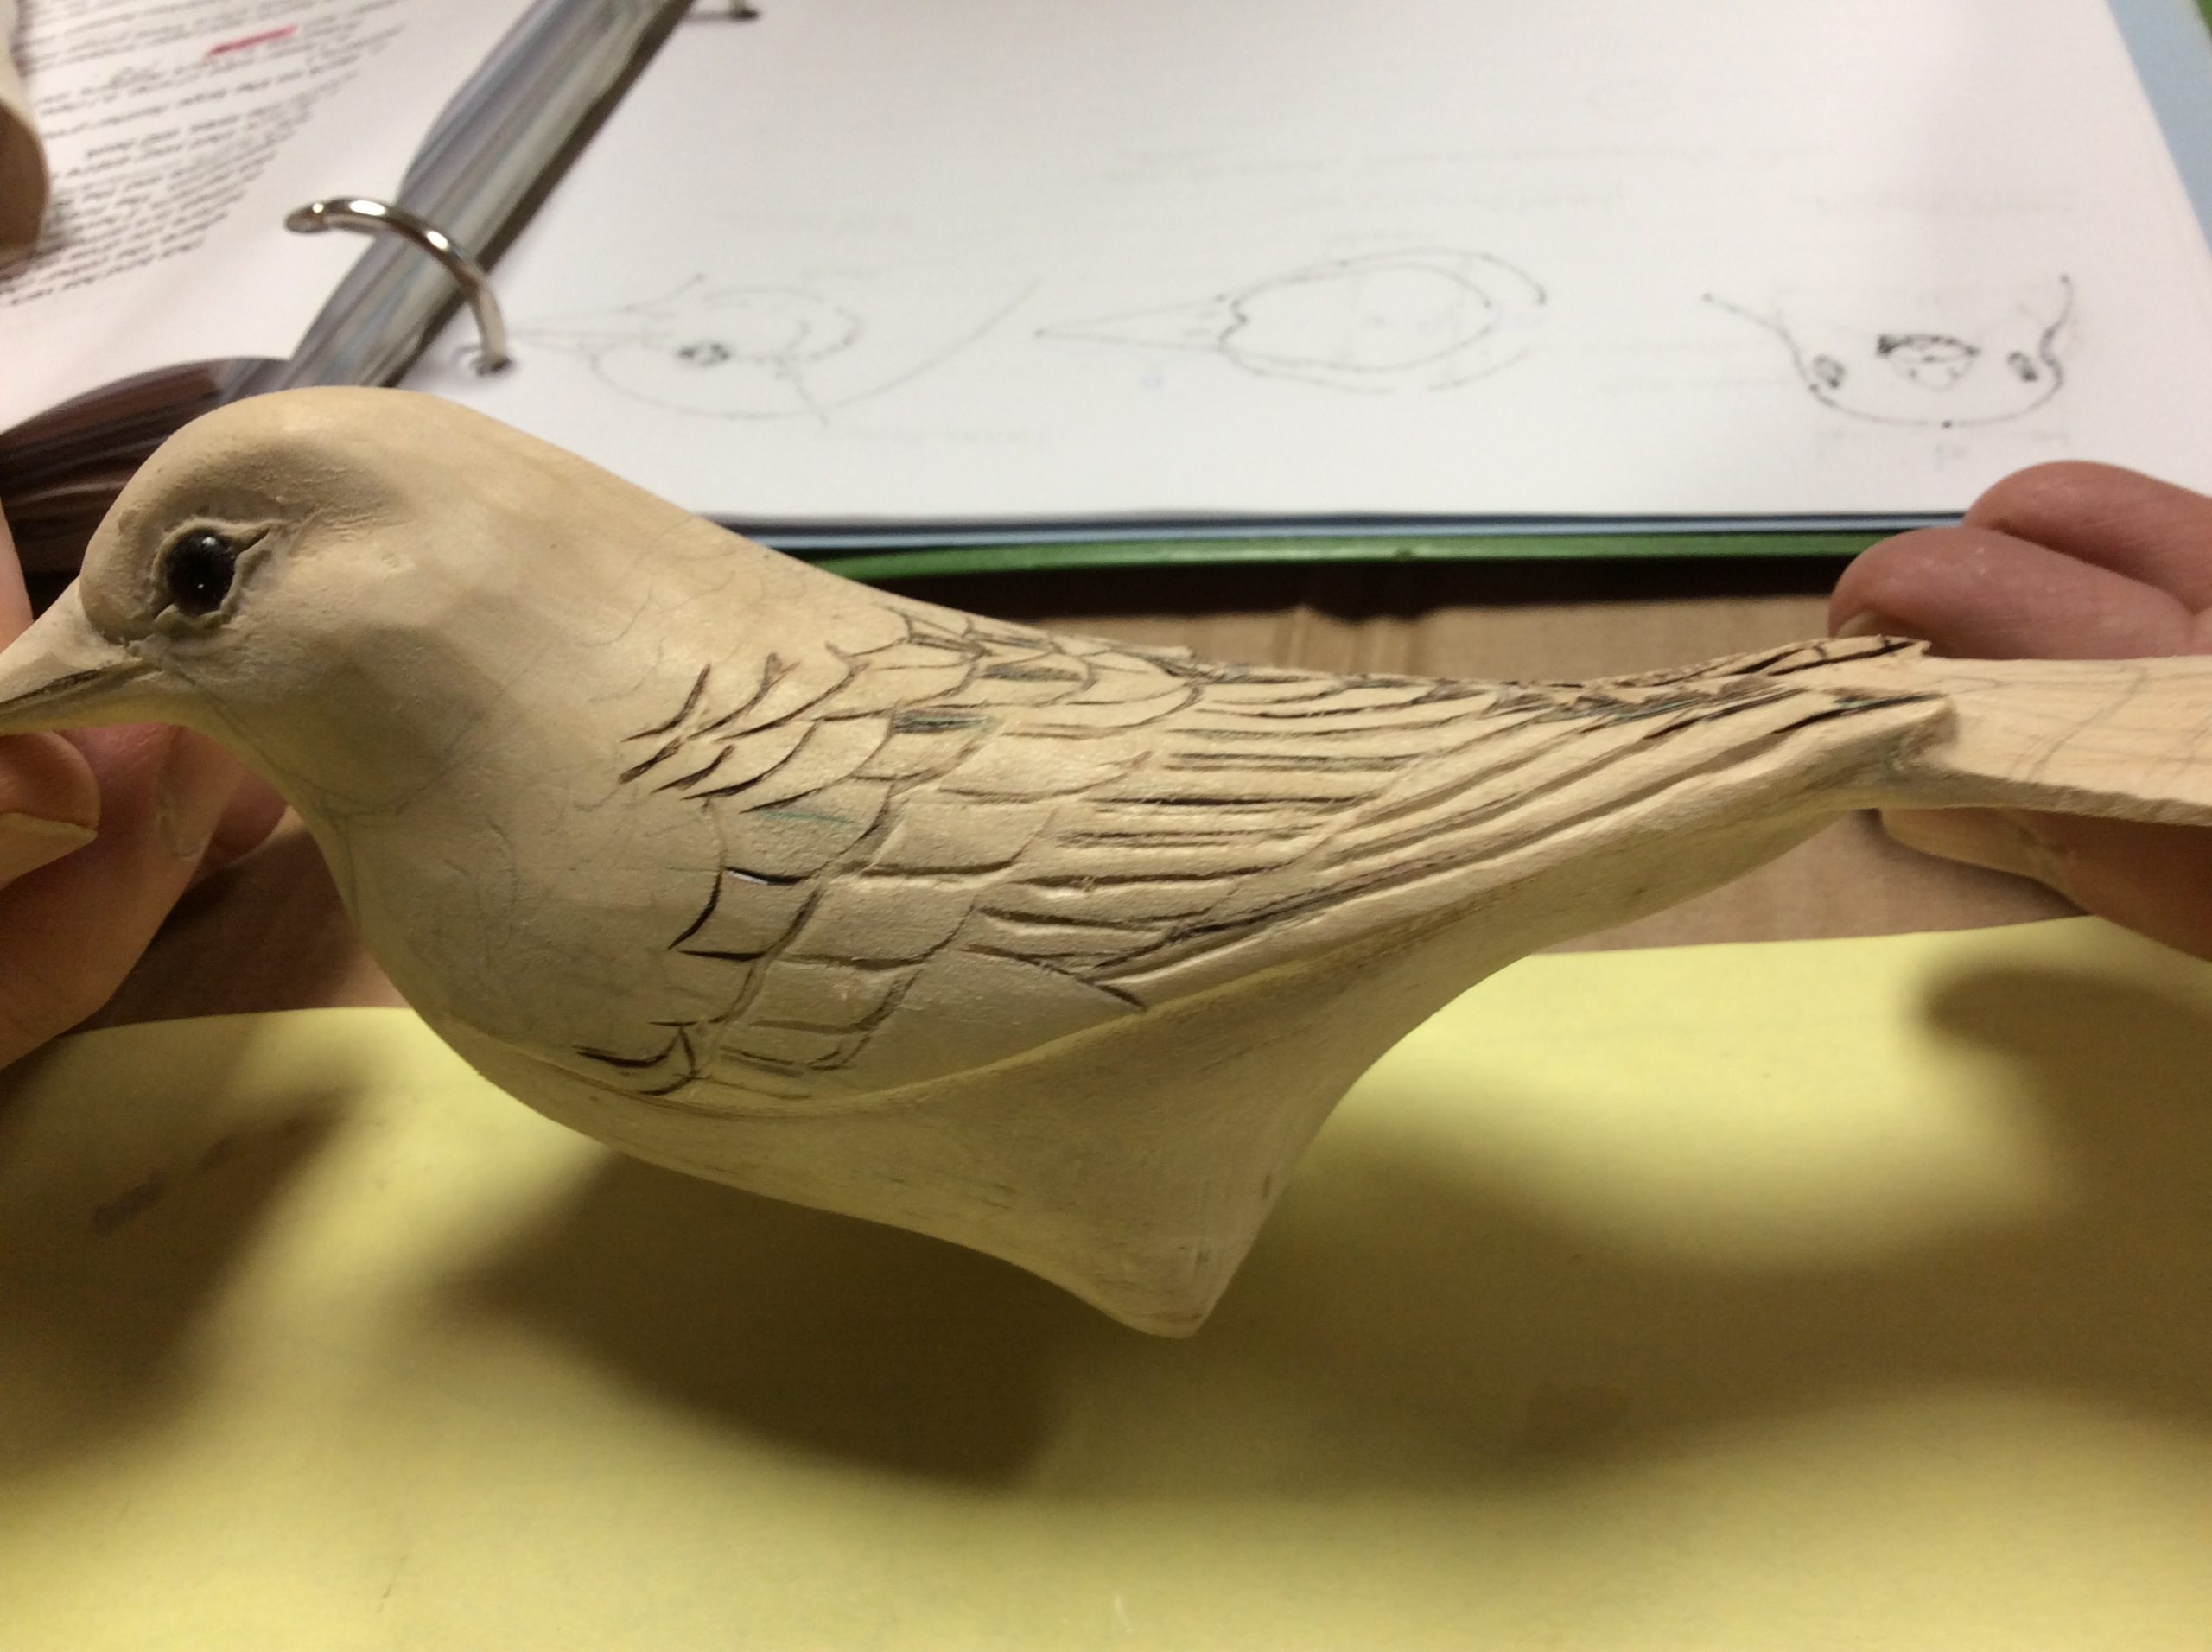
Oriole’s have very distinct colour lines. There is usually a row of feathers where the colour changes. Study where these major colour outlines happen before you draw on the feathers. If it helps, draw on the major colour outlines in a different colour and see if you can get feathers organized to fit this pattern. I have included three drawings which may help with feather organization. Drawing A has the main feather groups coloured differently. The second, B is based on our pattern with the wings spread so the back is visible and the third, C simplifies the arrangement a bit. It may be less confusing. It is very hard to locate these major groups from the drawing on our pattern. I had to redraw the lines several times before I got one that I could live with.
Step 1:
Be sure that your entire bird is sanded with 220 grit or better. Be careful around the eyes, and beak.
Step 2:
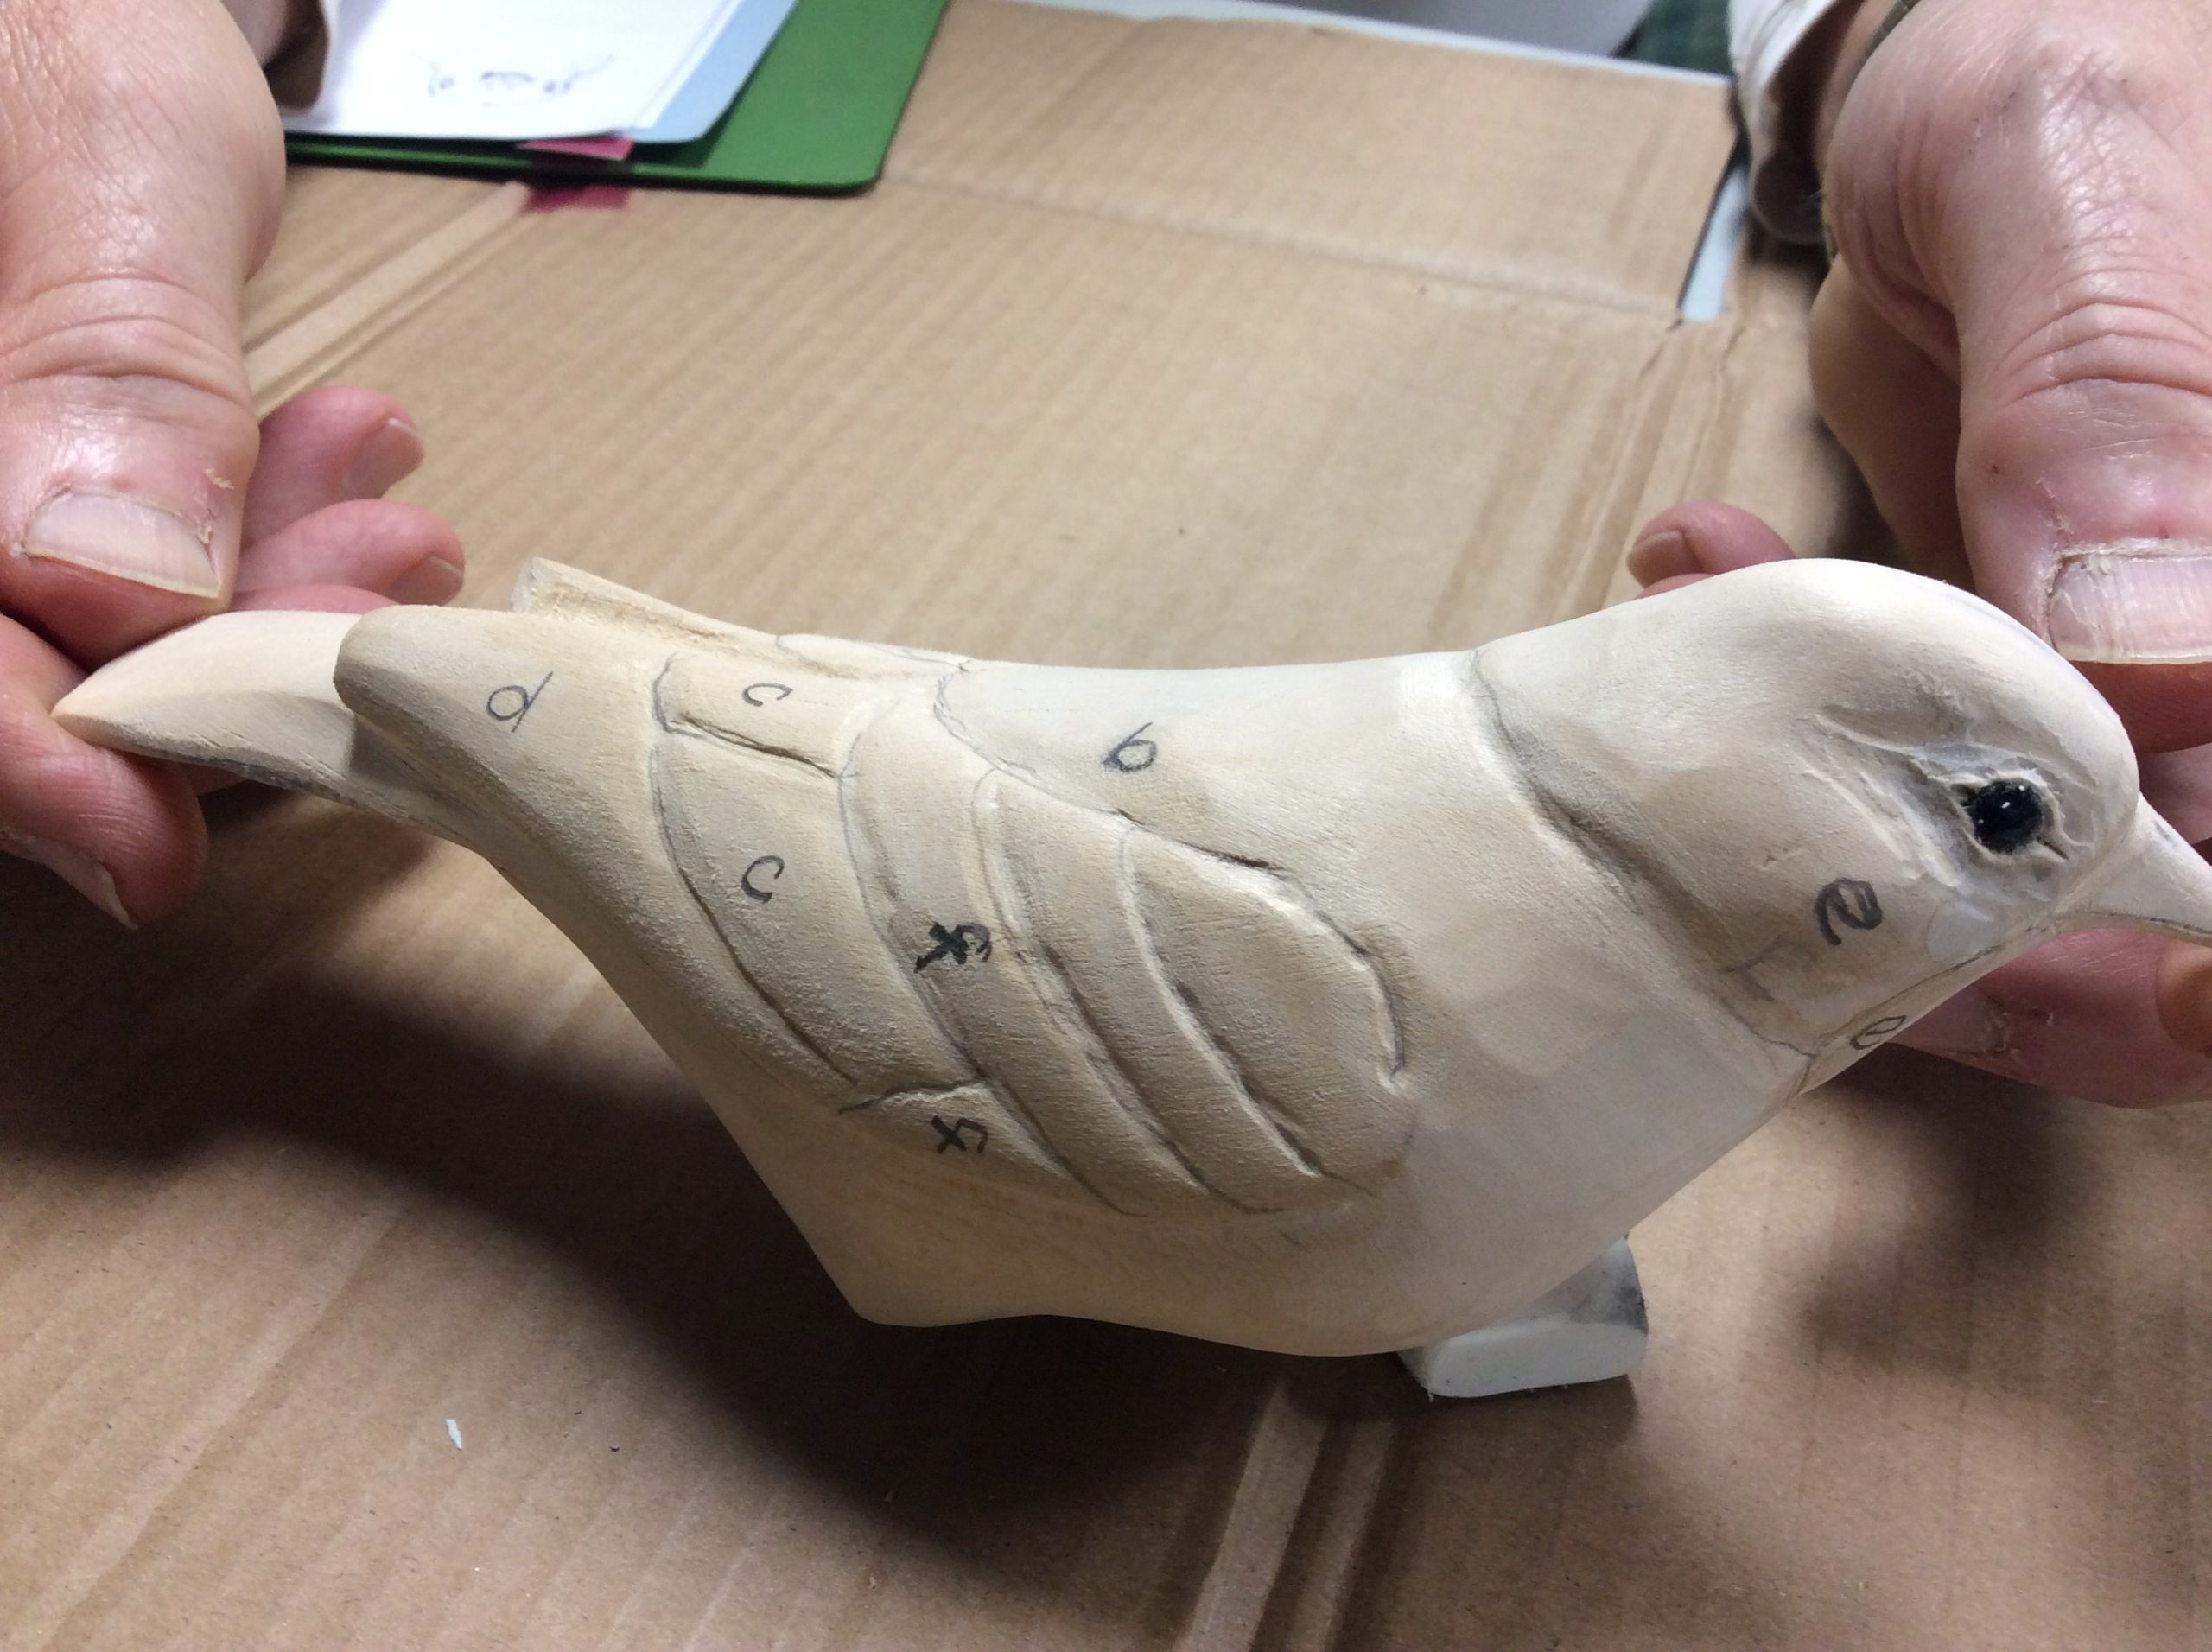
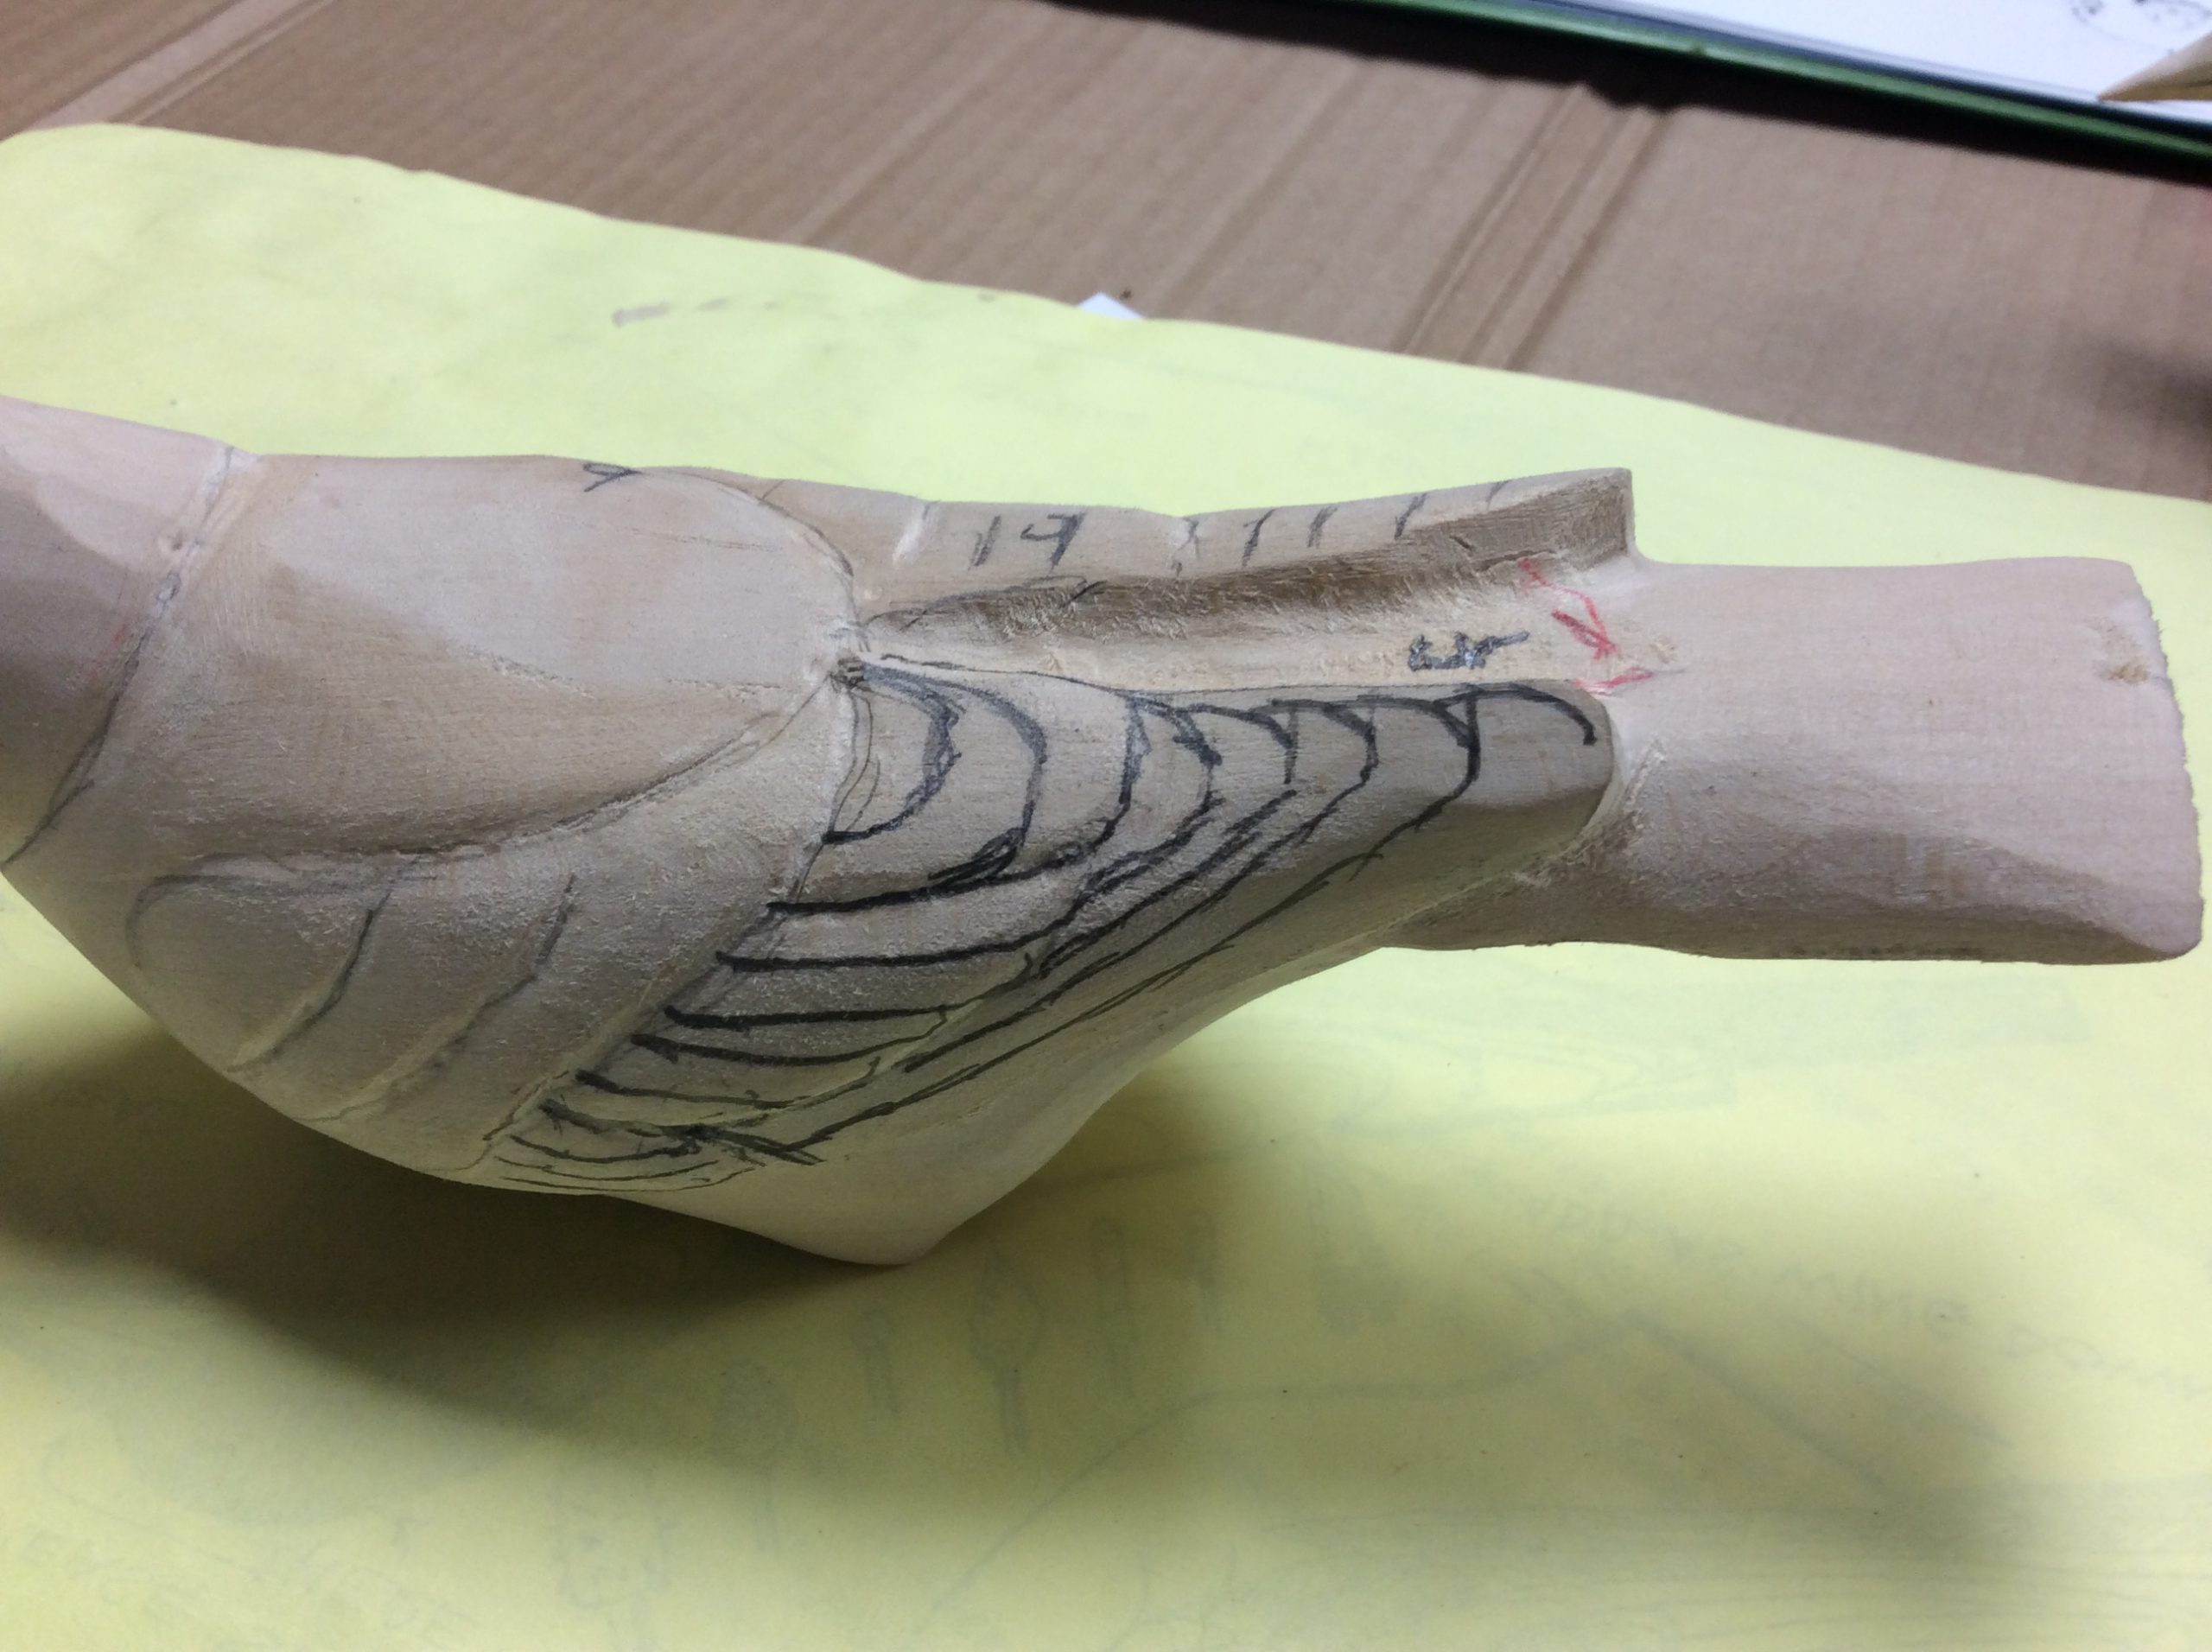
Mark on the large feather groups: (See drawings A, B, & C and your pattern.)
a. lower edge of wing,
b. Cape,
c. Tertials and secondaries,
d. Primaries,
e. Neck feathers, and bib,
f. Coverlets: secondary, upper and lower tail.
Step 3:
Use a rotary tool or sand paper wrapped around a pencil to create shallow and gentle depressions where these groups meet. Sand to create a smooth transition between these areas.
Step 4:
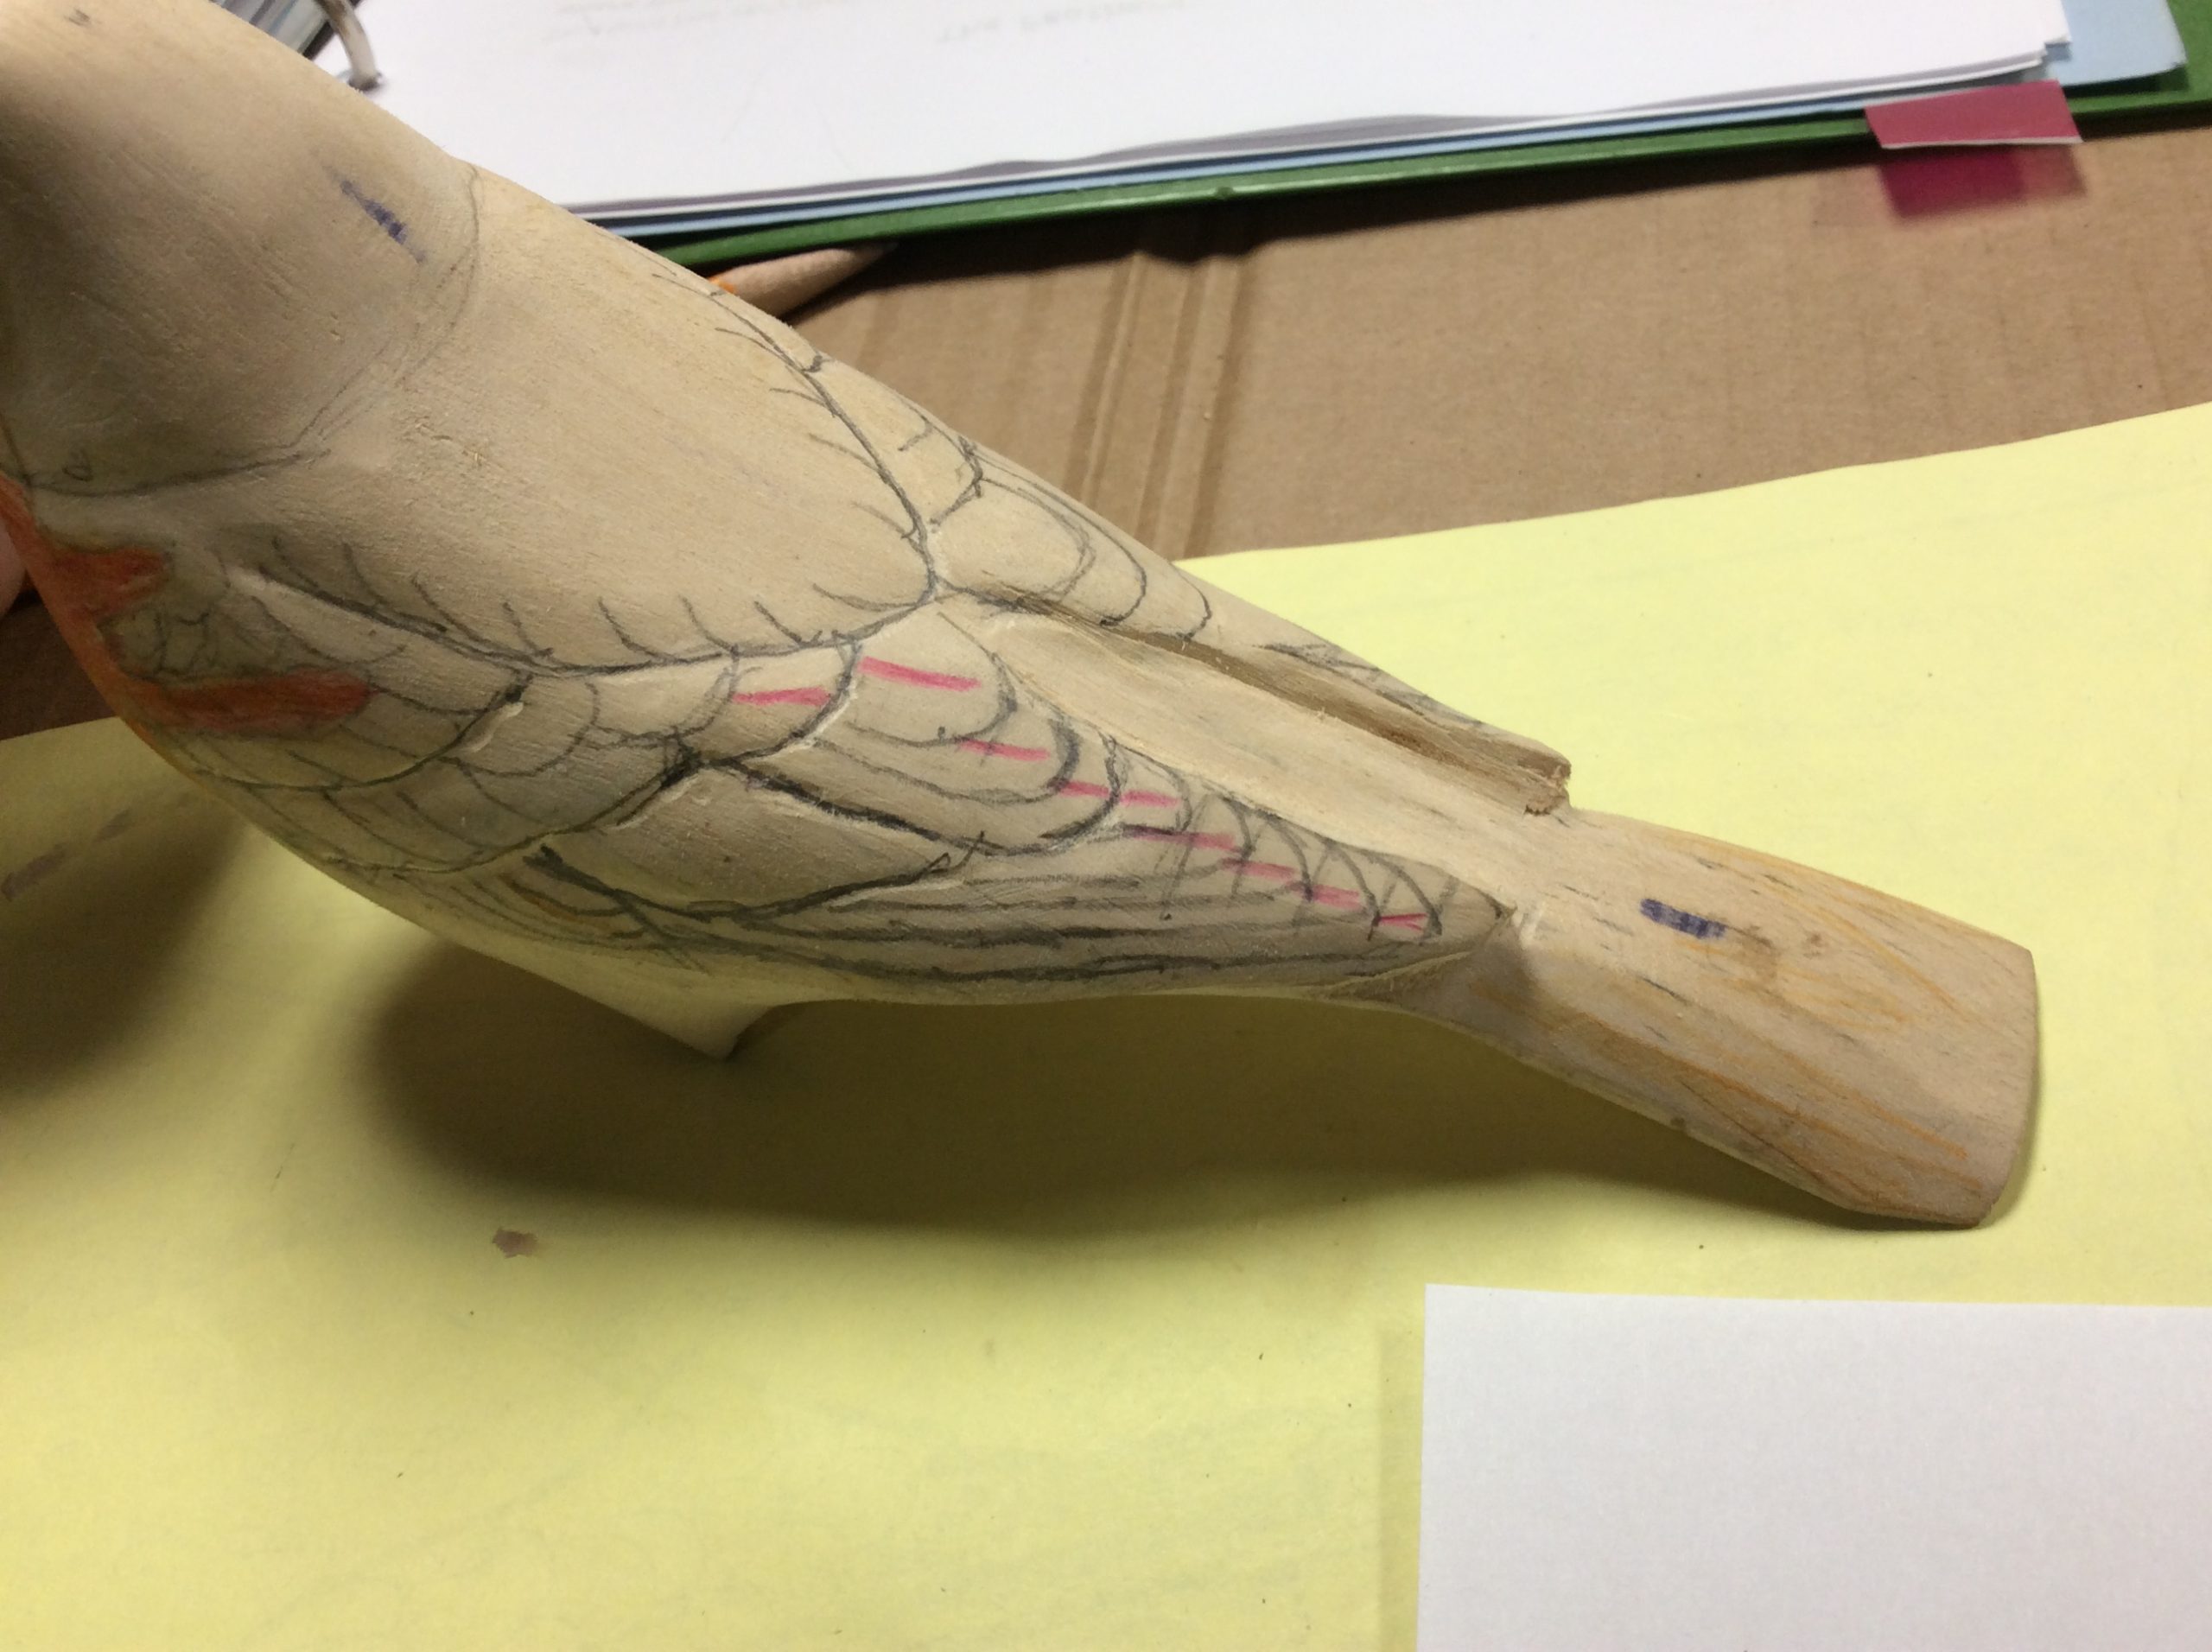
Draw in the tertials, secondaries and primaries on each wing. The feather arrangement must be adjusted to fit your bird. You can not just trace a two dimensional drawing and have it fit a three dimensional surface. You will need to spread the secondaries and coverlets to cover the space all the way down to the wing edge.
Step 5:
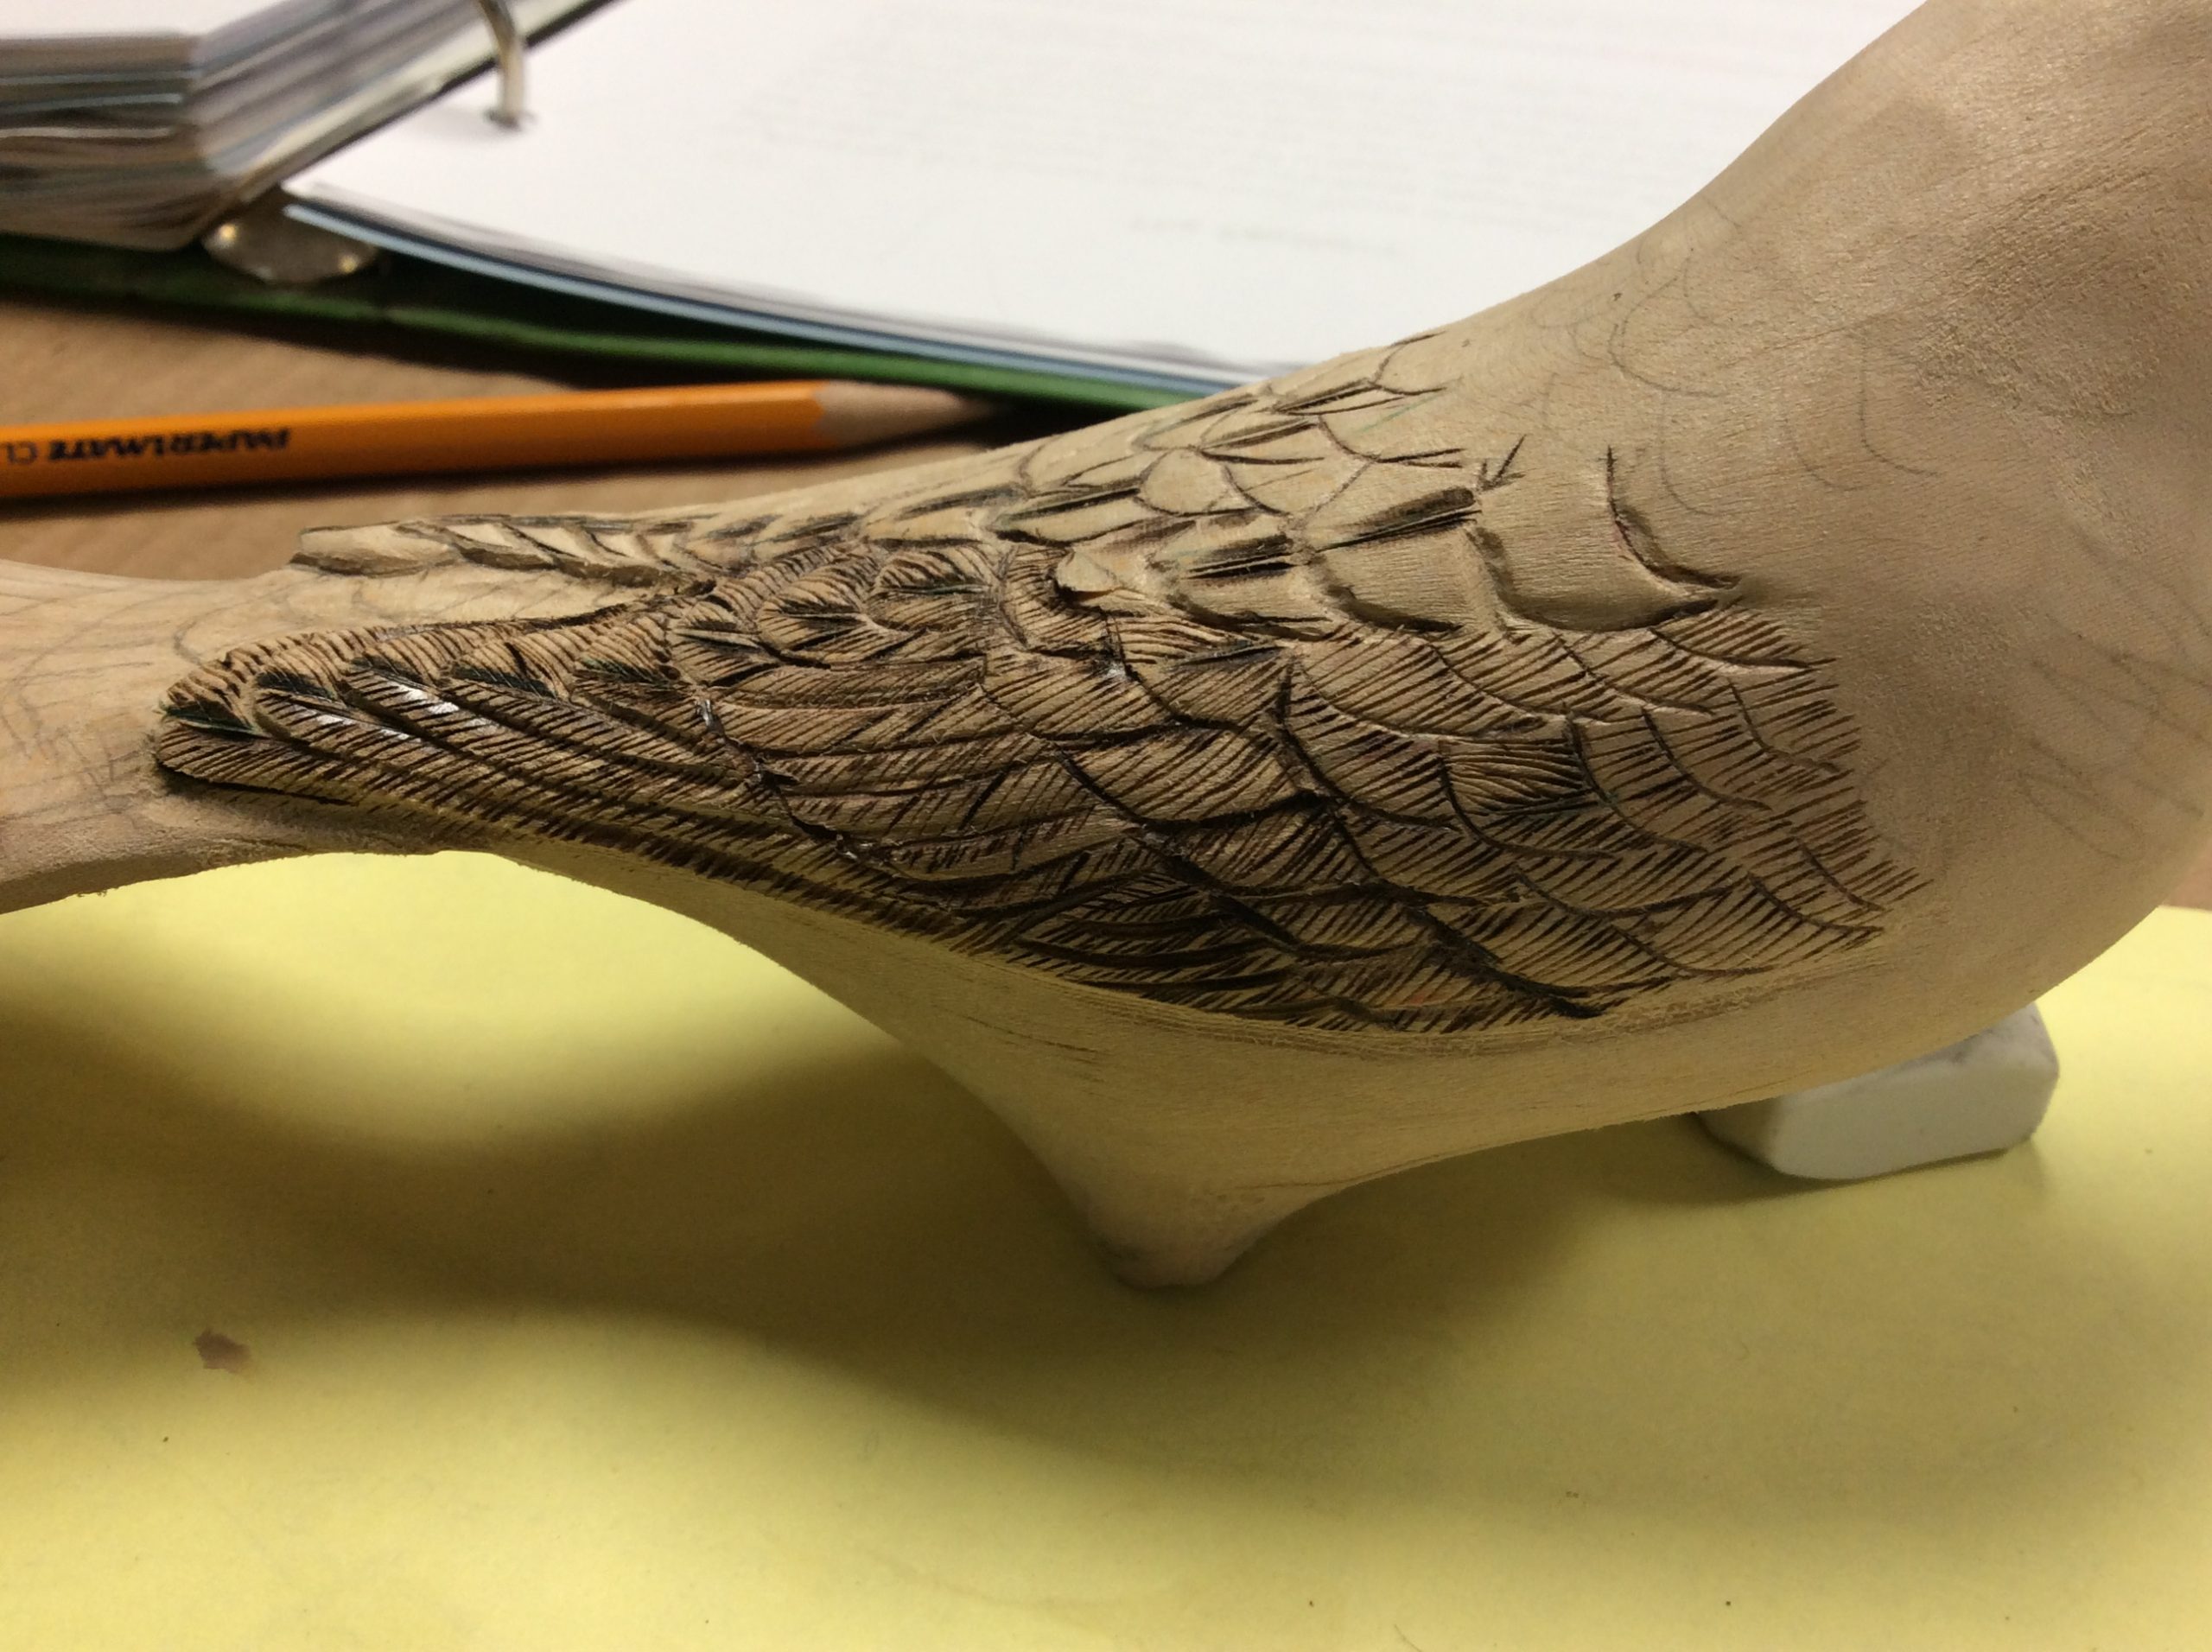
When happy with the feather placement burn or cut in these lines. Use a sharp knife, rotary tool or burner on its side to relieve each feather. Check to see which feather is over another and remove a tiny bit of wood along the edge to make it look like one is over the other. Sand as necessary to create a smooth transition between feathers .
Step 6:
The same process may be done on the cape and coverlets if desired.
Step 7:
It is often helpful to lightly redraw on your feather outlines with pencil. I use a different colour to mark on the quills of main feathers where they are visible. Remember these quills curve slightly in toward the centre line of the bird.
Step 8
You may wish to begin burning the details at this time or wait until you have drawn on all of the feathers. Just in case… I am impatient and like to get started burning. If you do not have access to a burner we will lend ours out. If you have one and would be willing to share contact John or I and we will give your name to members who are in need.
We will continue next week with steps for the tail and then texturing the other body parts. We hope all is going well with you. Some of you have kindly let us know about your progress.
R & J