
Use the following links below if you have not completed the previous steps:
- The Body (View Instructions)
- The Tail (View Instructions)
- The Beak (View Instructions)
- The Head (View Instructions)
- Feathering (View Instructions)
Step 1:
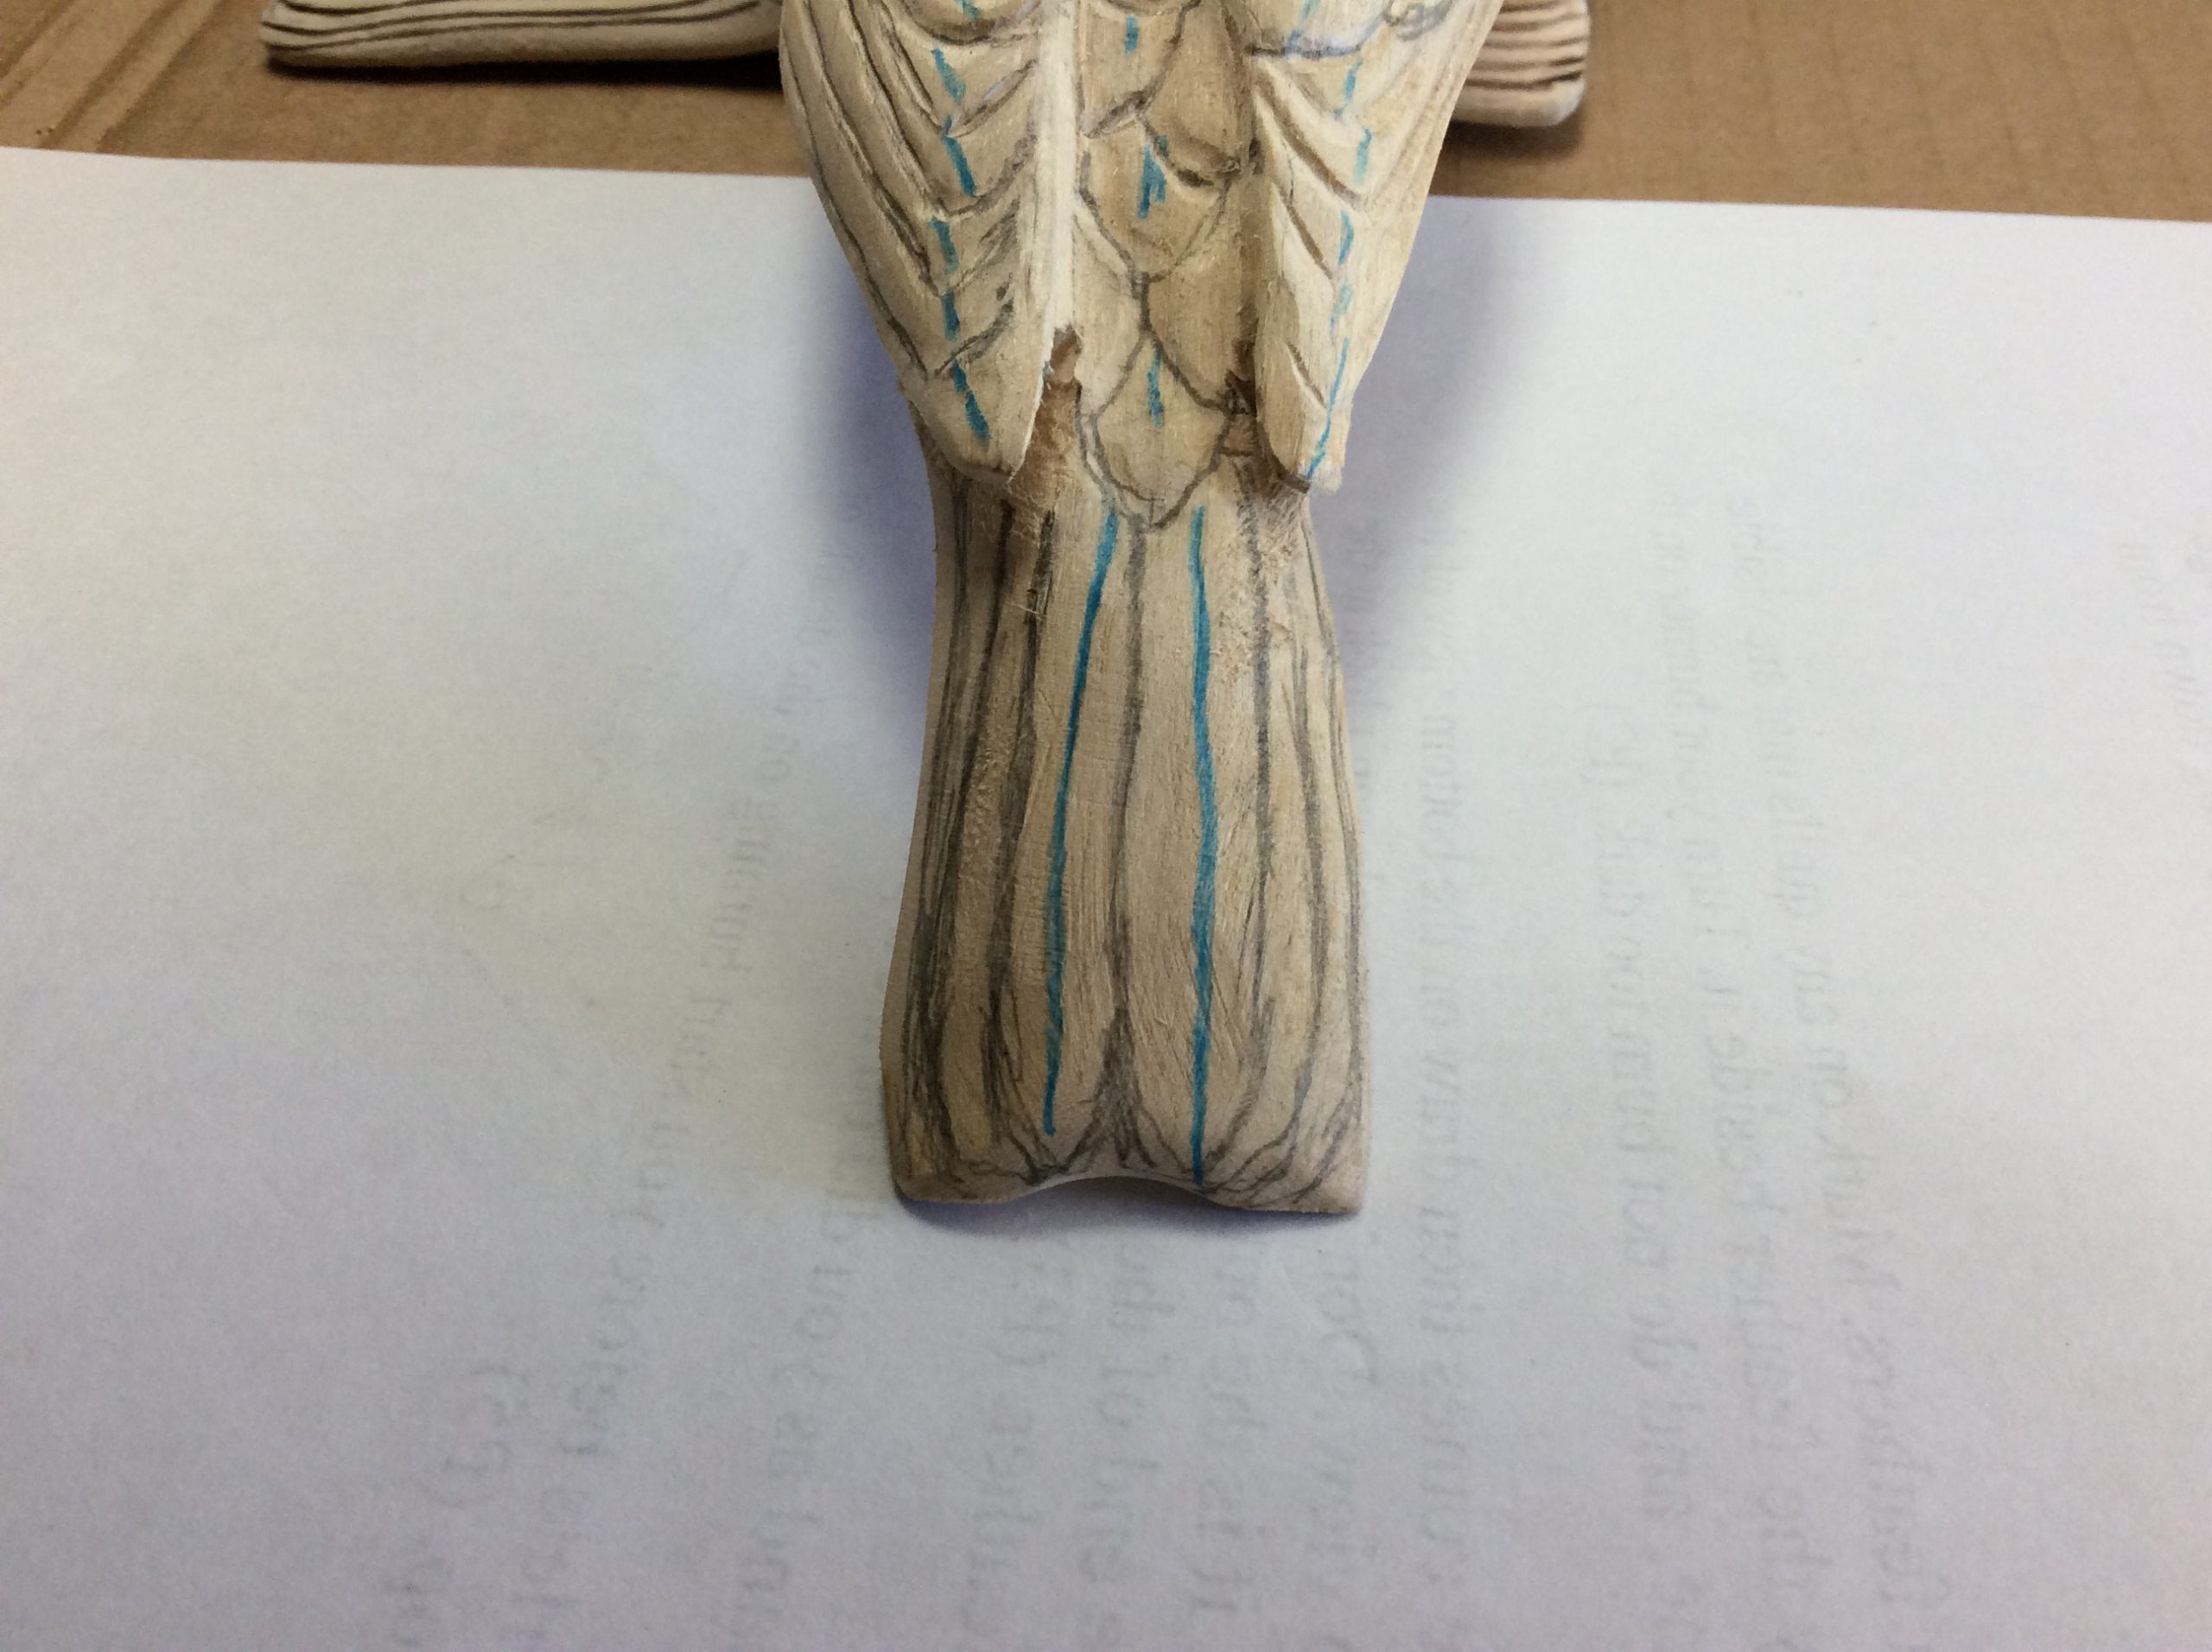
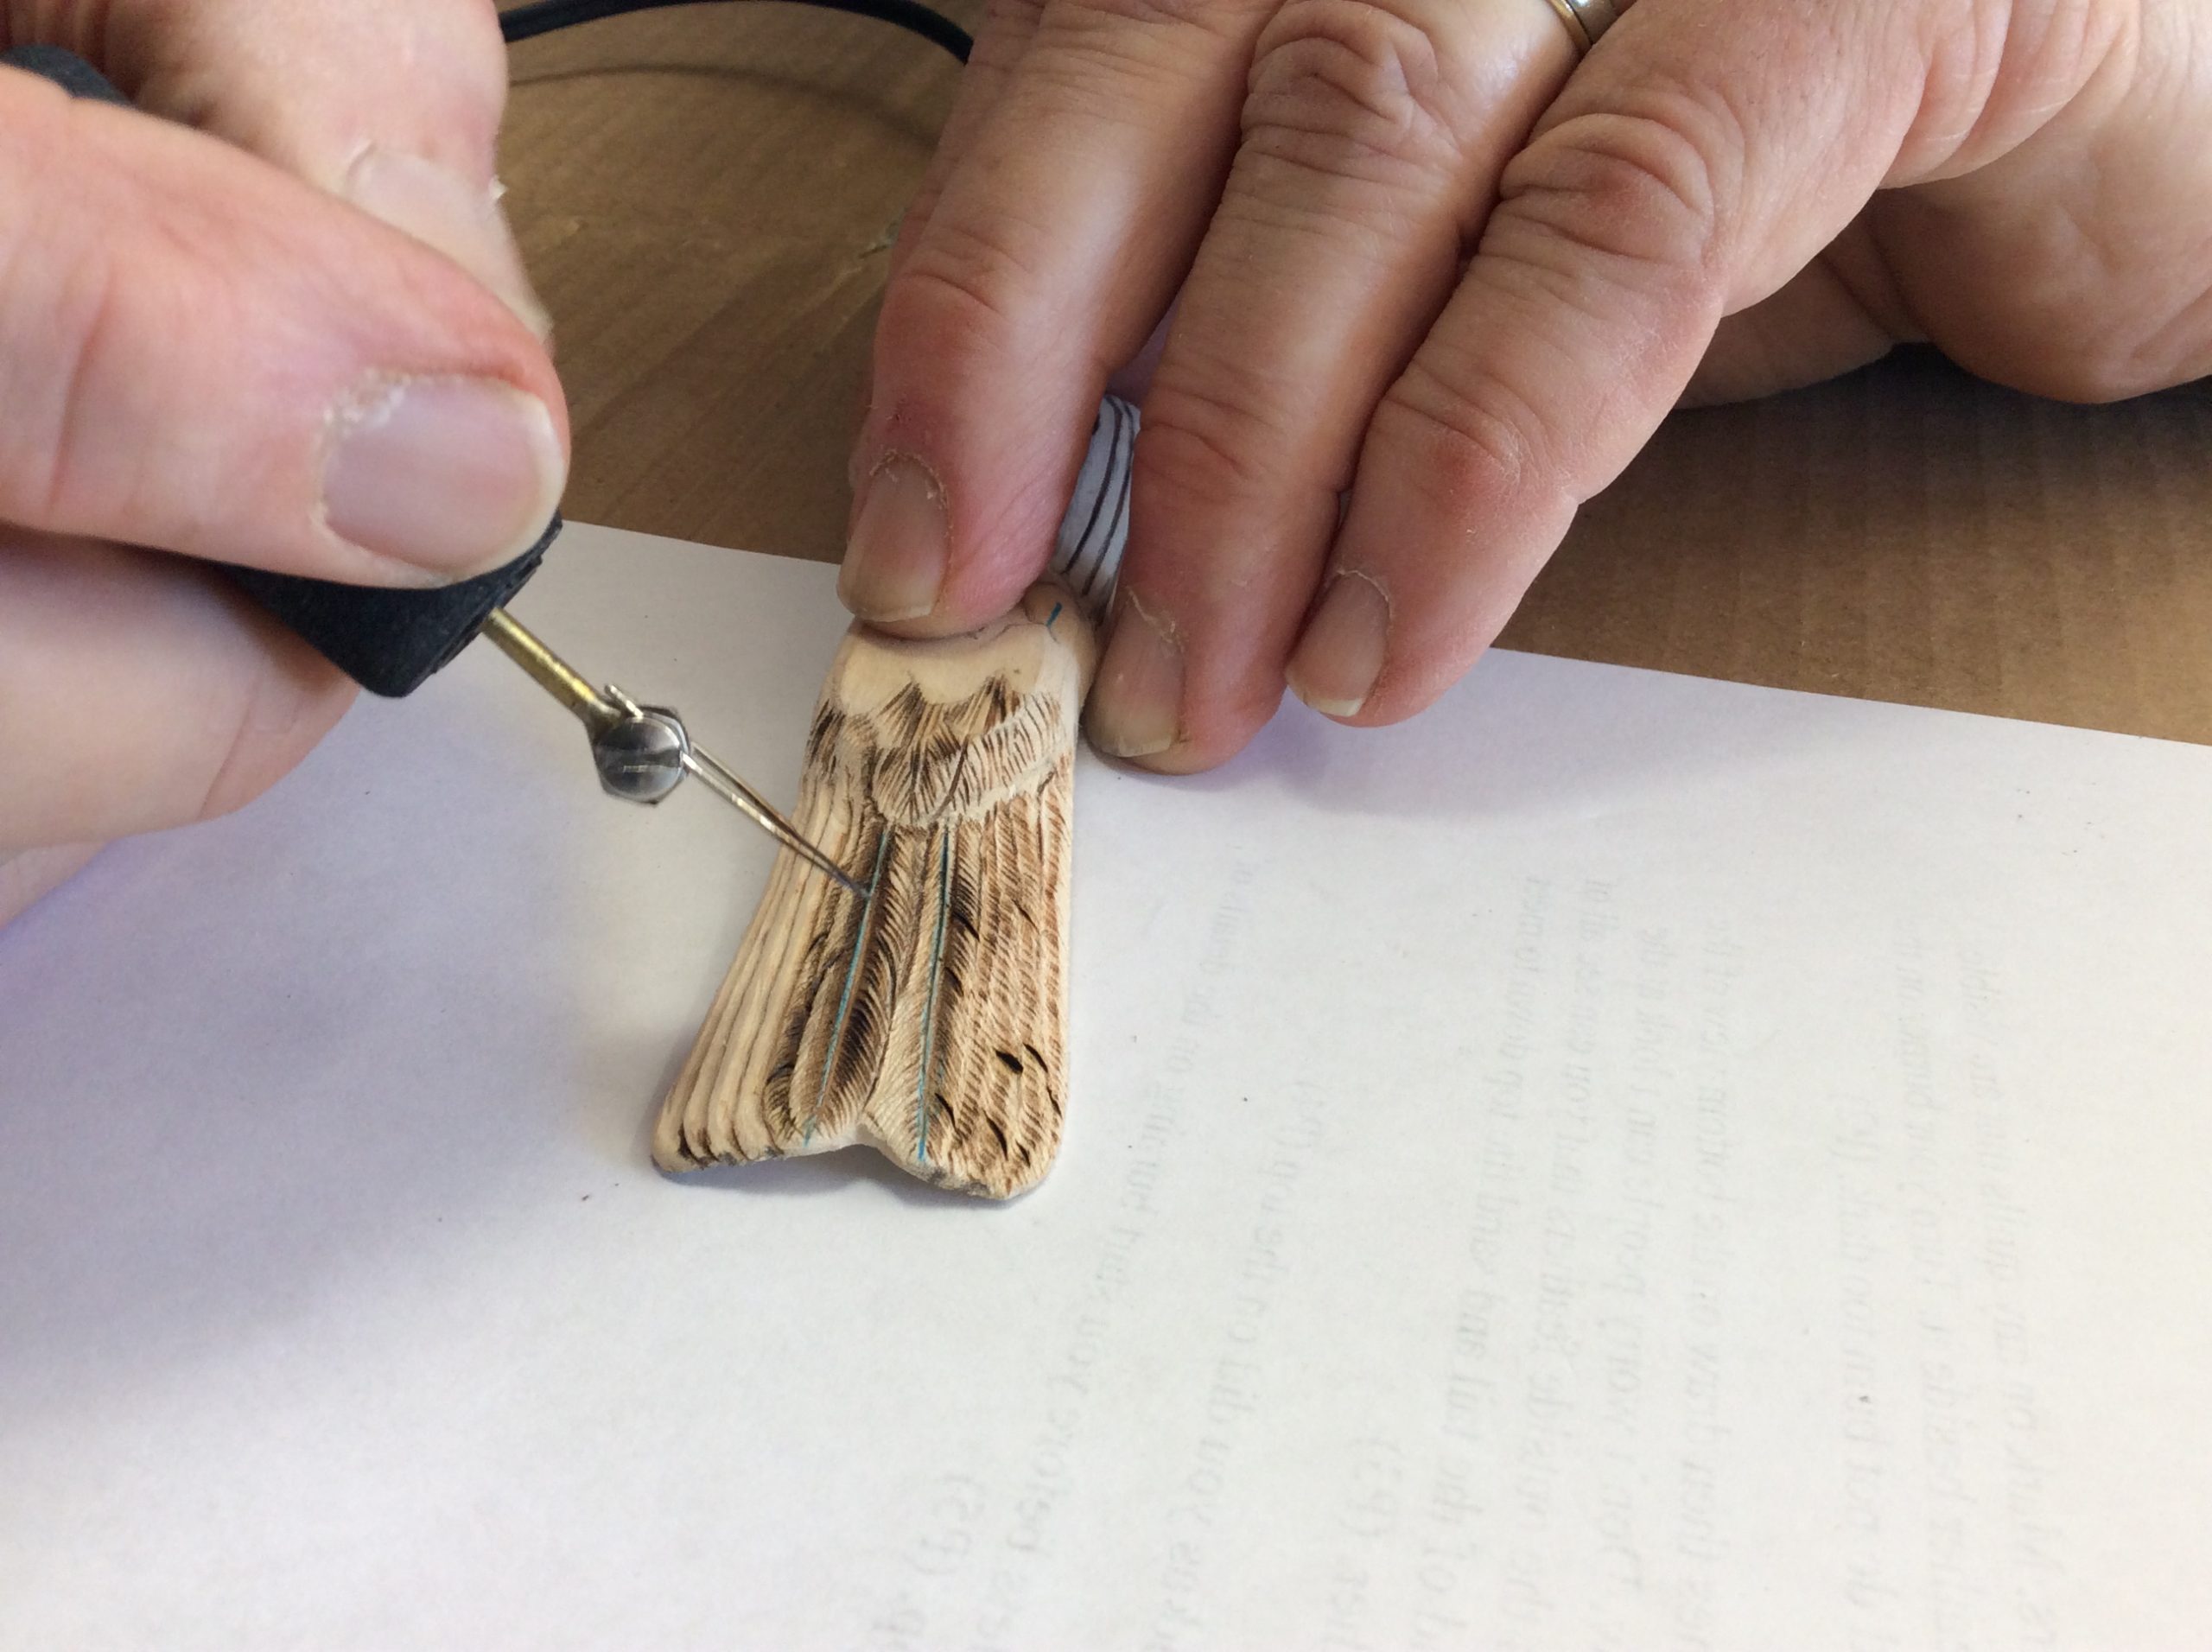
At this time you will need to sand down the tail to create the illusion of it being feather thin. Taper the top down all around to make the edge appear thin. Leave the centre area thicker to add strength. Be sure to redraw in the upper and lower tail coverlets, that you created when you were ruffing in the tail.
Step 2:
Once the tail has been shaped, draw in the top view of the feathers, and add quills where they are visible. Most quills are hidden by the next feather. There are 10 to 12 feathers on the tail. You can rarely see all of them. The top most feathers are the two in the centre. See pattern.
Step 3:
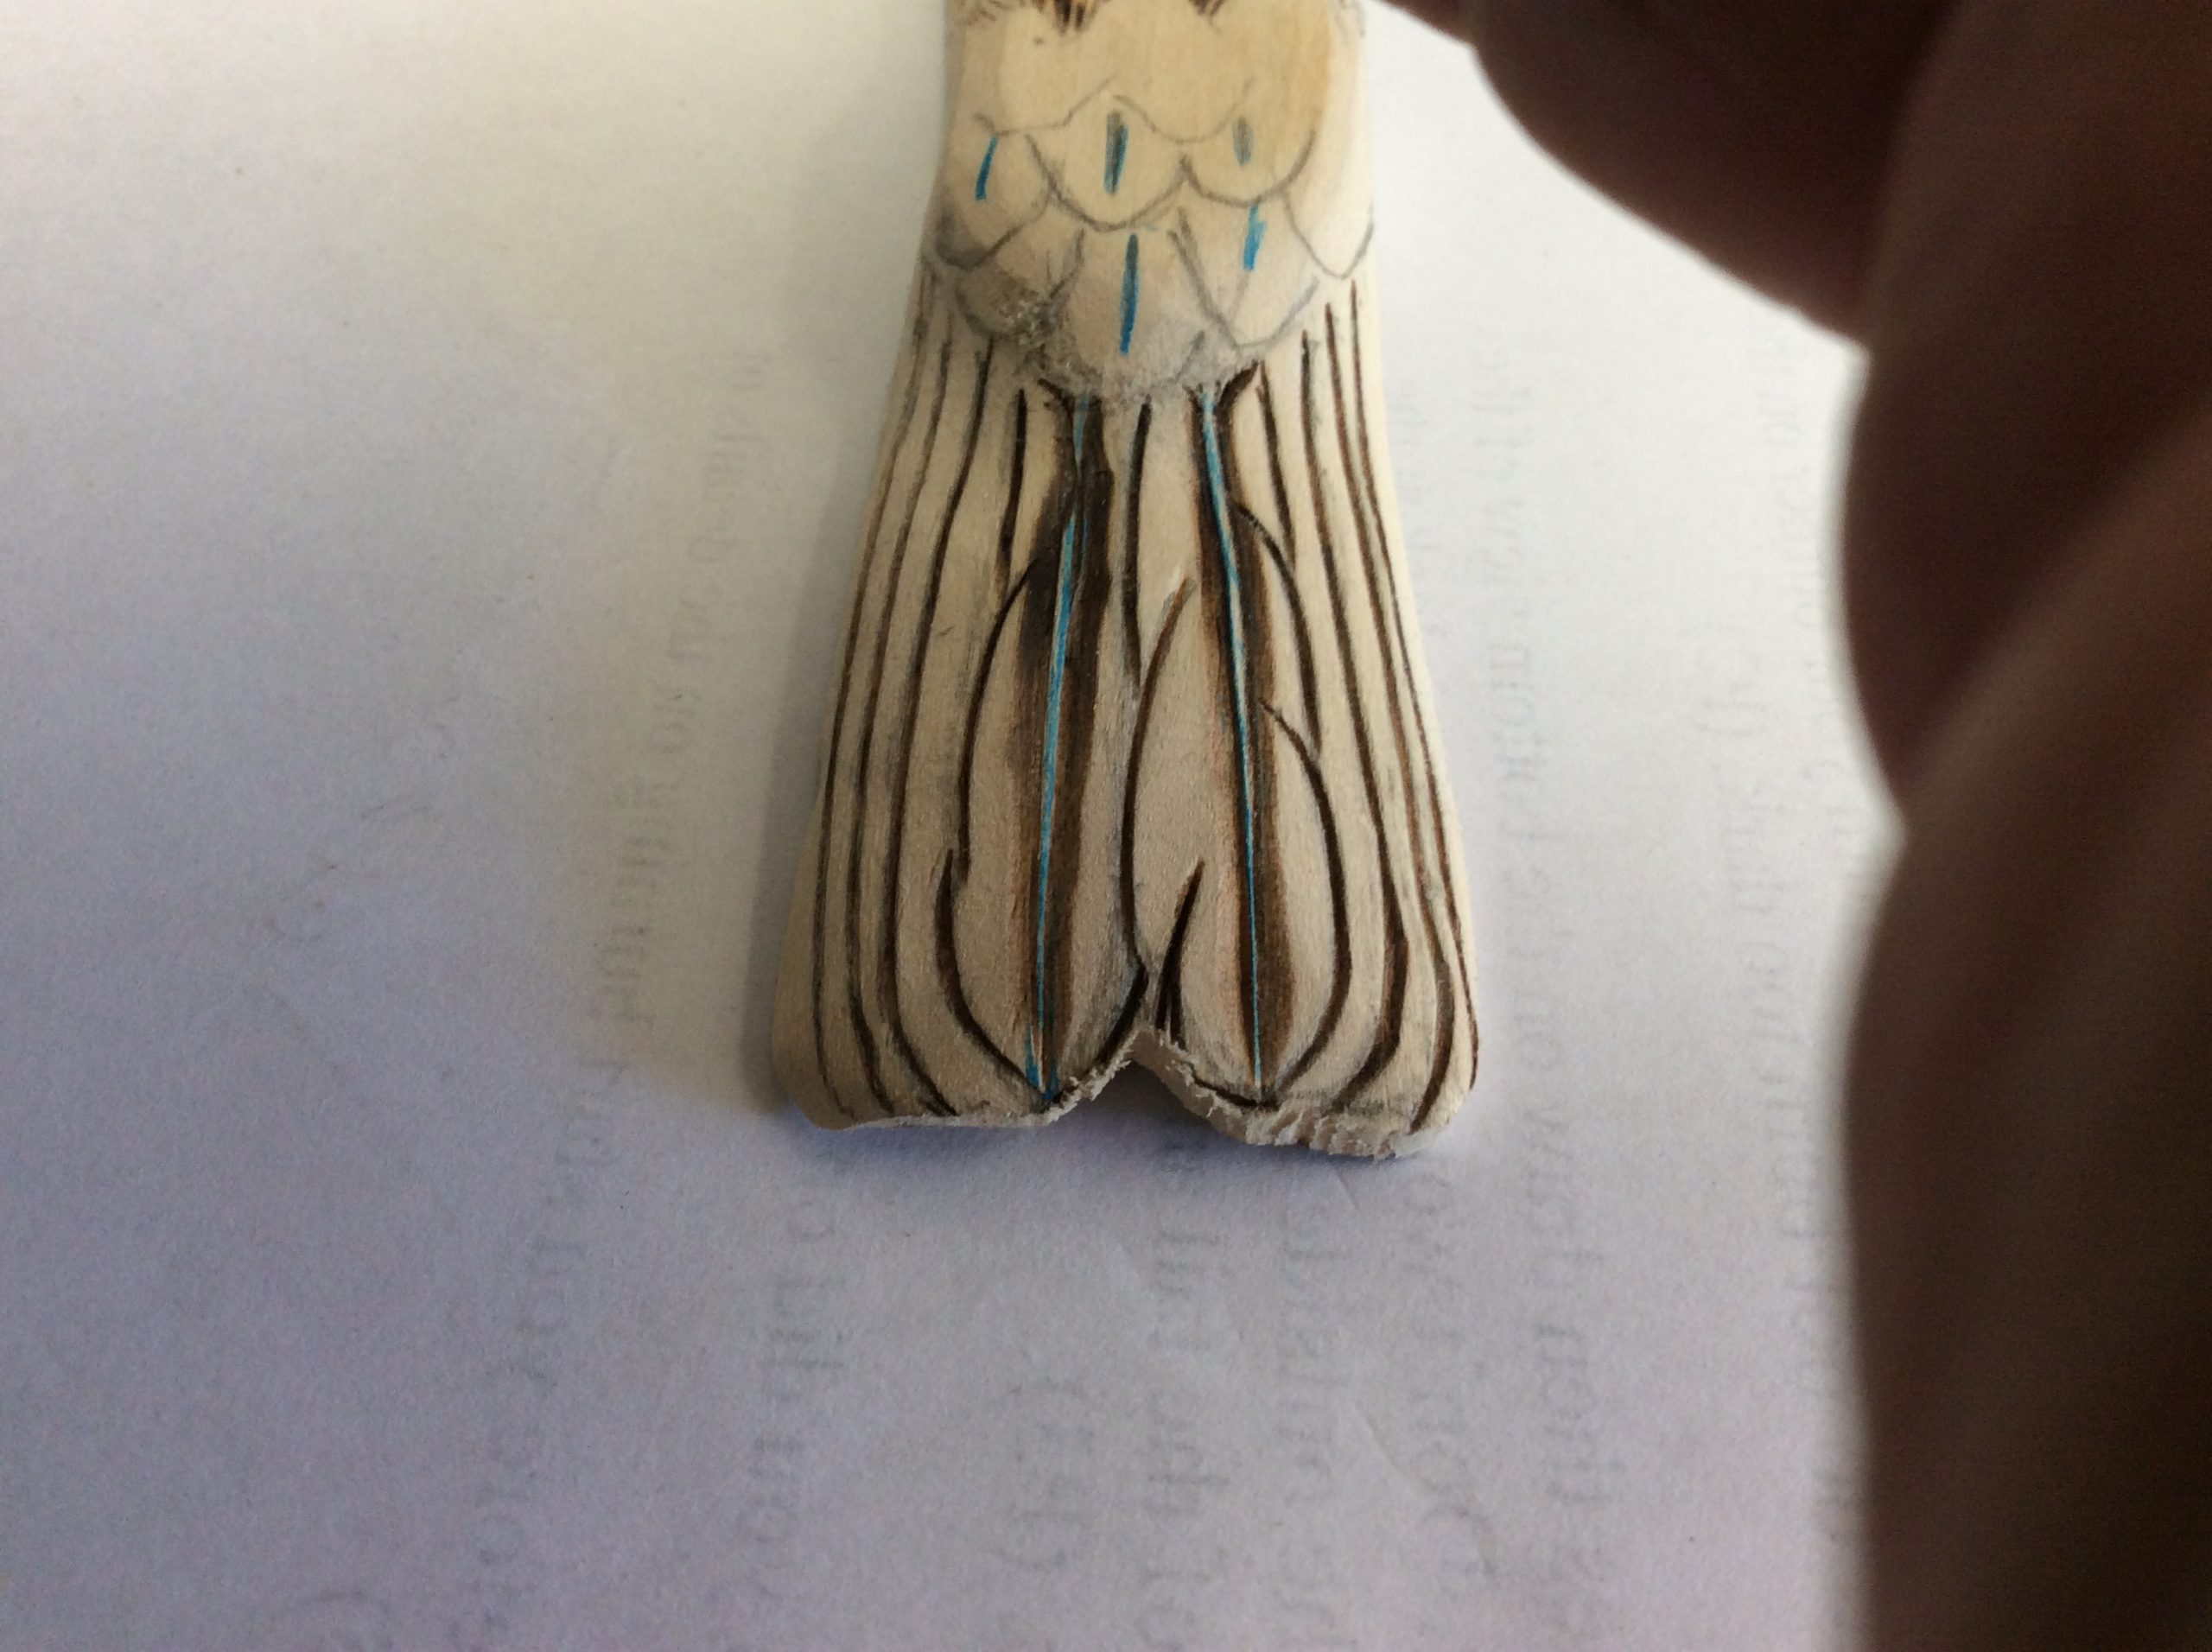
Cut or burn the edges of these feathers and then relieve them with a knife or by turning your burner tip on it’s side and lightly create an edge for each feather. (Not too deep and not too dark).
Step 4:
Trim the ends of each feather as shown in the pattern. Sand to create a gentle transition between feathers.
Step 5:
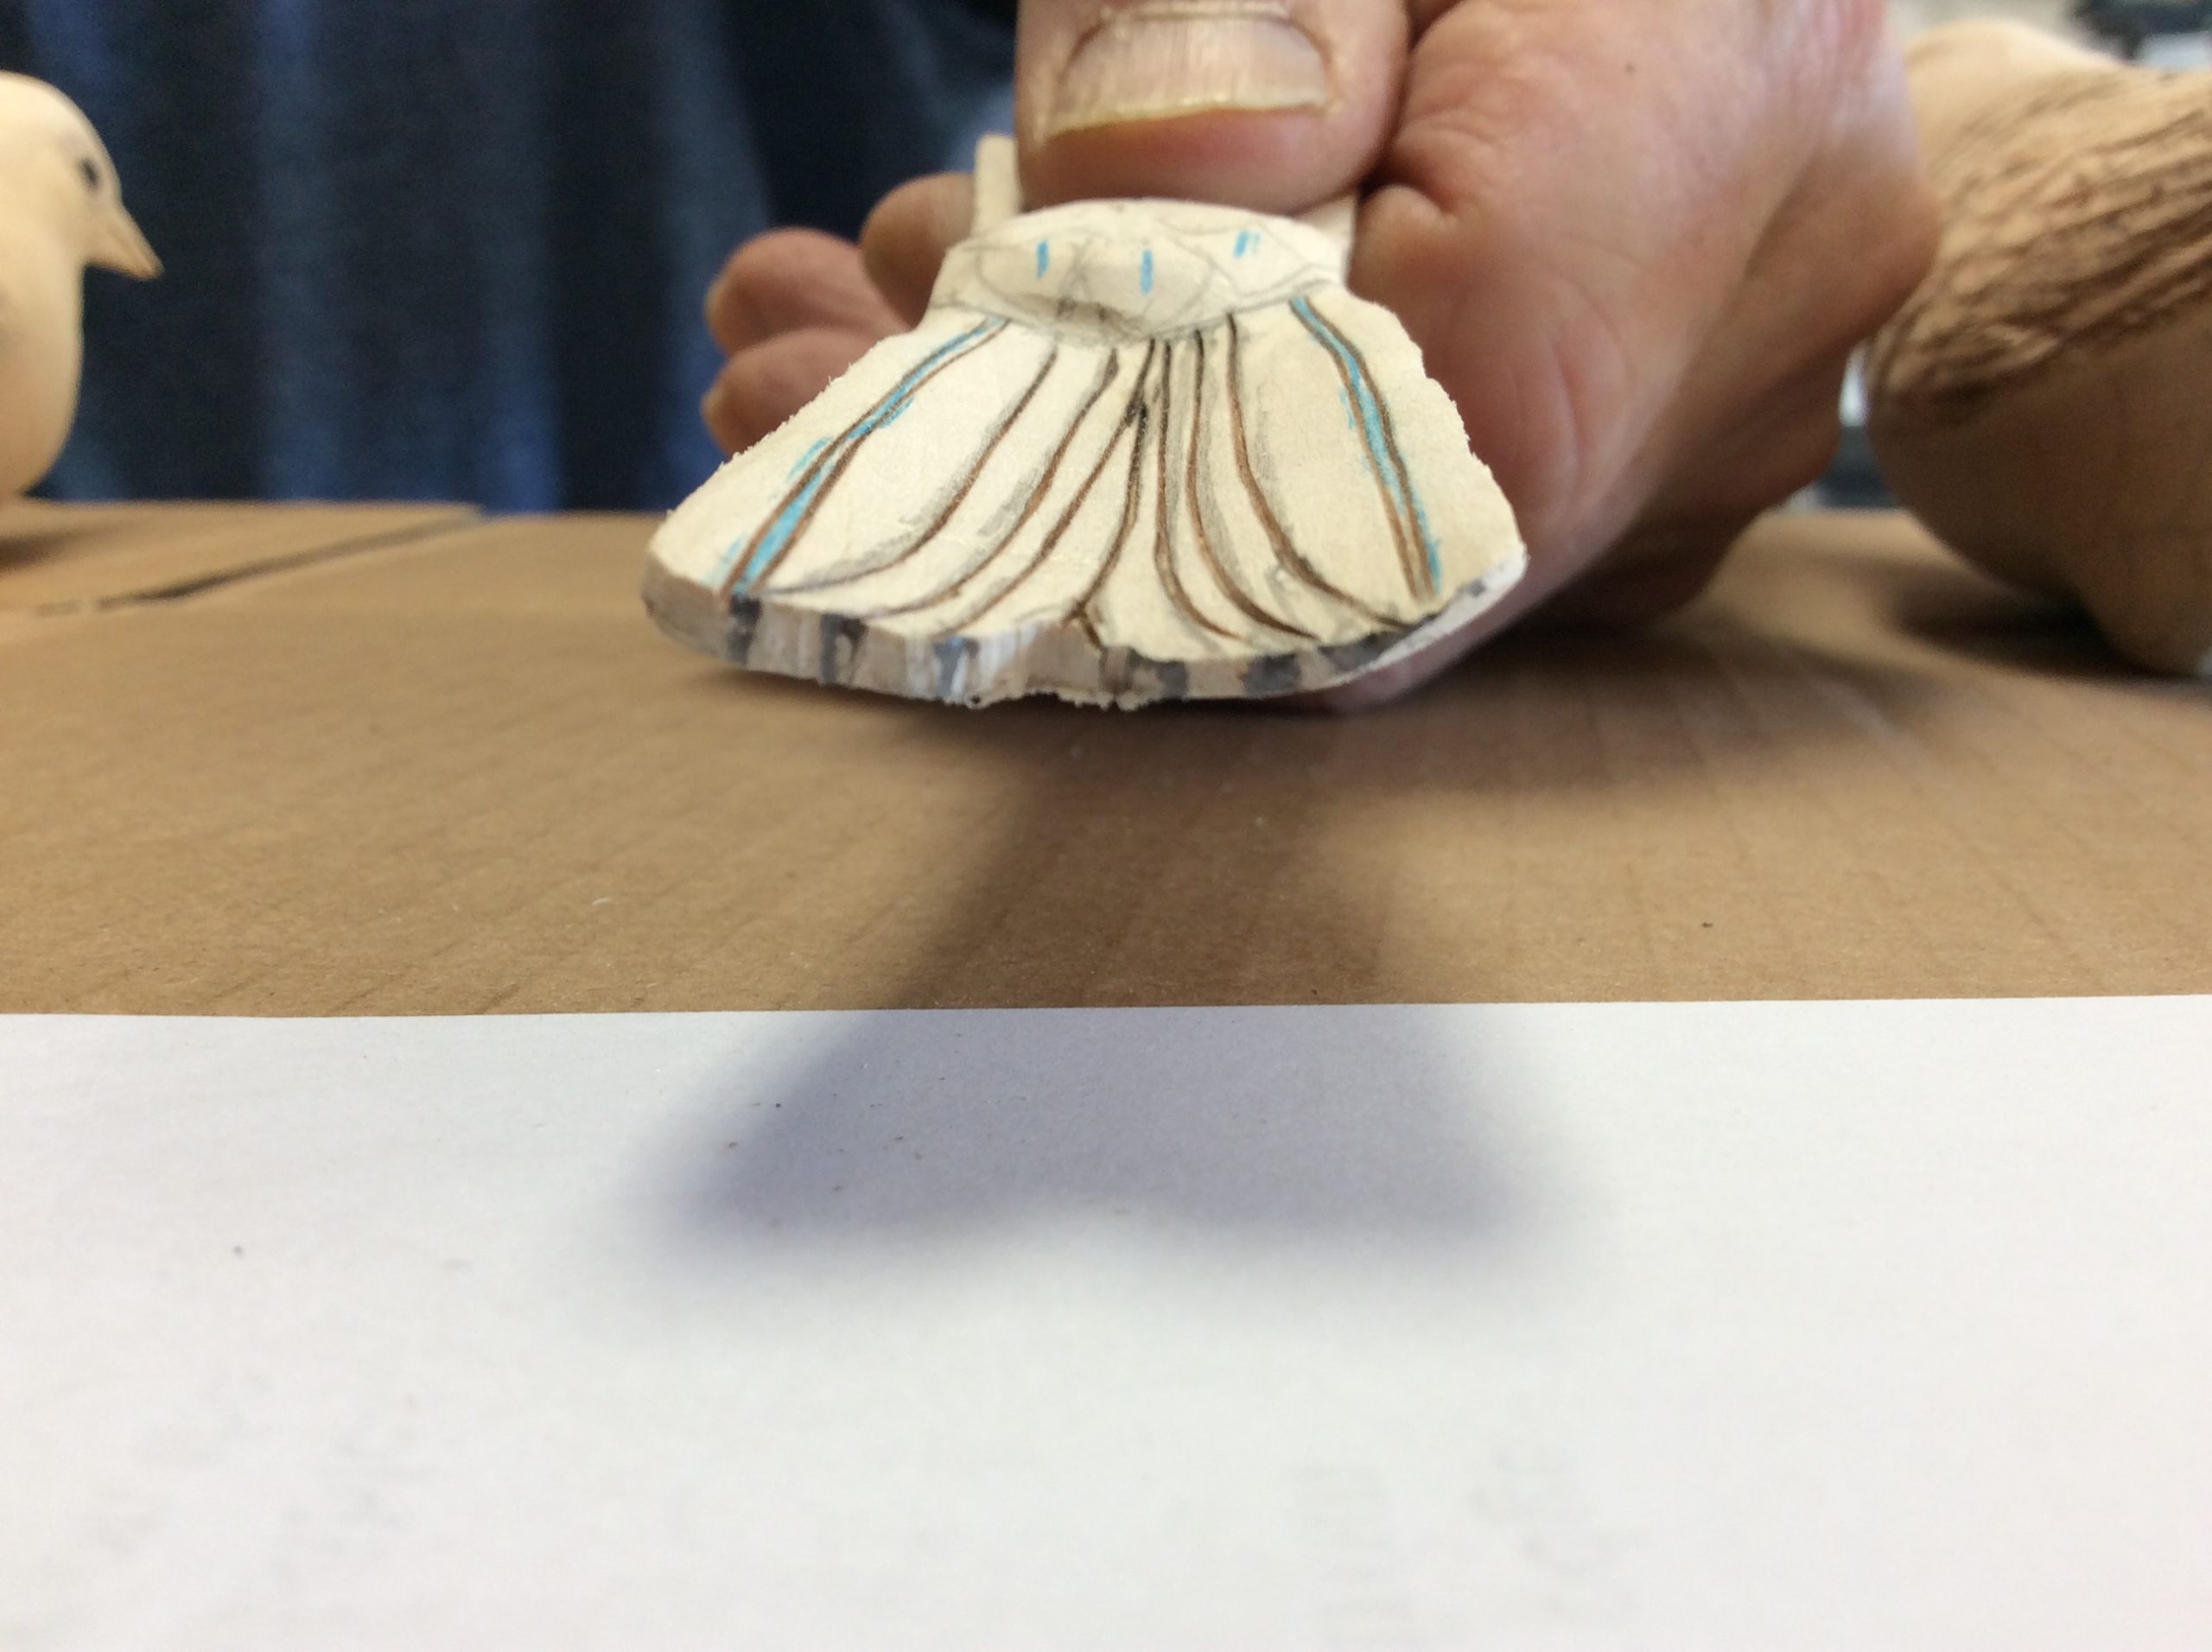
Mark on the end of the tail where the end of each feather is, then draw on the bottom view of the feathers trying to match them with the top view. Remember the outer feathers are the ones that you can see from the bottom. The centre feathers are nearly totally covered.

Step 6:
Cut or burn the edges, relieve and sand as you did with the top feathers.
Step 7
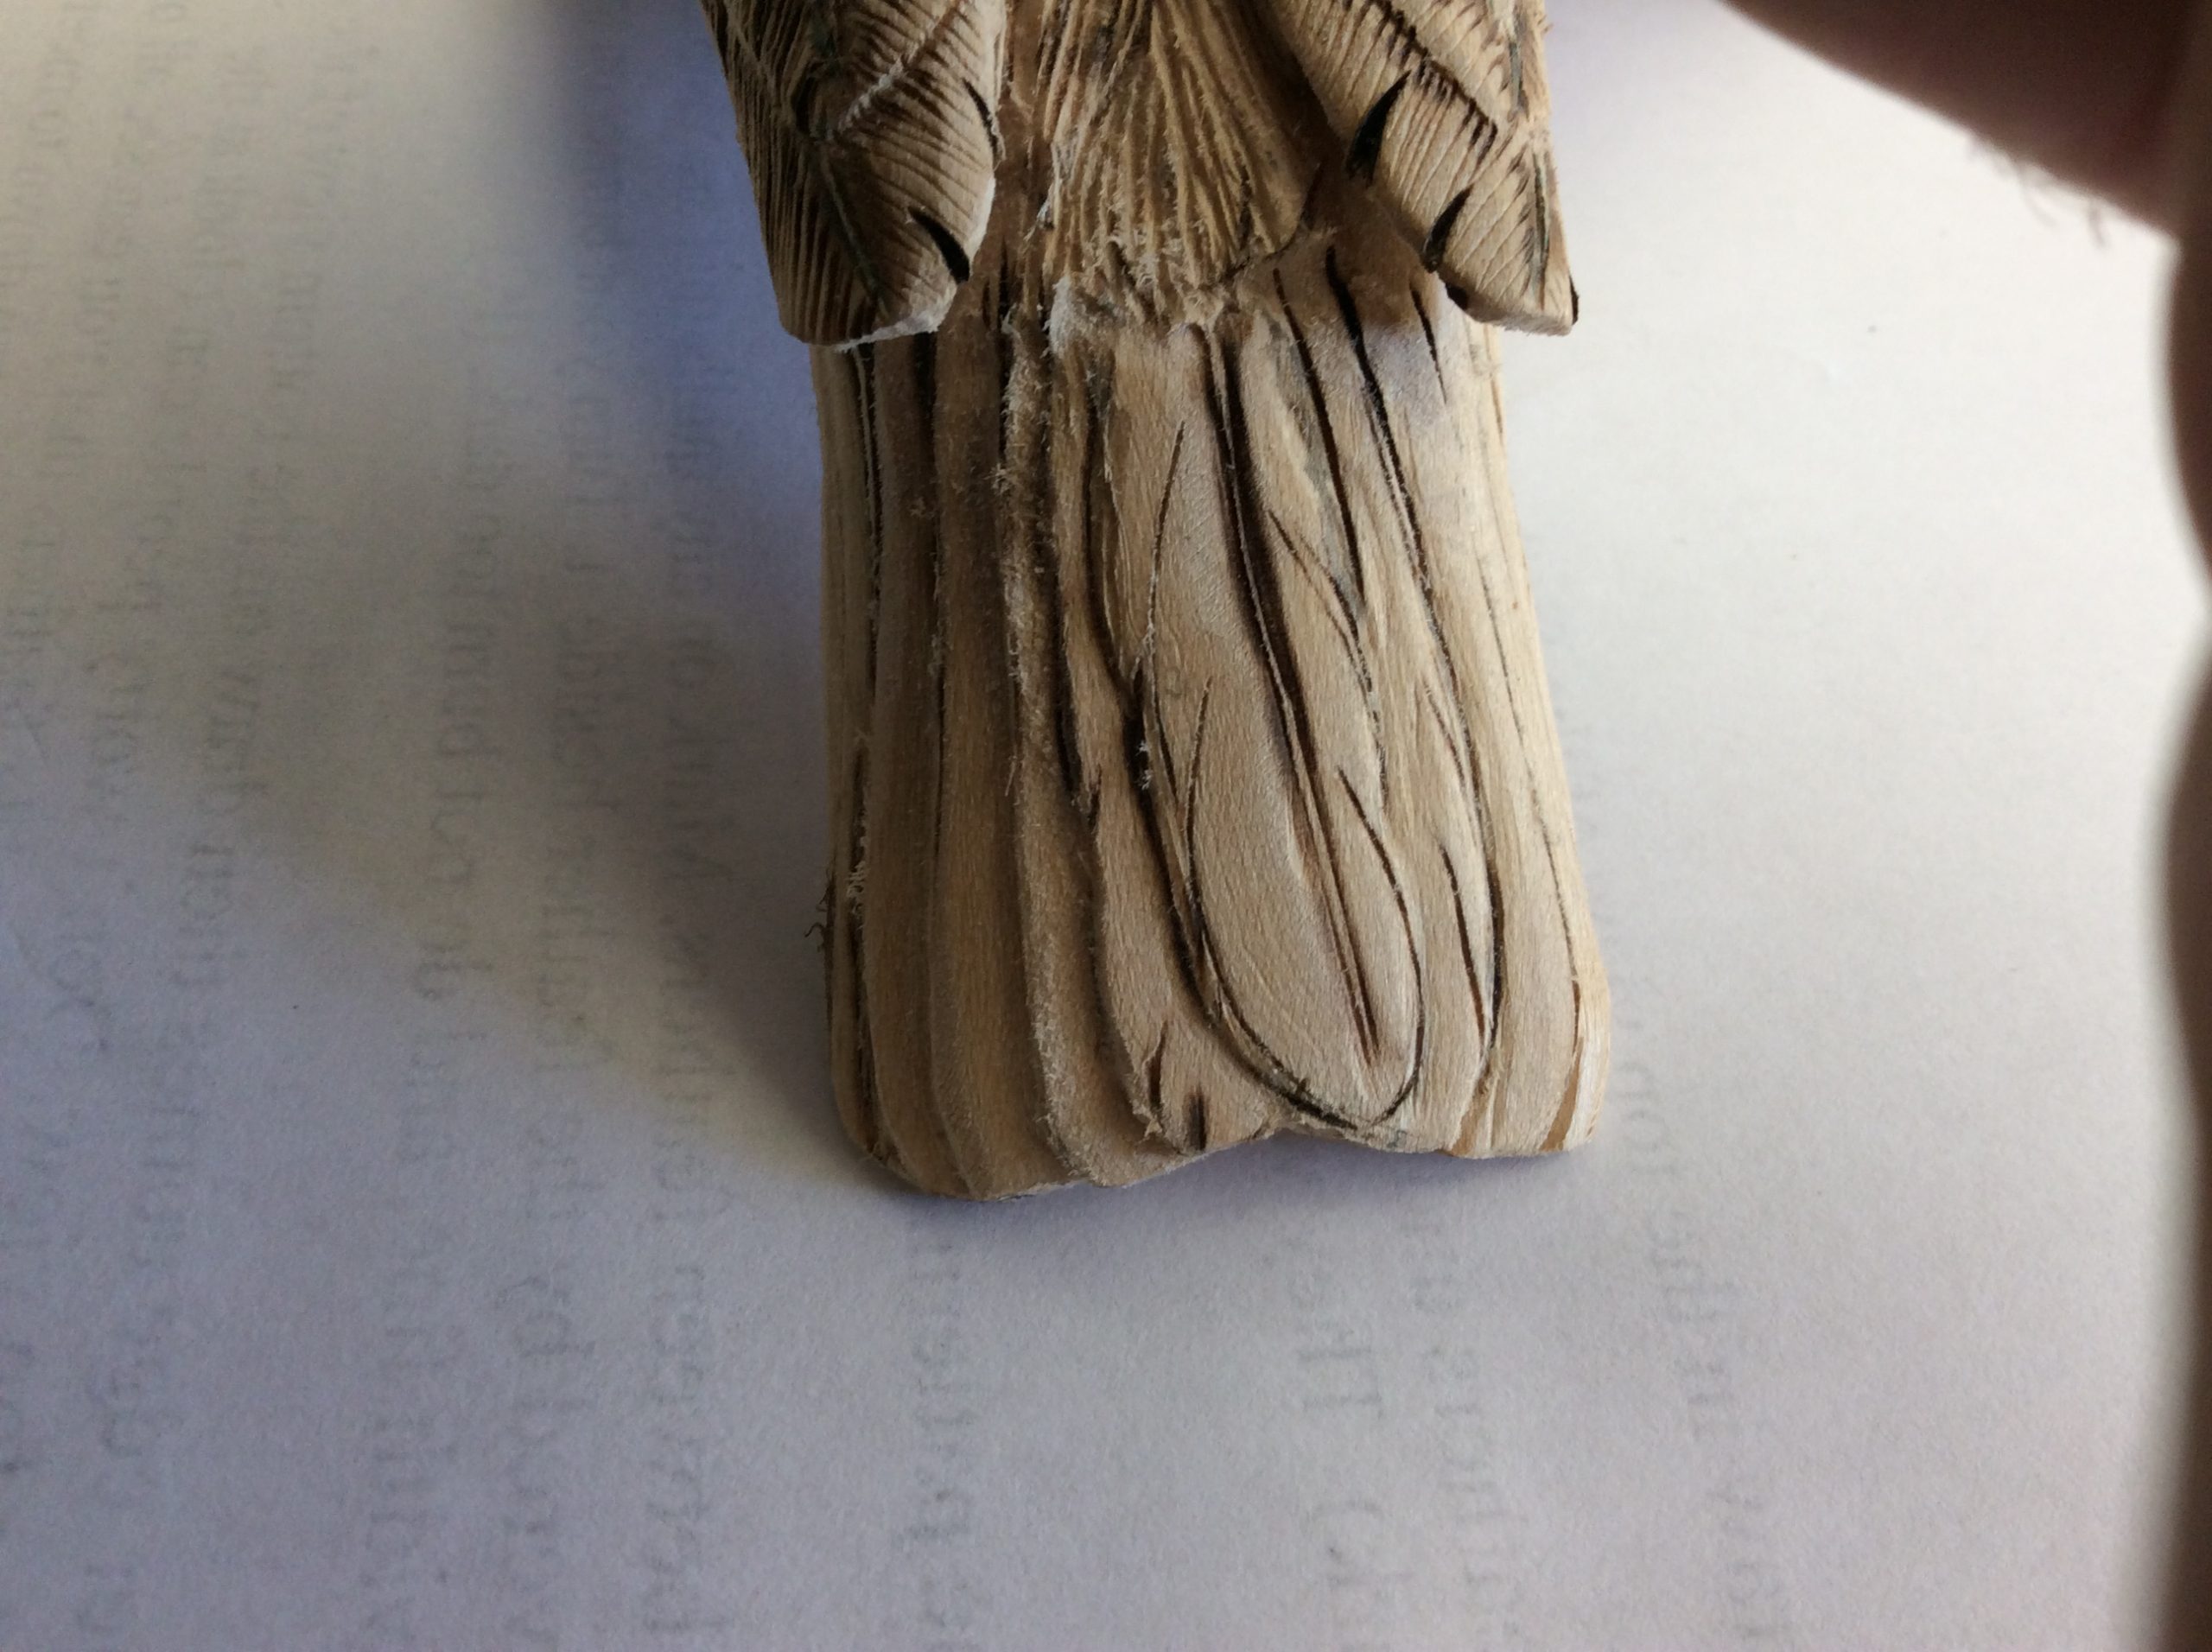
Re check the edges and end of the tail. Sand the top down to meet the bottom where necessary to create the illusion of a thin feather. Re draw your lines and re burn if needed. When you are happy with the feather layout, texture them with your burner. Keep the lines very close and curve them a little. Think about feather splits if you want to add interest.